Account Settings
The Account section in the left sidebar — below Settings — is where you manage your personal details, your company information, and the people who work inside your account. It contains three tabs:
- My Profile — your personal account details, password, two-factor authentication, company/billing info, and the e-papers option.
- Members — view and manage everyone who works inside your account.
- Departments — fine-tune your department structure (visible once departments are turned on).
Profile and company information that used to live under Settings has moved here. If you're looking for system preferences, slide transitions, or scaling mode, those stay in System Settings.
My Profile
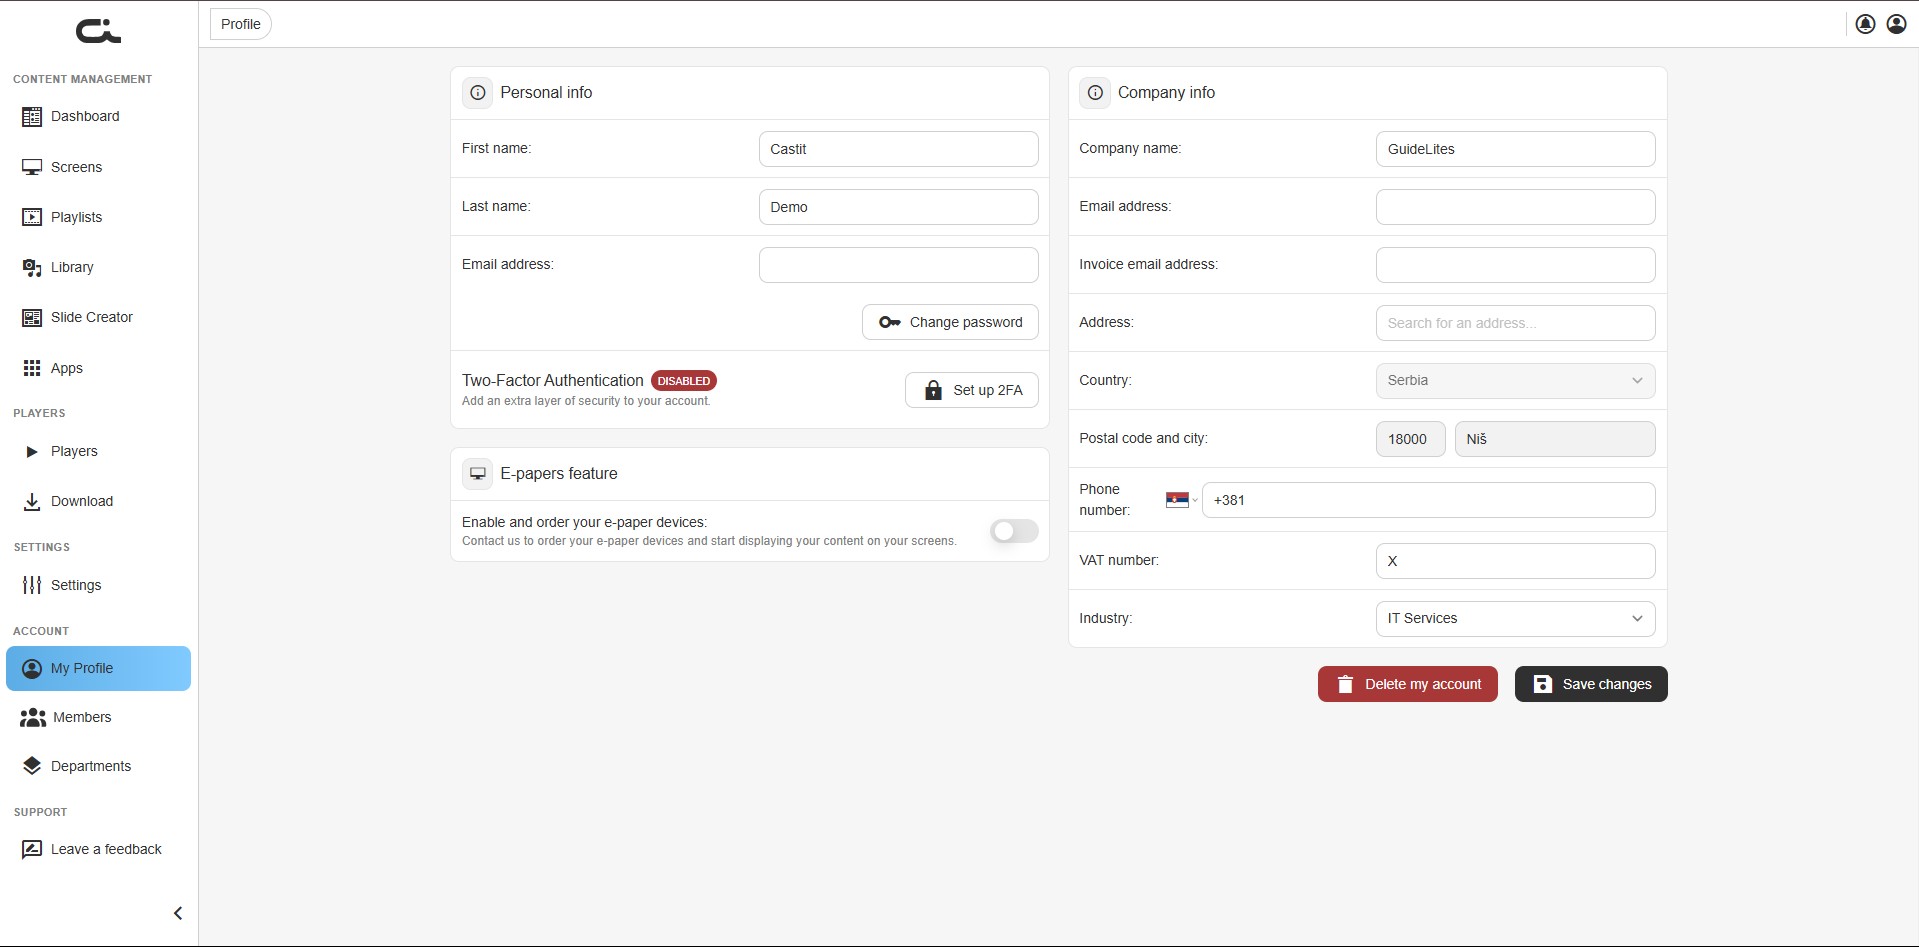
Open Account → My Profile to manage everything tied to your personal account and your organization's details. The page is split into two columns: Personal info on the left and Company info on the right.
After making any changes, click Save changes at the bottom right to apply them.
Personal Info
Update your personal details in this section:
- First name — your first name
- Last name — your last name
- Email address — the email address you use to log in
- Change password — opens a dialog to update your account password (see below)
Changing Your Password
To update your password:
- Click Change password in the Personal info section.
- In the dialog, enter your Current password (required for security).
- Enter your New password, then Repeat new password to confirm.
- Click Save.
Use the eye icon in each field to reveal what you've typed. Click Cancel to close the dialog without changing anything.
Two-Factor Authentication (2FA)
Two-Factor Authentication adds an extra security step when logging in. In addition to your password, you enter a temporary 6-digit code generated by an authentication app on your phone. This protects your account even if your password is compromised.
The Two-Factor Authentication area shows a status badge — DISABLED or ENABLED — next to a button that changes between Set up 2FA and Disable 2FA.
Enabling 2FA
- In the Personal info section, click Set up 2FA.
- A setup window appears. With an authentication app installed (Google Authenticator, Authy, or any compatible app), either scan the QR code or enter the manual entry key shown below it.
- Your app generates a 6-digit code. Enter it in the Enter the 6-digit code from the app field.
- Click Activate.
Once activated, the status changes to ENABLED and the button changes to Disable 2FA.
Authentication codes are time-based and refresh every few seconds. If a code expires before you enter it, just use the new code currently shown in your app.
Logging In with 2FA Enabled
When 2FA is on, your login gains one extra step:
- Enter your email and password as usual.
- When prompted, open your authentication app.
- Enter the current 6-digit code and confirm.
Disabling 2FA
To turn 2FA off, go to Account → My Profile and click Disable 2FA. You'll no longer be asked for a code at login.
If you lose access to your authentication app and can't log in, contact Castit support at support@castit.nl for help.
E-papers Feature
The E-papers feature card lets you opt in to wireless e-ink displays — useful for room booking, price labels, and wayfinding signs that update instantly without cables.
Toggle Enable and order your e-paper devices on to get started. Since e-papers use dedicated hardware, ordering goes through Castit: a short message box lets you tell the team how many devices you need and what you'll use them for, and they'll set everything up for you.
Company Info
Manage your organization's information in the right column:
- Company name — your organization's name
- Email address — general company email
- Invoice email address — where invoices are sent
- Address — search for and select your company address
- Country — select from the dropdown
- Postal code and city — your postal code and city
- Phone number — company contact number (with country dial code)
- VAT number — your company's VAT/tax identification number
- Industry — select your business industry from the dropdown
These details are used for account management and billing. After editing, click Save changes.
The Delete my account button (bottom left) permanently removes your account. This action cannot be undone — use it with caution.
Light & Dark Mode (and Switching Client)
Click your profile icon in the top-right corner to open the account menu without leaving the current page. This menu is where you switch the interface between Light and Dark mode.
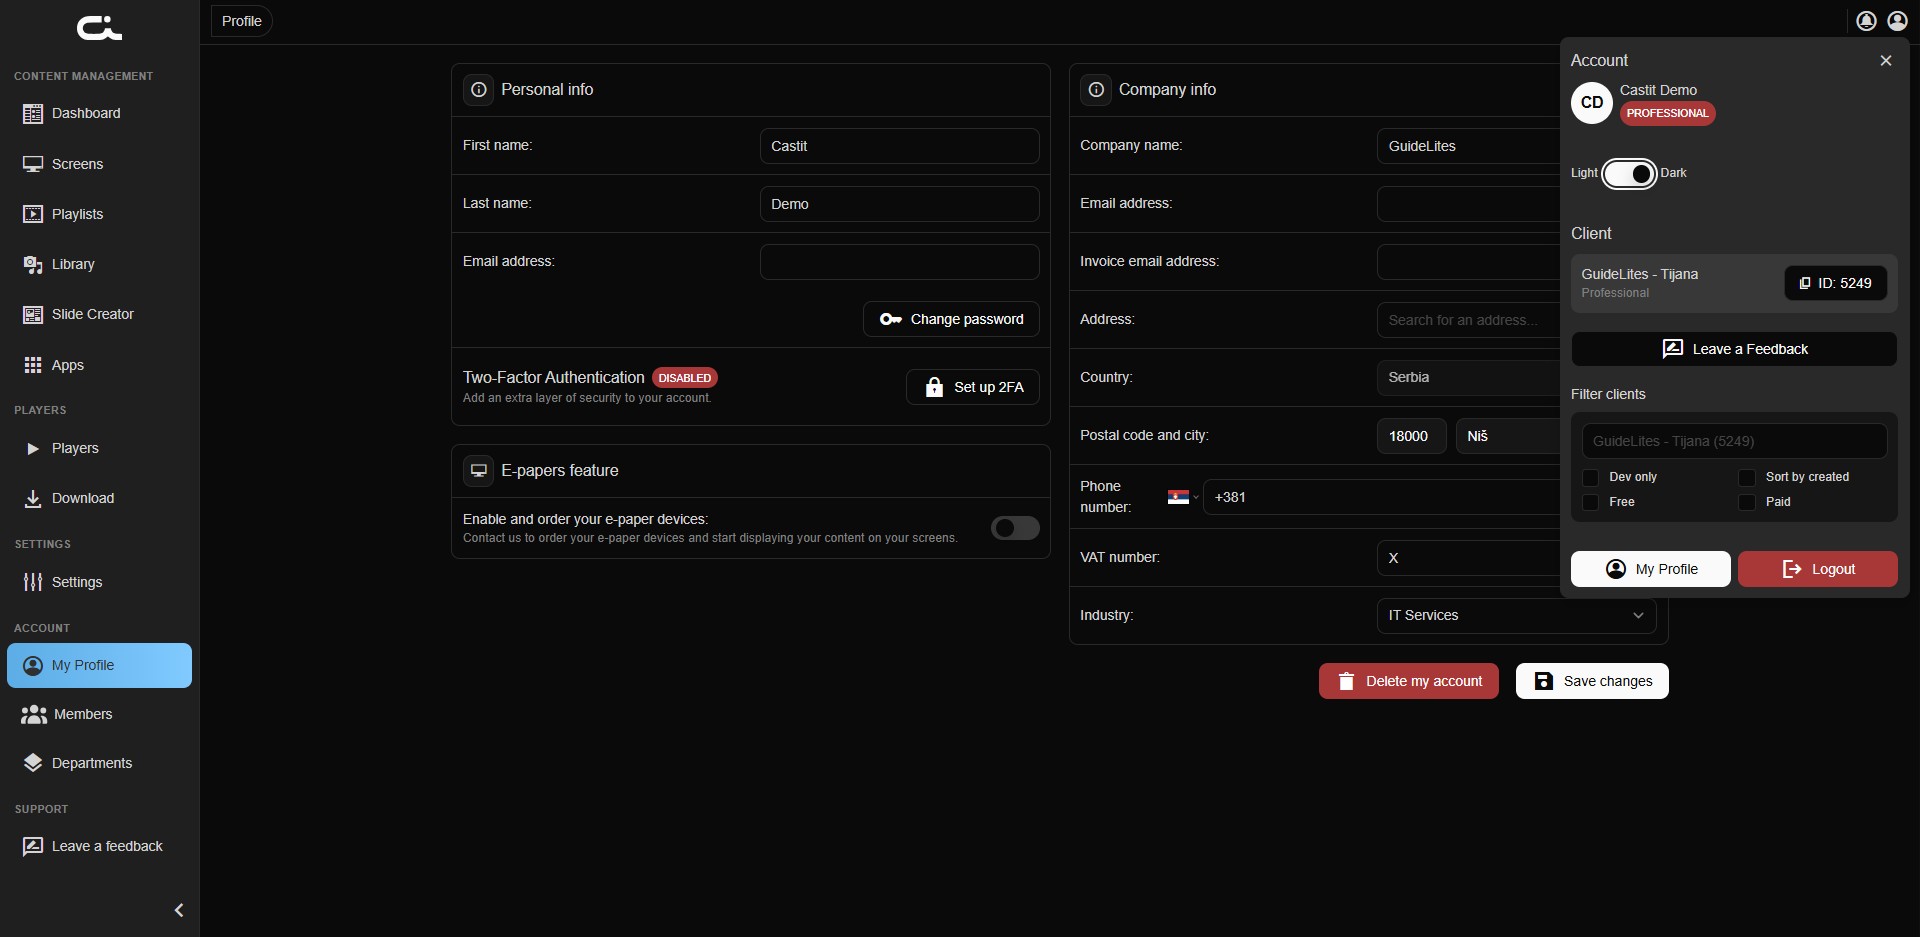
Use the Light / Dark toggle at the top of the menu to change the interface theme — the whole CMS switches instantly, and your choice is remembered.
From the same menu you can also:
- See your name and current subscription plan.
- Switch between clients (if your account manages more than one) using the client list and filters.
- Jump to My Profile or Logout.
Members
The Members tab is where you see and control who works inside your account — names, emails, roles, the departments they belong to, and whether each person can publish changes directly.
This is also where you promote a Member to a Moderator (using the Can publish toggle) and add new users.
➡️ For the full walkthrough — adding users, roles, and publishing rights — see Permissions, Departments & Drafts.
Departments
Once departments are turned on in Settings → Permissions & workflow, the Departments tab lets you manage the structure: create departments, see how many screens and members each one has, and assign screens and members to the right team or location.
➡️ Departments, how they affect what Members see, and how to assign screens are covered in detail in Permissions, Departments & Drafts.
Next Steps
- Permissions, Departments & Drafts — roles, the draft & publish workflow, and the Members and Departments tabs in depth.
- System Settings — system preferences, scaling mode, notifications, and slide transitions.
- Navigation and Interface — find the Account section in the sidebar.