System Settings
The Settings area is your control center for configuring Castit to match your organization's needs. Here you can adjust system preferences, customize slide transitions, and control how your team works inside the CMS.
Accessing Settings
To access Settings, click the Settings option in the left sidebar navigation menu. You'll see these tabs at the top of the page:
- System preferences - Configure general settings and how content is scaled on screens
- Notifications - Control video conversion and how Castit notifies you
- Slide transitions - Customize how content transitions on your screens
- Permissions & workflow - Turn on departments and the optional draft/publish workflow for your organization
- Admin settings - Administrator-only configuration
Profile and user management have moved. Your personal and company details now live under Account → My Profile in the left sidebar, and team members are managed under Account → Members. See Permissions, Departments & Drafts for the full picture.
Profile & Company Details
Your personal information, company details, and Two-Factor Authentication (2FA) are no longer part of System Settings. They now live under Account → My Profile in the left sidebar, where you can update personal info, change your password, set up 2FA, and manage company/billing details.
➡️ See Account Settings for the full walkthrough.
System Preferences
System preferences control how Castit behaves and communicates with you. These settings apply globally across your account.

General Settings
Interface Language
Choose your preferred language for the Castit interface. Available options include:
- English
- Dutch
- Serbian
Click the dropdown to select your language.
Playlist Item Default Duration
Set the default duration (in seconds) for items added to playlists. This is the amount of time each piece of content will display before moving to the next item. The default is 15 seconds, but you can adjust this to match your content needs.
For example:
- Set to 5 seconds for quick-rotating promotional content
- Set to 30 seconds for detailed informational displays
- Set to 10 seconds for a balanced viewing experience
This setting only affects new items added to playlists. Existing playlist items will keep their current durations. You can always override this default when adding individual items to a playlist.
Scaling Mode
Scaling mode controls how content fills your screens when the content's dimensions don't exactly match the display. Choose one of three options — a live Preview on the right shows how your choice looks on a screen:
- Aspect ratio - The image covers the entire area while keeping its proportions. May crop parts of the image that fall outside the screen.
- Full screen - The image stretches to fill the whole screen, which may distort its proportions.
- No scaling - The image displays at its original size, without stretching or cropping.
Click an option to select it, then click Save changes to apply.
Use Aspect ratio for most content to avoid distortion. Choose Full screen only when filling the entire display matters more than preserving proportions.
Notifications
The Notifications tab controls automatic video processing and how Castit keeps you informed.
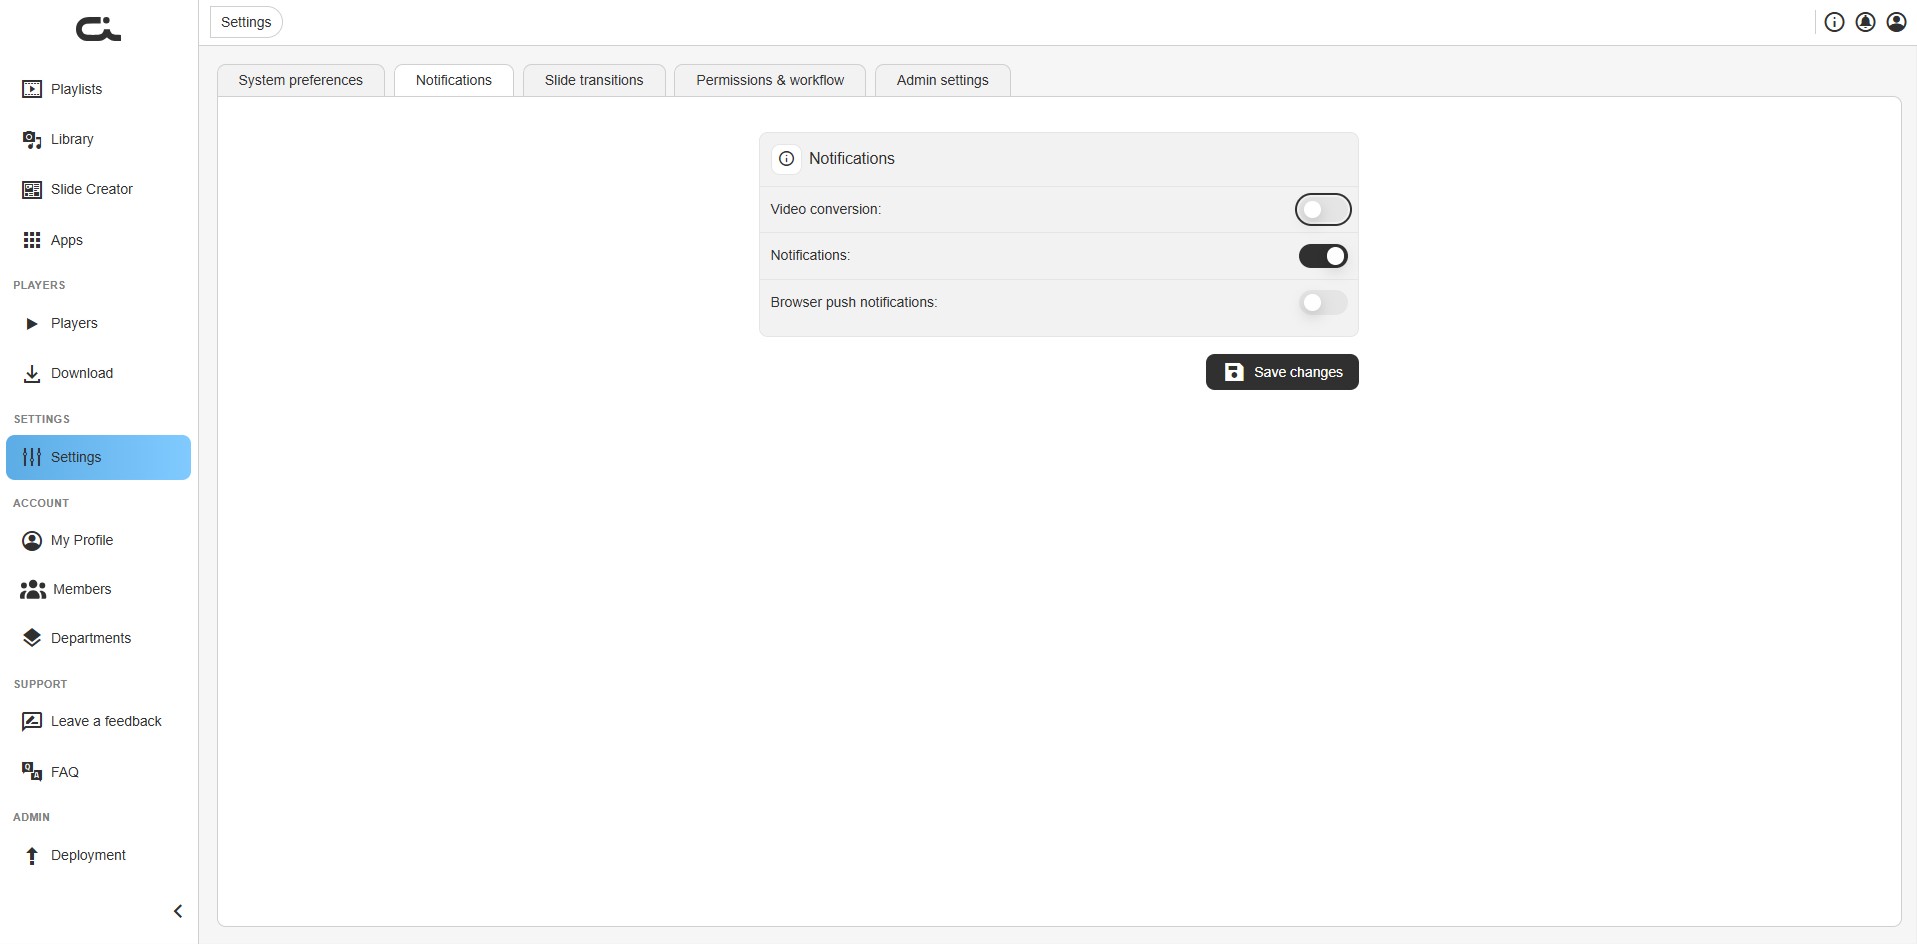
Video conversion
Toggle this on to enable automatic video conversion. When enabled, Castit converts uploaded videos to formats optimized for display on your screens, ensuring smooth playback across all player types.
Notifications
Enable or disable in-app system notifications. When turned on, you'll receive notifications about:
- Player connection status changes
- Content upload completions
- System updates and maintenance
- Important account alerts
Browser push notifications
Toggle this on to receive notifications through your web browser, even when the Castit tab isn't in focus. Your browser may prompt you to allow notifications the first time you enable this.
After adjusting your preferences, click Save changes to apply them.
Slide Transitions
Make your content more engaging by adding smooth animations when content changes on your screens. Slide transitions control how items enter and exit your displays.
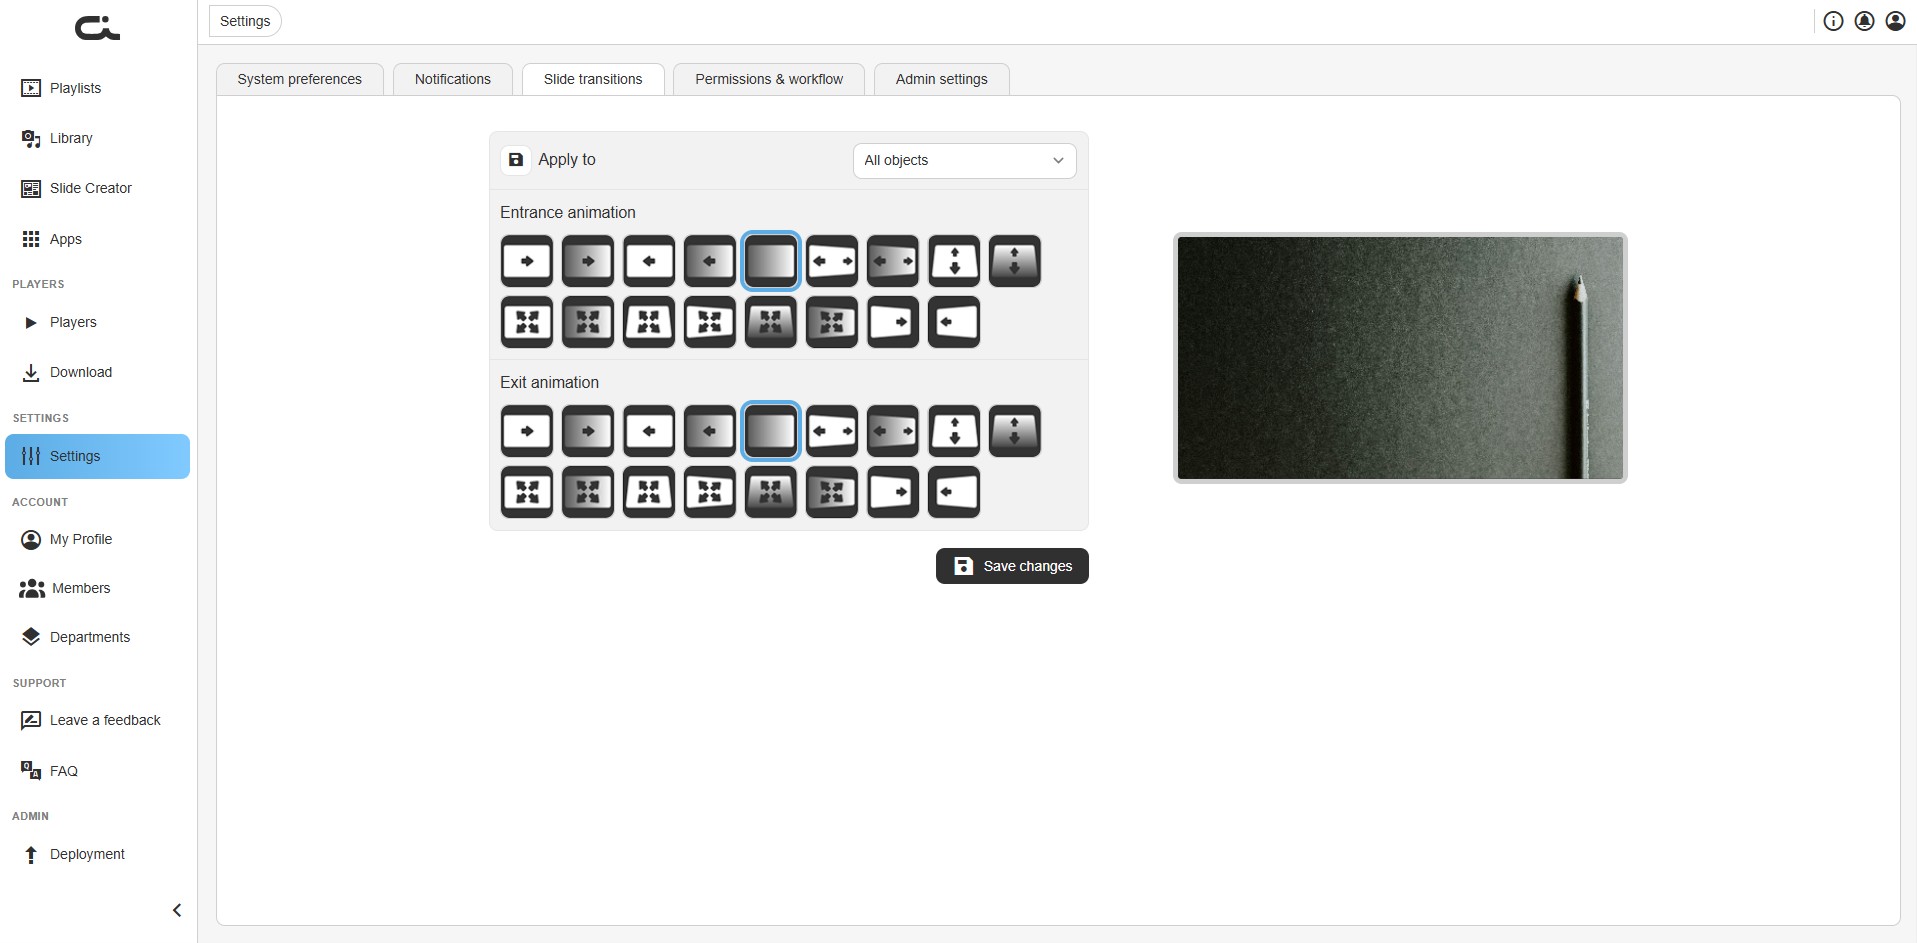
Apply To
Use the Apply to dropdown to choose which content types these transition effects apply to:
- All objects - Apply transitions to every content type
- Images - Apply only to image content
- Slide creator objects - Apply only to slides built in the Slide Creator
- Video objects - Apply only to videos
Select a specific type if you want different transitions for different media.
Entrance Animation
Select how content appears when it first displays on your screen. Castit offers multiple entrance effects:
- Fade in - Content gradually appears
- Slide from left/right/top/bottom - Content slides in from the selected direction
- Zoom in - Content grows from small to full size
- Various grid patterns - Content appears in creative grid patterns
Click any animation icon to select it. The preview area on the right shows how the animation will look.
Exit Animation
Choose how content disappears when its display time ends. Exit animations mirror the entrance options:
- Fade out - Content gradually disappears
- Slide to left/right/top/bottom - Content slides off screen
- Zoom out - Content shrinks away
- Various grid patterns - Content disappears in creative patterns
Keep your audience in mind when selecting transitions:
- Professional environments - Use subtle fades for a polished look
- Retail spaces - Try dynamic slides and zooms to grab attention
- Information displays - Simple transitions keep focus on content
After selecting your transitions, click Save changes to apply them to your screens.
Permissions & Workflow
The Permissions & workflow tab is where an admin decides how the whole organization works inside the CMS. It has two independent ON/OFF toggles, each with a short explanation of what changes when it's off:
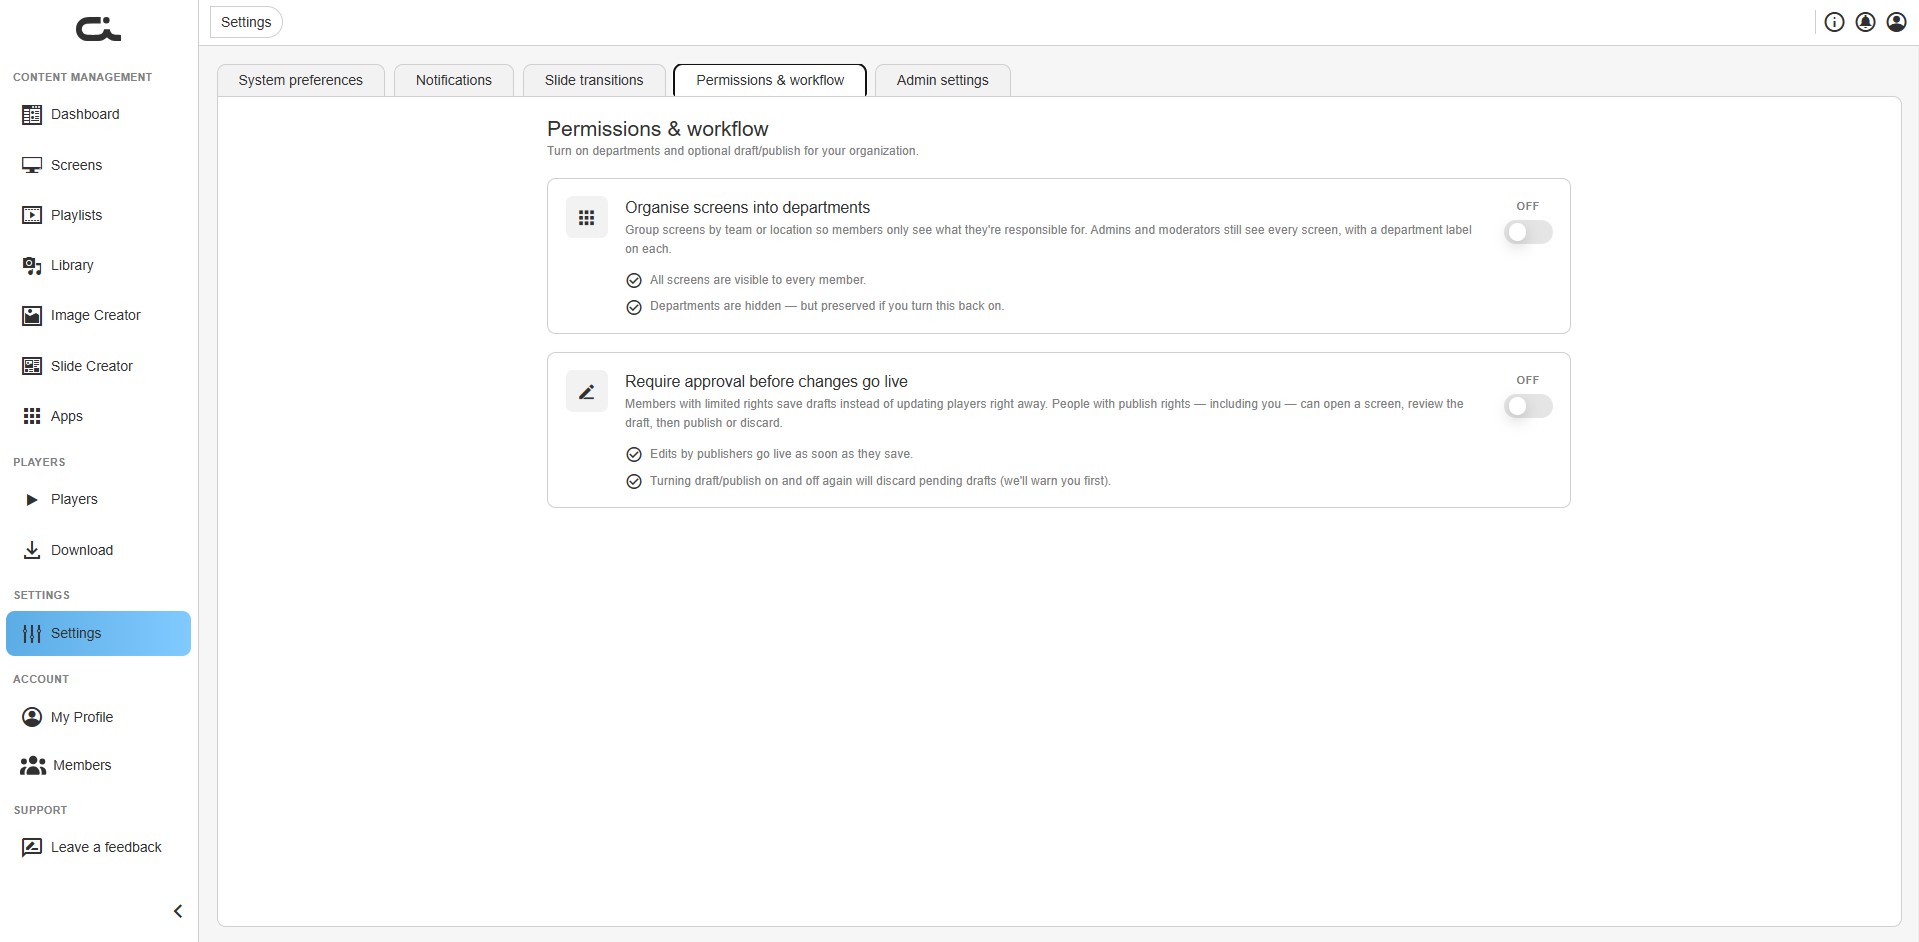
- Organise screens into departments — Group screens by team or location so Members only see what they're responsible for. Admins and Moderators still see every screen, with a department label on each. When off: all screens are visible to every Member, and departments are hidden but preserved if you turn this back on.
- Require approval before changes go live — Members with limited rights save drafts instead of updating players right away. People with publish rights (including you) can open a screen, review the draft, then publish or discard. When off: edits by publishers go live as soon as they save. Turning draft/publish on and off again discards pending drafts (Castit warns you first).
These features, the user roles (Admin, Member, Moderator), and the Account → Members and Account → Departments tabs are all covered in detail on their own page:
➡️ Permissions, Departments & Drafts
Best Practices
Here are some tips for managing your Castit settings effectively:
System Preferences
- Choose a language that all team members can understand
- Set playlist default durations based on your typical content type (shorter for ads, longer for detailed info)
- Use Aspect ratio scaling for most content to avoid distortion
Notifications
- Enable notifications to stay informed about player status and system updates
- Turn on browser push notifications if you manage screens away from the Castit tab
- Leave video conversion on for reliable playback across mixed player types
Slide Transitions
- Test transitions on your actual displays before deploying to all screens
- Match transition speed to your audience's viewing patterns
- Keep transitions consistent across similar content types
Permissions & Workflow
- Turn on departments only when teams should see different screens
- Use the draft/publish workflow to review changes before they reach players
- Assign each Member the minimum rights they need (see Permissions, Departments & Drafts)
Next Steps
Now that you've configured your settings, you're ready to:
- Set up your account — profile, password, 2FA, and company details
- Create screens to organize your content
- Upload content to your library
- Pair players to display your content
If you need help or have questions about any settings, use the Contact us! button in the top right corner of the Castit interface.