Using Apps
Learn how to browse, install, and configure ready-made apps for your screens and playlists.
Overview
The Apps marketplace is a collection of pre-built applications and widgets you can add directly to your screens and playlists. Apps act as dynamic content sources — news feeds, social media, weather, calendars, dashboards, and more — that update automatically with live data, so you don't have to build or maintain that content by hand.
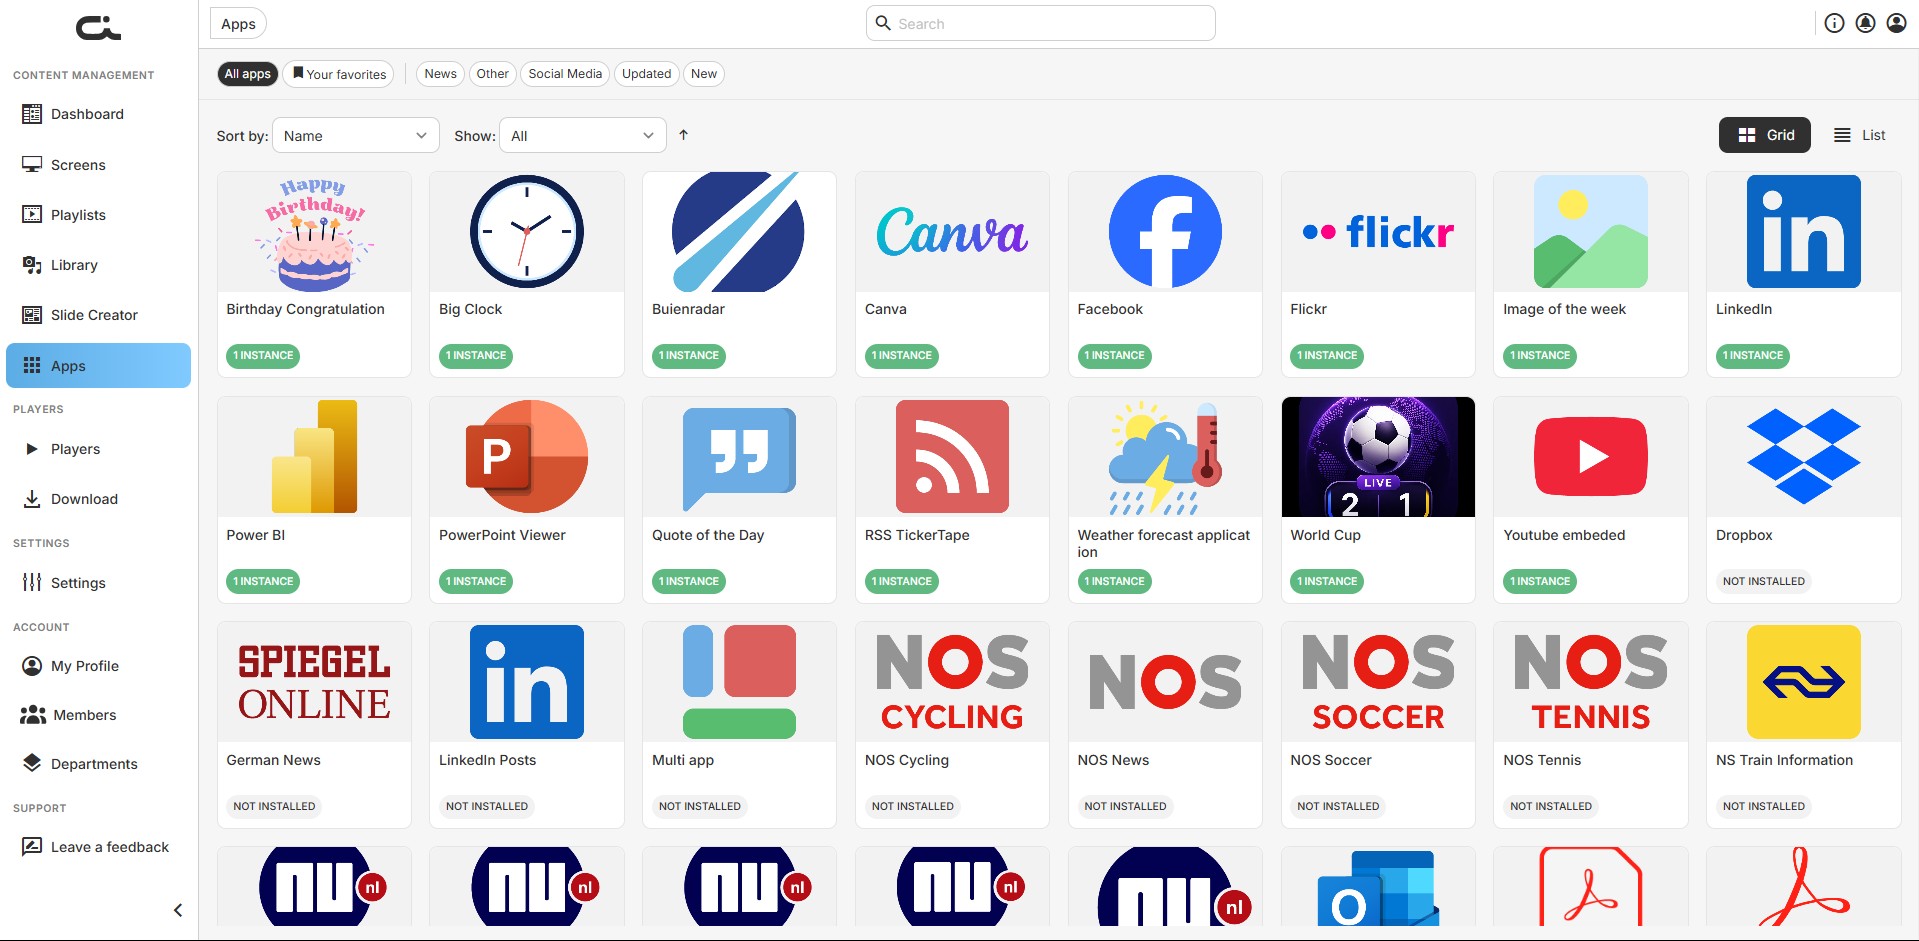
Accessing the Apps Marketplace
- Log in to your Castit account
- Click Apps in the left sidebar navigation
- Browse the marketplace of available apps
Browsing and Filtering
Categories
Use the category chips at the top to filter the list:
- All apps: Every available app
- Your favorites: Apps you've marked as favorites
- News: News sources and feeds
- Other: Miscellaneous apps and utilities
- Social Media: Social media integrations
- Updated: Recently updated apps
- New: Newly added apps
Sort, Show, and View
- Sort by: Order the list (e.g. by Name), with an arrow to toggle ascending/descending
- Show: Filter by installation status
- View: Switch between Grid and List view with the toggle in the top-right
Search
Use the search bar at the top to find an app by name.
Each app card shows the app's logo, name, and a status badge — N INSTANCE if it's installed (and how many instances you've configured) or NOT INSTALLED if it isn't yet.
Available Apps
Below are the available apps grouped by type.
News
- NOS News: General news from NOS
- NOS Cycling: Cycling news from NOS
- NOS Soccer: Soccer news from NOS
- NOS Tennis: Tennis news from NOS
- NU.nl News: General news from NU.nl
- NU Business: Business news channel from NU.nl
- NU Sport: Sports news channel from NU.nl
- NU Tech: Technology news channel from NU.nl
- NU Video: Video news channel from NU.nl
- Spiegel Online: Latest news from Germany via Spiegel Online
- Voorne-Putten.nl News: Regional news from the Voorne-Putten area
- RSS Tickertape: Display a scrolling RSS ticker on your screen
Social Media
- Facebook: Show photos and posts from your Facebook page
- LinkedIn: Promote your company and content on screen
- LinkedIn Posts: Display your latest LinkedIn posts
- Flickr: Show your own photos as a channel
- YouTube Embedded: Embed a YouTube video on your screen
Weather
- Weather Forecast: Show the local weather
- Weather Forecast Application: Display the forecast for the coming days
- Buienradar: Dutch precipitation and weather radar
- RainViewer.com Weather Radar: Accurate, real-time weather radar
- Windy.com Weather Radar: Rich weather-forecast visualization
Documents and Embeds
- PowerPoint Viewer: Turn presentations into digital signage content
- PDF Viewer: Display static PDF documents as on-screen content
- PDF Interactive Viewer: Show interactive PDF documents
- Website Embed Into Playlist: Play any website URL as a playlist item
- Website To Slide: Render a full web page as a slide
- Canva: Use Canva designs as content
Business and Productivity
- Power BI: Cast your Power BI dashboards to screens
- Outlook Calendar: Show your Outlook calendar on screen
- iCalendar: Display a whole week of calendar items
- Real Estate Agents: Publish property listings via the ERA Makelaardij Immotool integration
- Talent Gezocht Top Vacancies: Top job vacancies from the Rotterdam port
- NU.nl (see News)
Widgets
- Big Clock: Show the time, day, and date
- Birthday Congratulation: Display birthday greetings
- Quote Of The Day: Show a daily quote
- Image Of The Week: Display a different photo each week
- World Cup: Show World Cup scores and updates
Specialized
- NS Train Information: Dutch train departure times for your station
- Traffic Info: Display traffic information
- Dropbox: Pull content directly from Dropbox
- Streaming App: Put a live stream directly onto Castit
- Multi App: Combine multiple apps into one
- Playlist Trigger Application: Trigger playlist changes from app logic
- WindowSight: Curated outdoor visual art
- WindowsSight (see WindowSight)
Available apps can change over time — check the New and Updated categories for the latest additions and improvements.
Installing an App
Installing an app takes only a few clicks:
- Open Apps in the left sidebar
- Click an app card to open its details
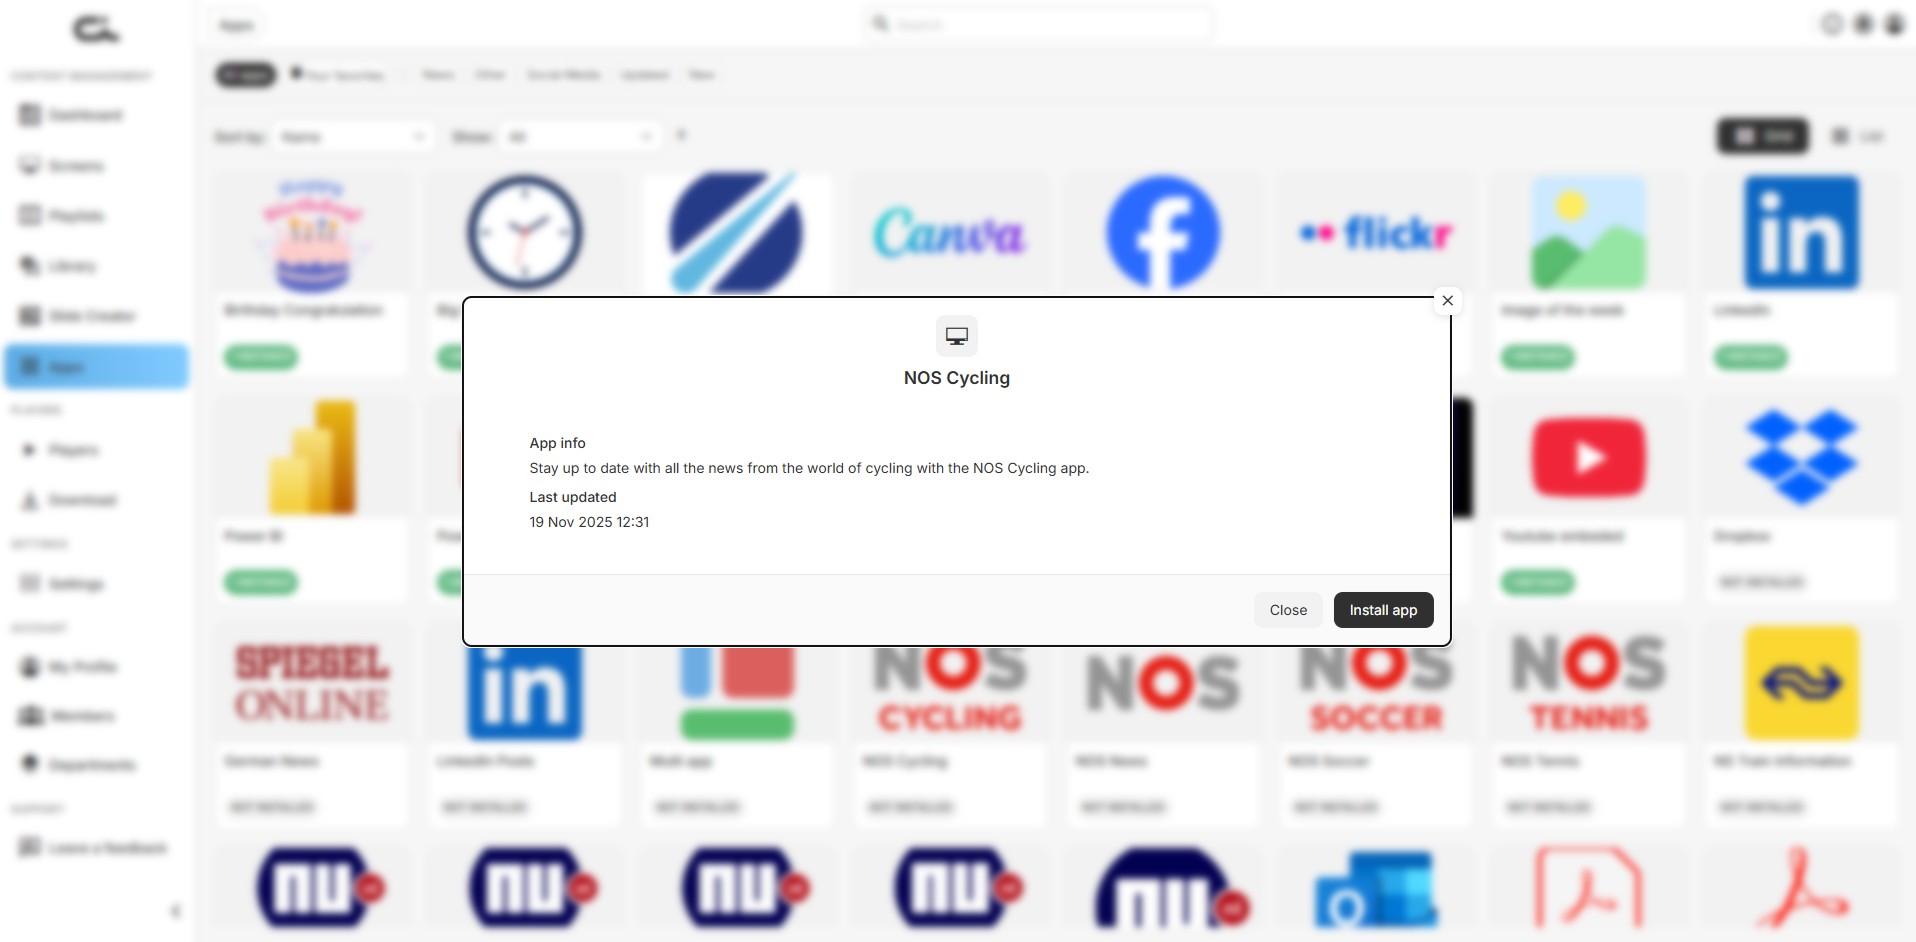
- Review the App info and Last updated date
- Click Install app (or Close to go back)
You can also install directly from the card's ⋮ menu — on a not-installed app it offers App info and Install app.
Once installed, the card's badge updates to 1 INSTANCE, and the card's ⋮ menu changes to offer Create instance, App info, Add to favorites, and Uninstall app.
Apps marked NOT INSTALLED must be installed before you can configure them or use them in screens and playlists.
Configuring an App with Instances
An app instance is a configured version of an app. Multiple instances let you display the same app with different settings — for example, one Weather instance for London and another for Amsterdam.
Creating an Instance
- Open Apps and click an installed app
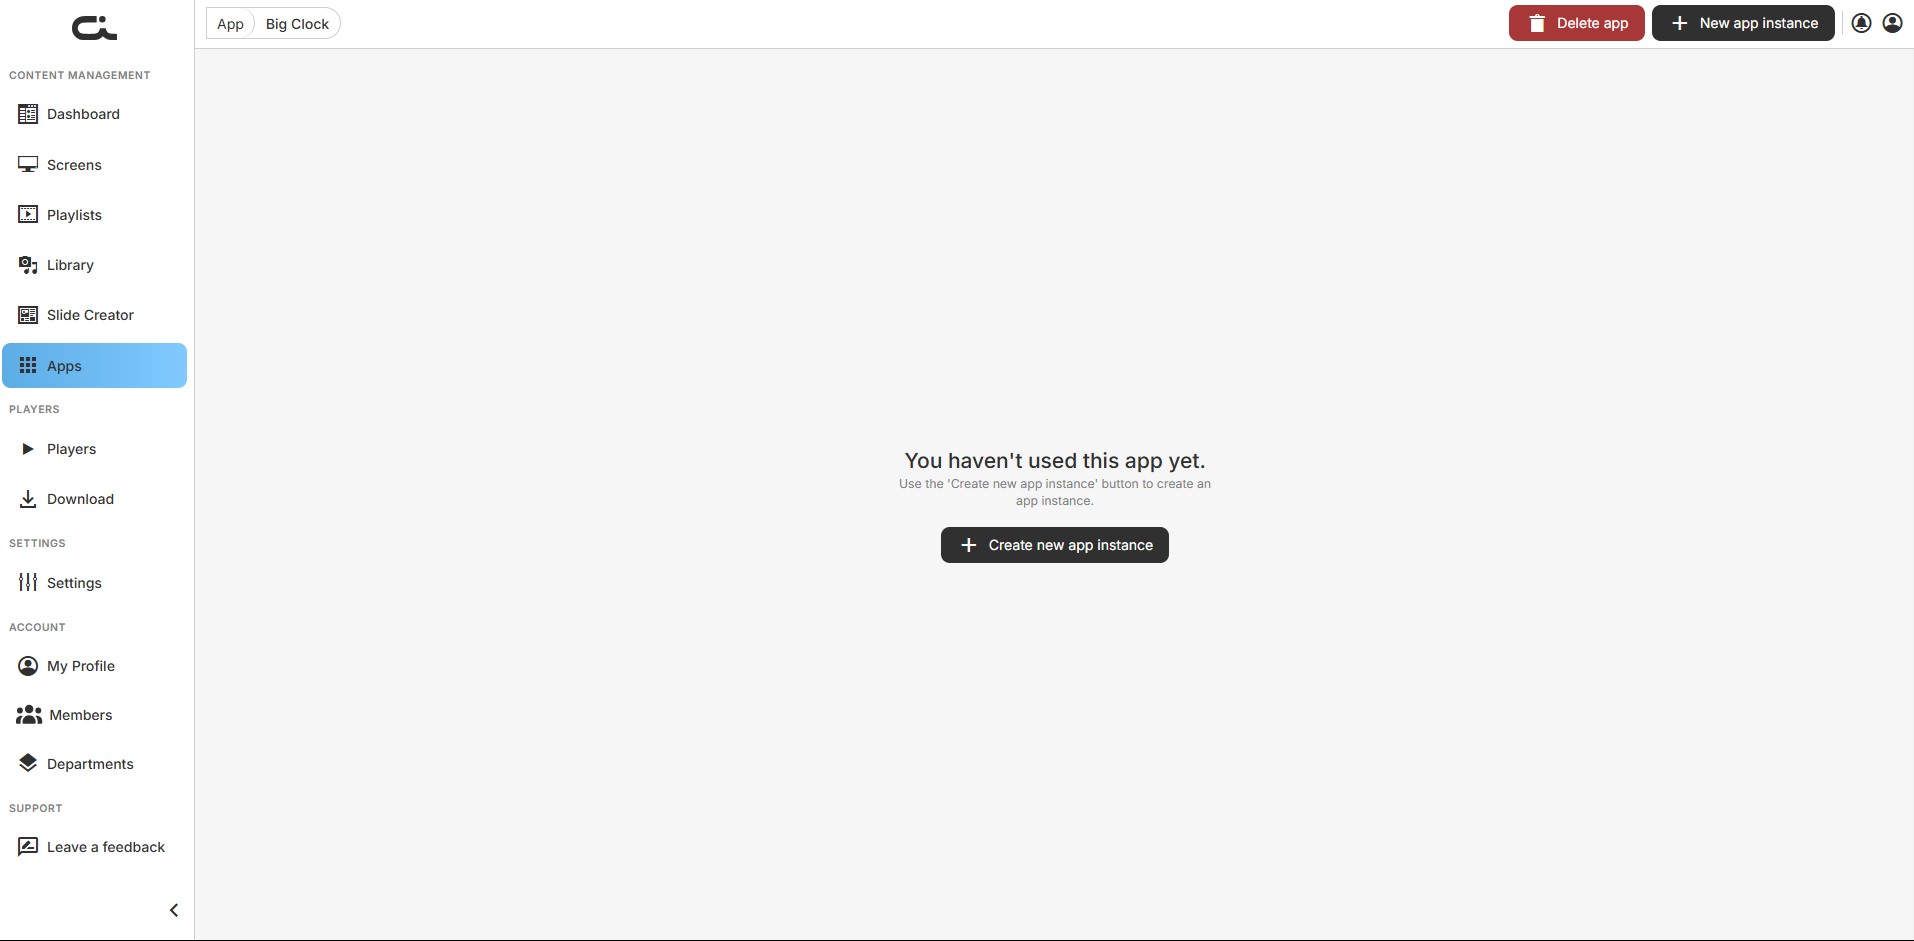
- If it has no instances yet, you'll see "You haven't used this app yet." — click Create new app instance (or use New app instance in the top bar)
Instance Settings
Every app instance uses the same two-part layout:
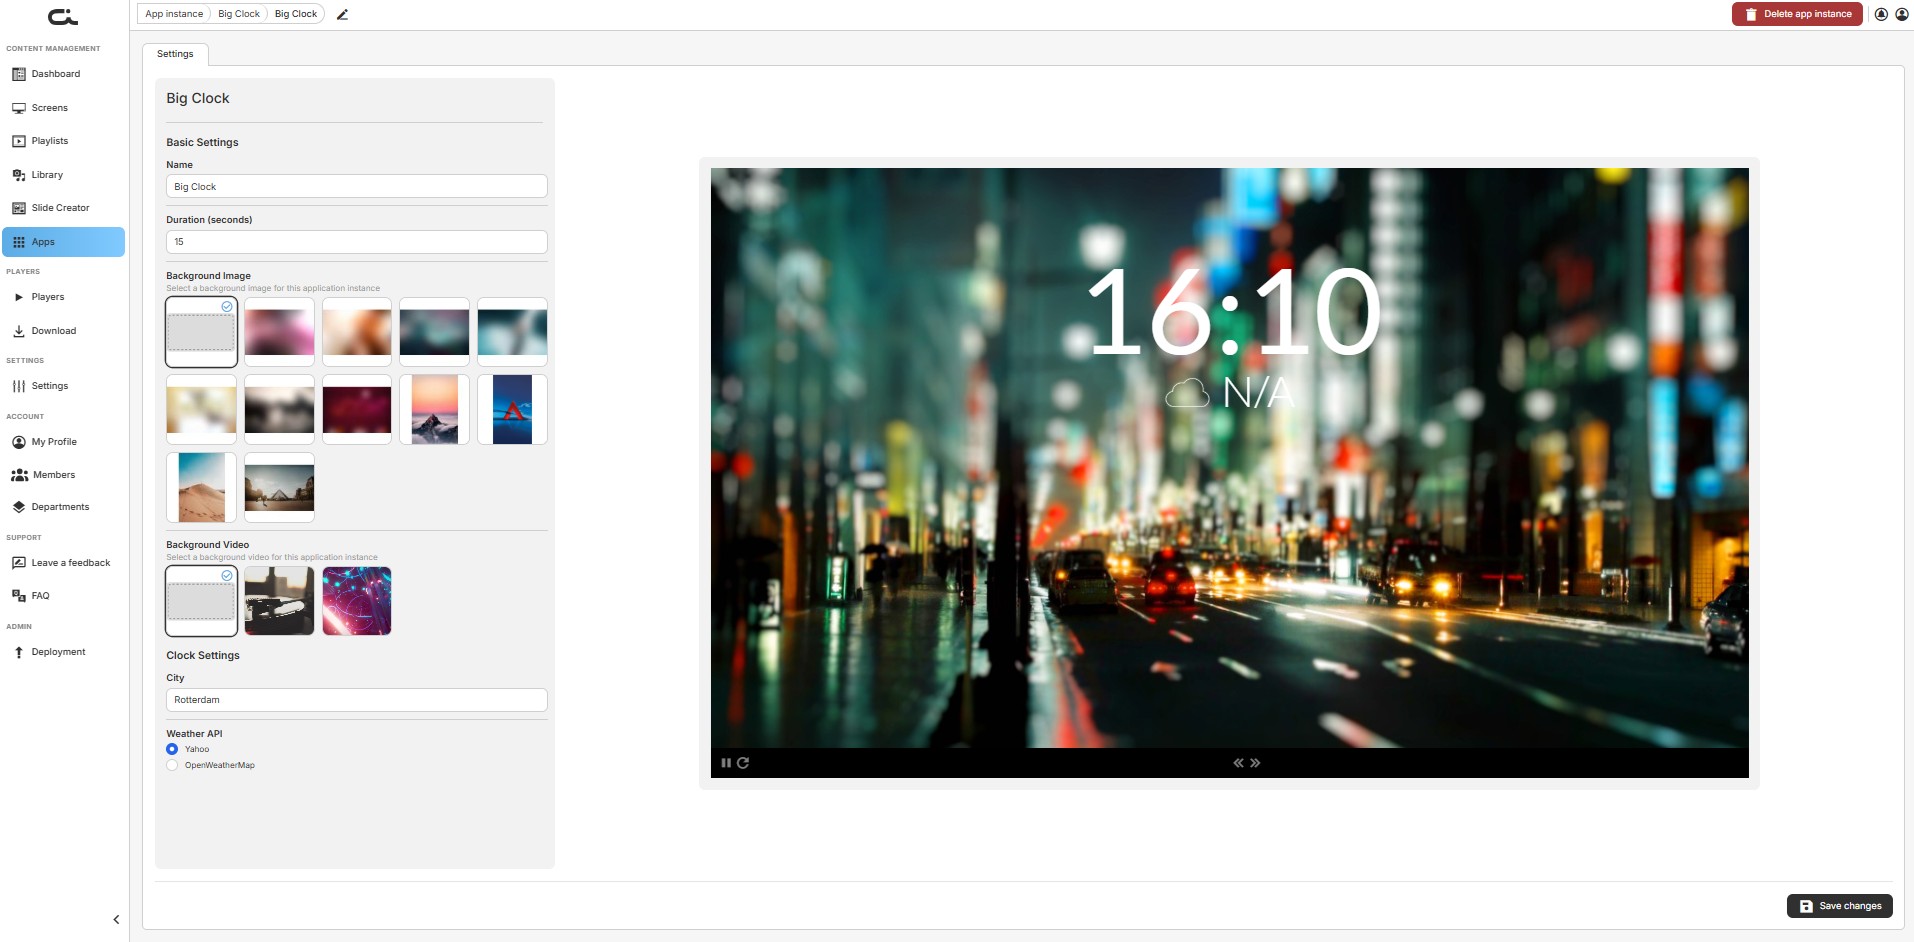
Left – Settings
- Name: A label for this instance
- Duration (seconds): How long the app shows when played (default 15)
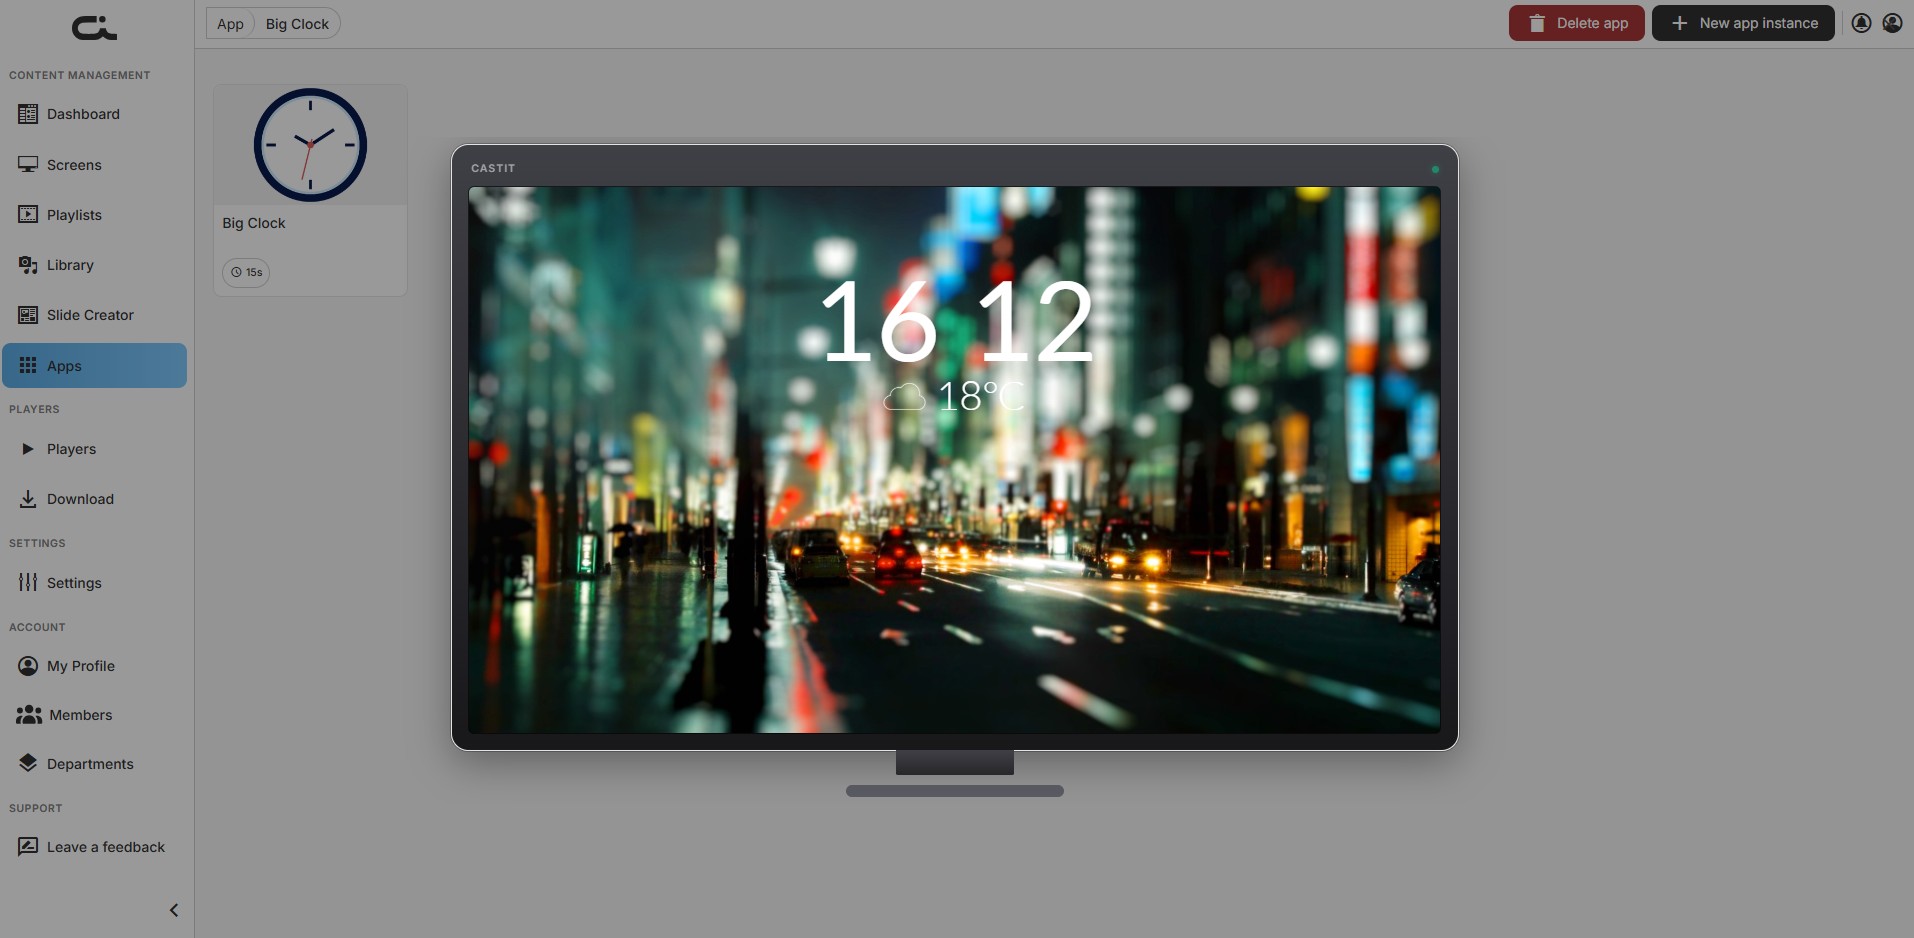
- App-specific settings: Vary by app — for example, the Big Clock app offers a background image or video, a city, and a weather API source
Right – Live preview
The preview panel shows how the app will look on screen, updating as you change settings.
Click Save changes to apply. Use Delete app instance (top-right) to remove this instance, or Delete app to uninstall the app entirely.
Some apps need extra setup — signing in to an external service, entering an API key, or providing a URL.
Managing Instances
When an app has instances, each appears as a card with its duration badge. Hover a card and use its ⋮ menu to:
- Preview: See a full-screen preview of the instance
- Edit: Reopen the instance settings
- Delete: Remove the instance
Using Apps in Your Content
Once an app instance is configured, add it to screens and playlists like any other content.
Adding to a Screen
- Open Screens in the left sidebar
- Select or create a screen
- Add the app instance to the screen's content
- Set its display duration
- Save the screen
Adding to a Playlist
- Open Playlists in the left sidebar
- Create or edit a playlist
- Add the app instance as a playlist item
- Set its duration and order
- Save the playlist
Apps are dynamic content — they refresh automatically with live data (news, weather, social media) without manual updates.
Managing Installed Apps
Favorites
Mark frequently used apps as favorites from a card's ⋮ menu (Add to favorites), then find them under the Your favorites category.
Uninstalling an App
Uninstall from the card's ⋮ menu (Uninstall app), or open the app and use Delete app in the top bar.
Uninstalling an app affects any screens or playlists currently using its instances.
App Setup Guides
Step-by-step setup for individual apps. Each guide covers the app-specific settings beyond the standard install-and-create-an-instance flow described above. Install the app and create an instance first, then follow the relevant guide.
Birthday Congratulation
The Birthday Congratulation app automatically displays a personalized greeting (a name, photo, and message) on the day of each person's birthday. You build a list of people once, and the app shows the right slide on the right day. On days when no one has a birthday, the app shows nothing, so it's safe to leave running on a screen or in a playlist year-round.
Step 1: Configure the basic settings
After creating an instance, you land on the Settings tab. The left side holds the settings; the right side shows a live preview.
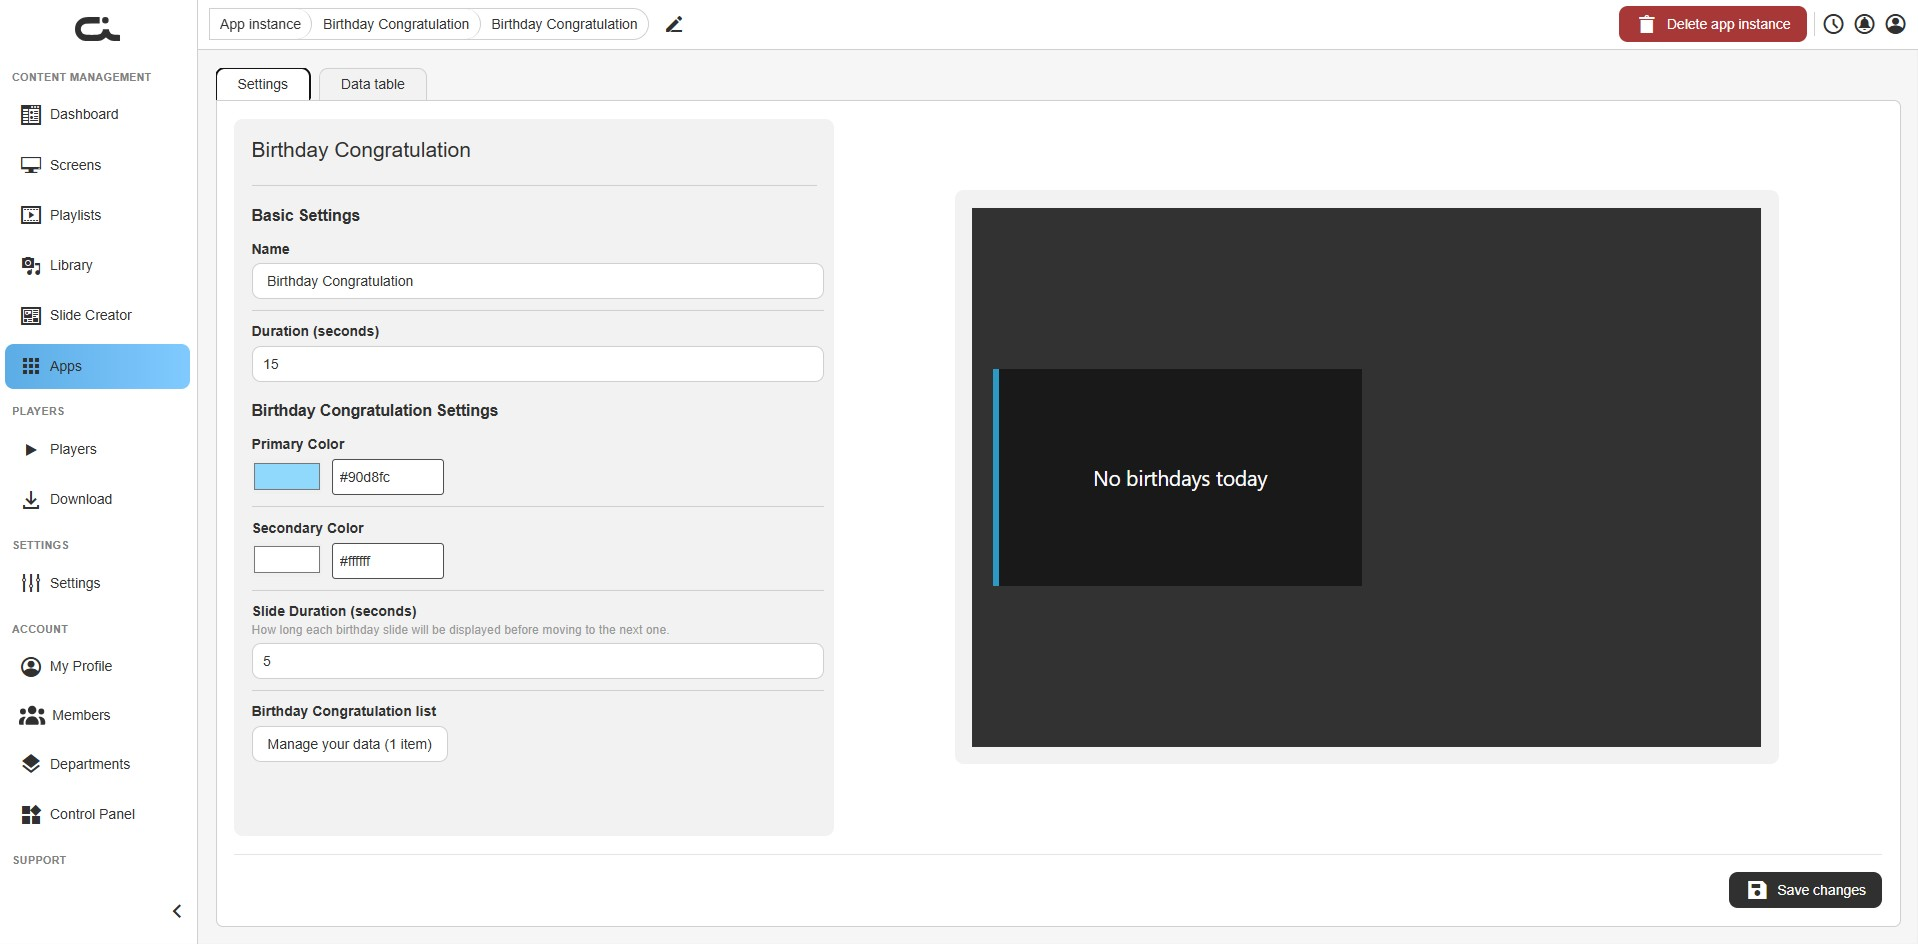
Set the following:
- Name: A label for this instance (helpful if you run more than one, for example one per department or location)
- Duration (seconds): How long the app shows in total when it plays (default 15)
- Primary Color: The accent color used for the slide (the bar and highlights). Click the swatch or type a hex value (e.g.
#90d8fc) - Secondary Color: The secondary slide color (e.g.
#ffffff) - Slide Duration (seconds): How long each individual birthday slide shows before moving to the next, for days when more than one person has a birthday (default 5)
When you're happy with these, click Save changes at the bottom-right.
The Duration is the total time the app occupies in a screen or playlist, while Slide Duration is the time per person. If three people share a birthday, set the Duration high enough to give each slide its turn.
Step 2: Add people to the birthday list
Open the Data table tab (or click Manage your data under the settings). Each row is one person.
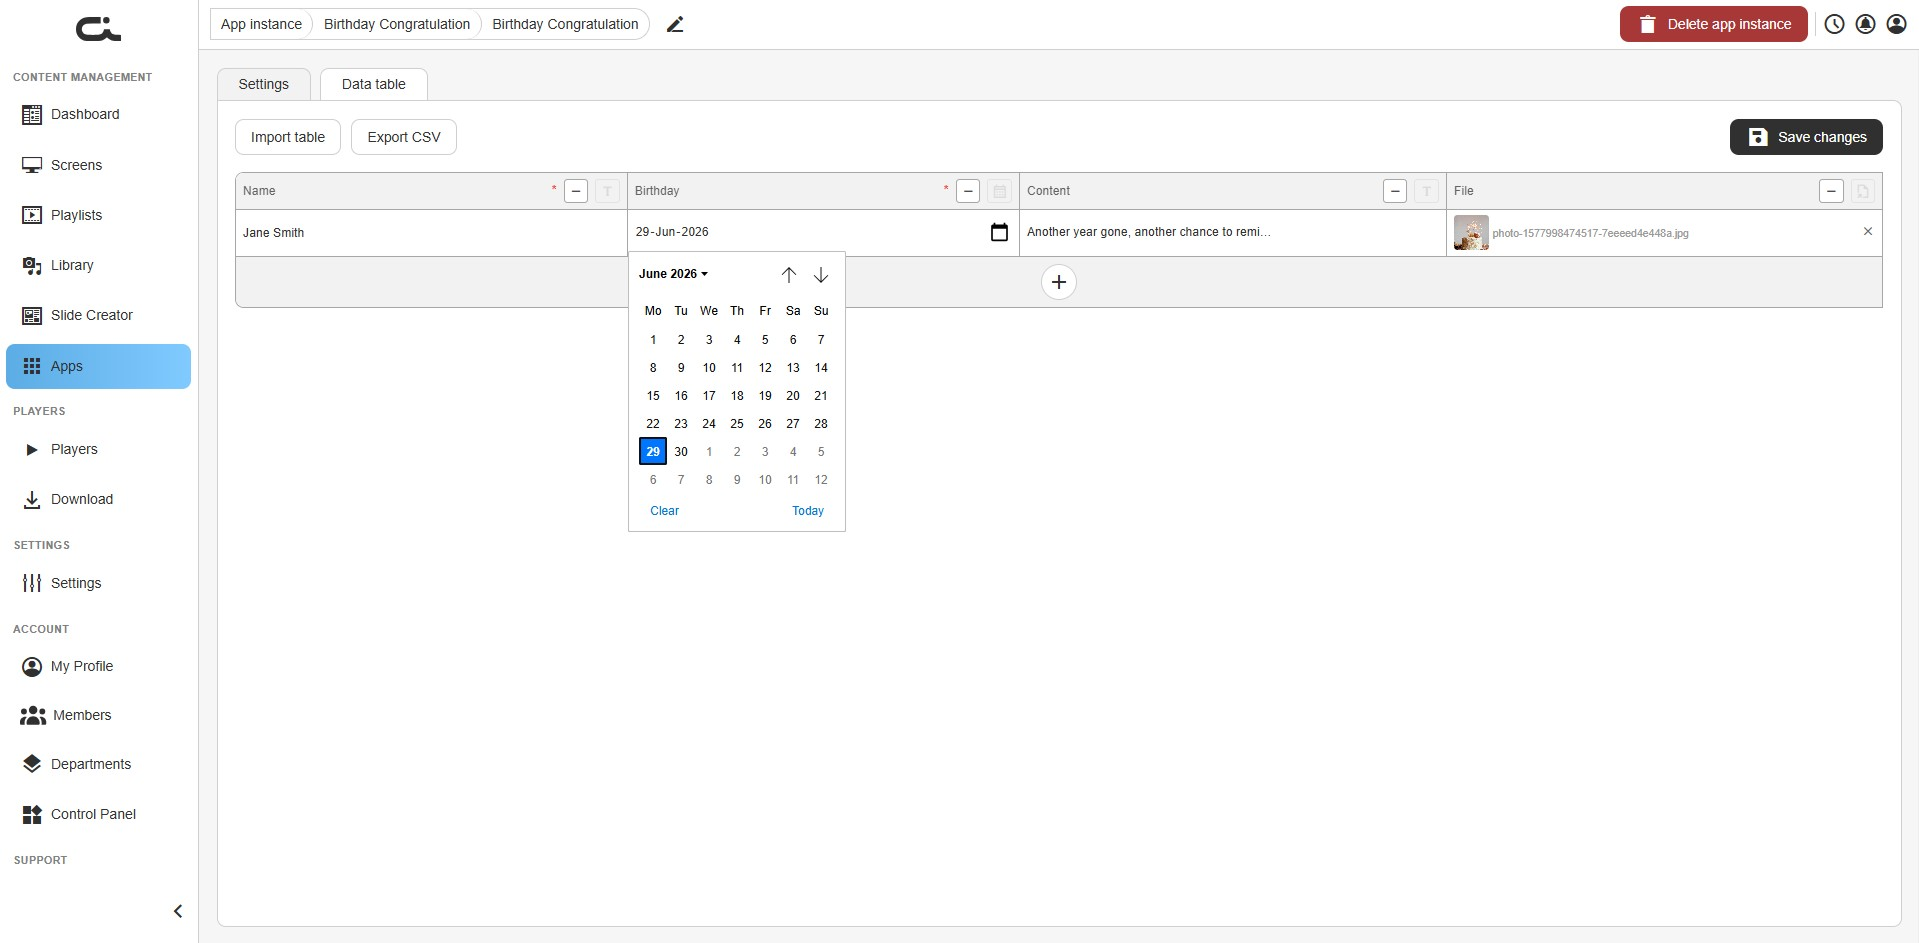
To add someone:
- Click the + button to add a new row
- Name (required): Type the person's name. This appears on the slide
- Birthday (required): Click the calendar icon and pick the date. Use Today to jump to the current month, or Clear to reset
- Content: Type the congratulatory message that appears next to the name. You can format it with bold, italic, and lists
- File: Add a photo or video for the slide. Choose Upload to add a new file (jpg, png, gif, webp, mp4, mpeg, mov, avi), Library to pick existing media, or Stock for a stock image
Repeat for everyone you want to include, then click Save changes (top-right) to store the list.
Only Name and Birthday are required. If you leave out the photo or message, the app still shows a greeting with the details you provided.
Managing the list in bulk
For large lists, use the buttons at the top of the Data table:
- Import table: Bring in many people at once from a file instead of adding rows by hand
- Export CSV: Download the current list, handy as a backup or to edit externally and re-import
Remember to click Save changes after importing.
Step 3: Check the preview and use the app
The preview panel on the Settings tab shows how a slide will look. On a day with no matching birthday it reads "No birthdays today"; on a matching day it renders the name, photo, and message with your chosen colors.
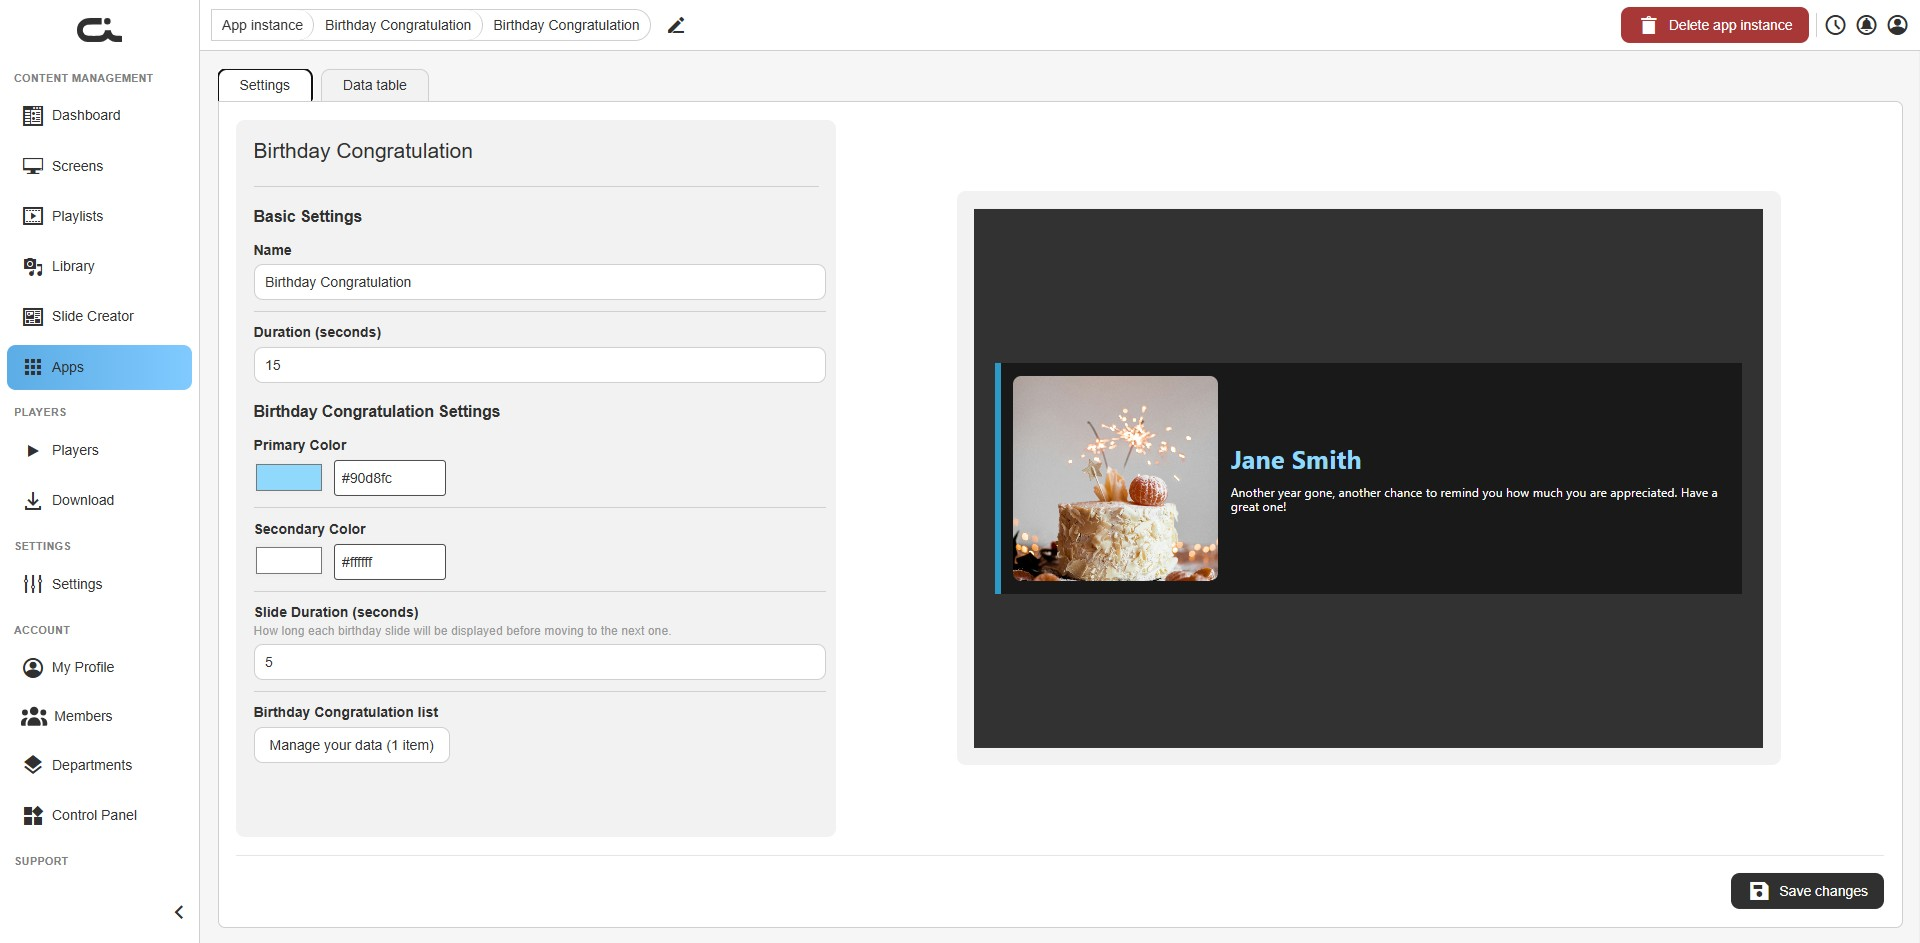
Once the list is saved, add the instance to a screen or playlist just like any other app (see Using Apps in Your Content). The app handles the rest, and each person's slide appears automatically on their birthday.
Set this app up once on an always-on screen or in a recurring playlist and it will keep celebrating birthdays all year with no further work. Just keep the list up to date and Save changes whenever you edit it.
Big Clock
The Big Clock app shows a large, easy-to-read clock with the current time, and the local temperature, over a background of your choice. It's a simple way to fill a screen with something useful and good-looking, and it updates the time and weather automatically.
Step 1: Set the basic settings
After creating an instance, you land on the Settings tab. The left side holds the settings; the right side shows a live preview that updates as you change them.
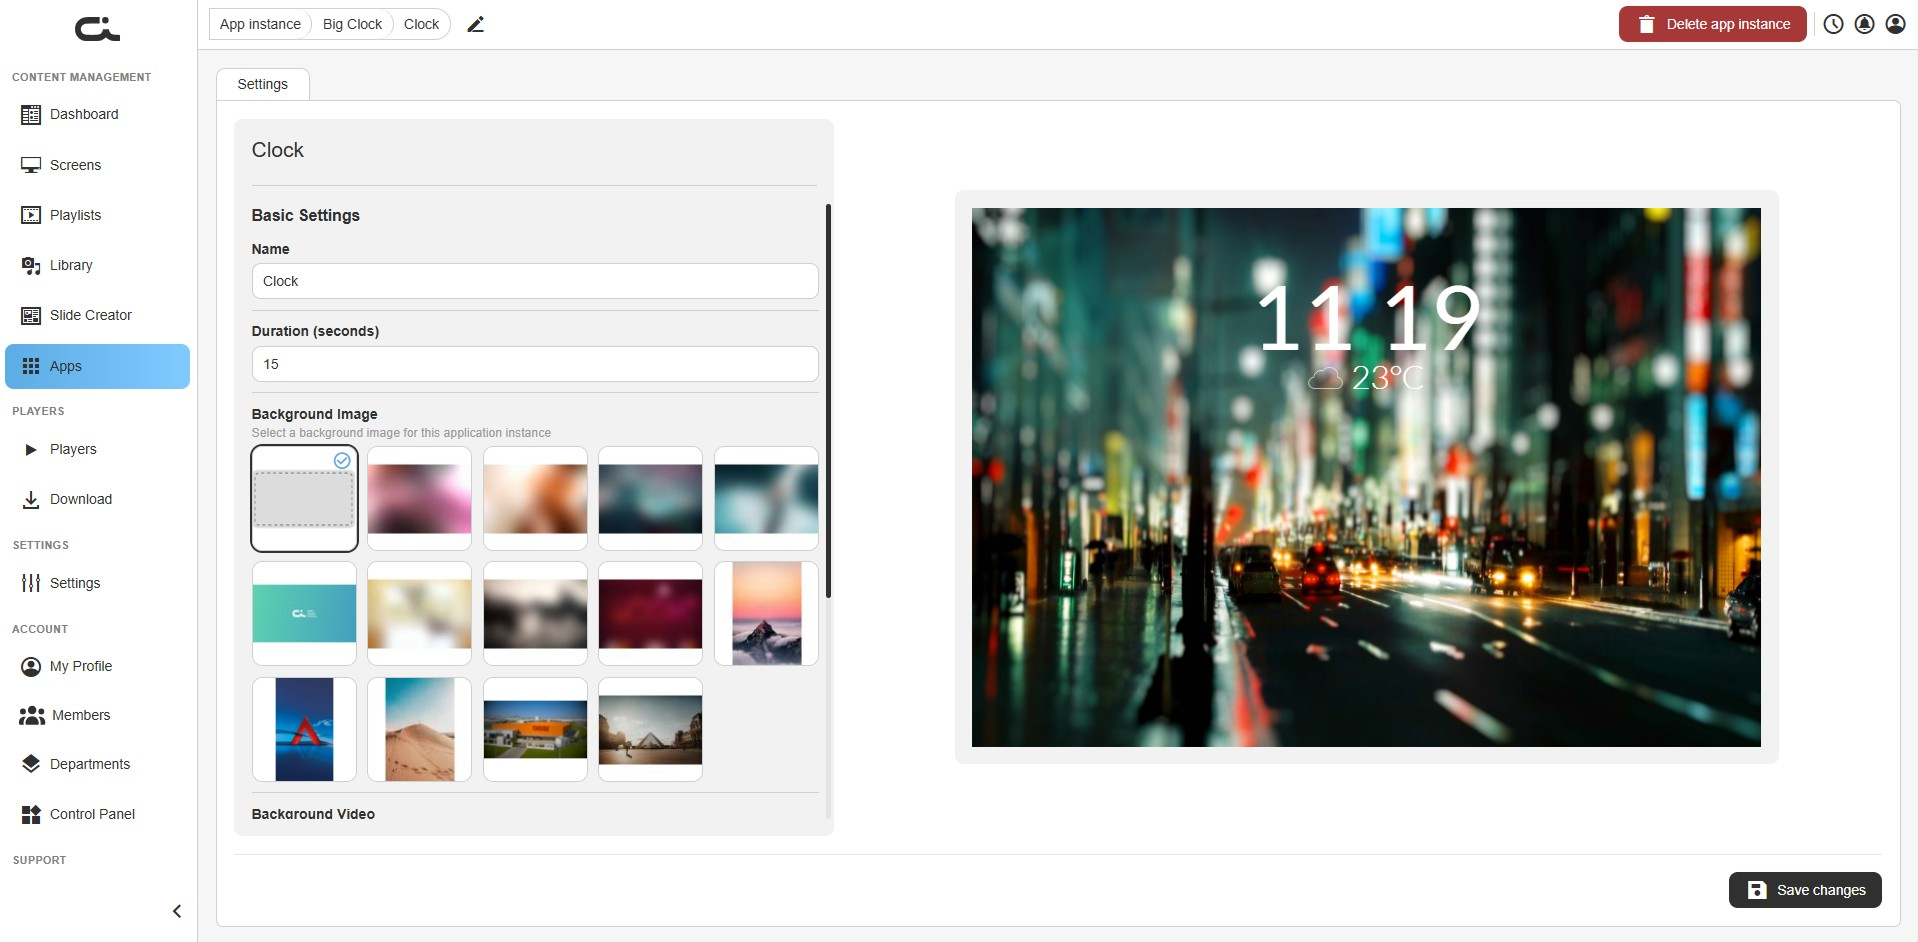
Start with:
- Name: A label for this instance (helpful if you run more than one, for example one per location)
- Duration (seconds): How long the app shows when it plays (default 15)
Step 2: Choose a background
Pick the look of the clock screen. You can use either a background image or a background video, not both:
- Background Image: Click one of the preset images in the grid. The first (blank) option means no image
- Background Video: Scroll down past the images to the video grid and click a preset video for an animated background. The first (blank) option means no video
The live preview shows your choice right away, with the time and temperature laid over it.
A video background looks lively but uses more of the player's resources and needs a stable connection. If a screen ever looks sluggish, switch to a still image.
Step 3: Set the city and weather source
Scroll down to Clock Settings to control the temperature reading:
- City: Type the city whose local time and weather you want to show (for example,
Rotterdam) - Weather API: Choose the weather source, either Yahoo or OpenWeatherMap. If the temperature ever looks wrong or stops updating, try the other source
When everything looks right in the preview, click Save changes at the bottom-right.
The temperature is pulled live, so the player needs an internet connection to keep it current. The clock itself follows the city you set.
Step 4: Use the app
Once saved, add the instance to a screen or playlist just like any other app (see Using Apps in Your Content). The time and temperature keep updating on their own, so there's nothing more to maintain. If you later change the background, city, or weather source, remember to click Save changes again.
Buienradar
The Buienradar app shows a live precipitation and weather radar map for the Netherlands or Belgium. It's a familiar, at-a-glance way to show local rain and weather conditions, and the map animates and refreshes on its own.
Step 1: Set the basic settings
After creating an instance, you land on the Settings tab. The left side holds the settings; the right side shows a live preview of the radar map.
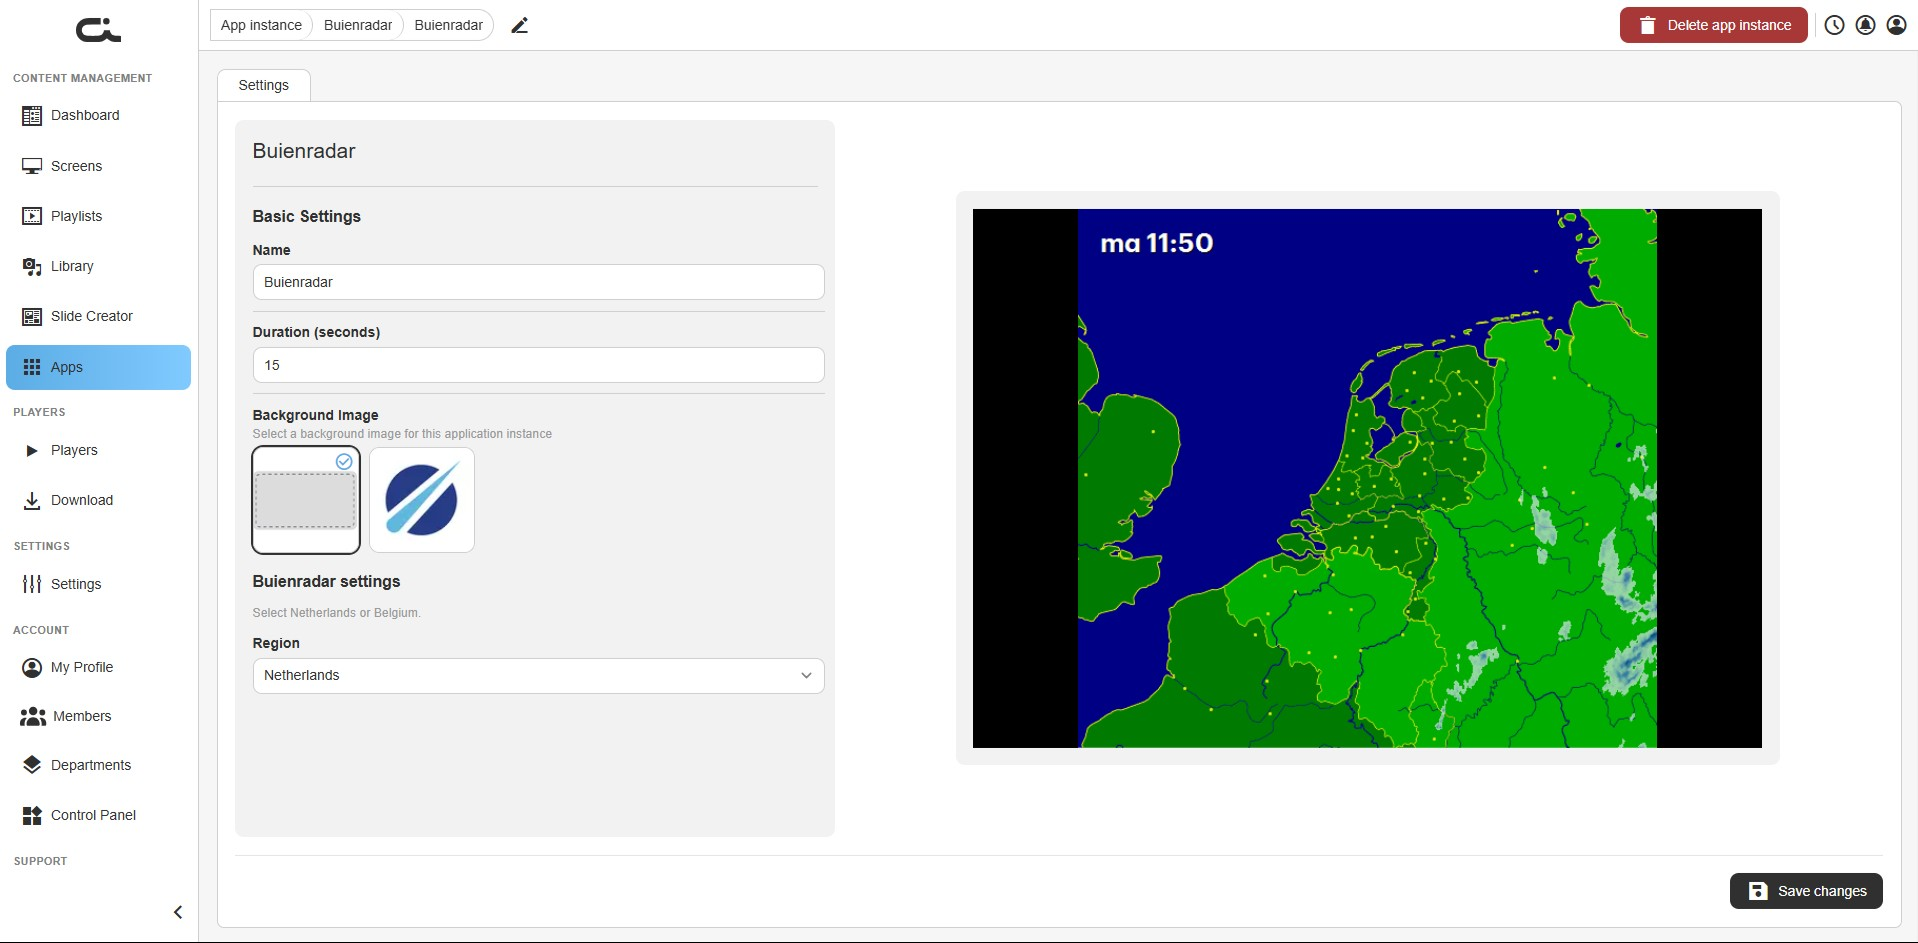
Set the following:
- Name: A label for this instance (helpful if you run more than one, for example one for each region)
- Duration (seconds): How long the app shows when it plays (default 15)
- Background Image: Optionally pick a preset background from the small grid. The first (blank) option means no background
Step 2: Choose the region
Under Buienradar settings, set the Region dropdown to either Netherlands or Belgium. The radar map and coverage follow your choice, and the preview updates to match.
When the preview looks right, click Save changes at the bottom-right.
The radar map is pulled live, so the player needs an internet connection to keep it current.
Step 3: Use the app
Once saved, add the instance to a screen or playlist just like any other app (see Using Apps in Your Content). The map keeps animating and refreshing on its own. If you later change the region or background, remember to click Save changes again.
Canva
The Canva app puts your Canva designs straight onto your screens. You connect your Canva account, pick a design, and it appears on screen, staying in sync with Canva so that when you update the design there, the screen updates too.
Step 1: Connect your Canva account
When you first open a Canva instance, the Settings tab shows a Not Connected card, and the preview asks you to connect your account.
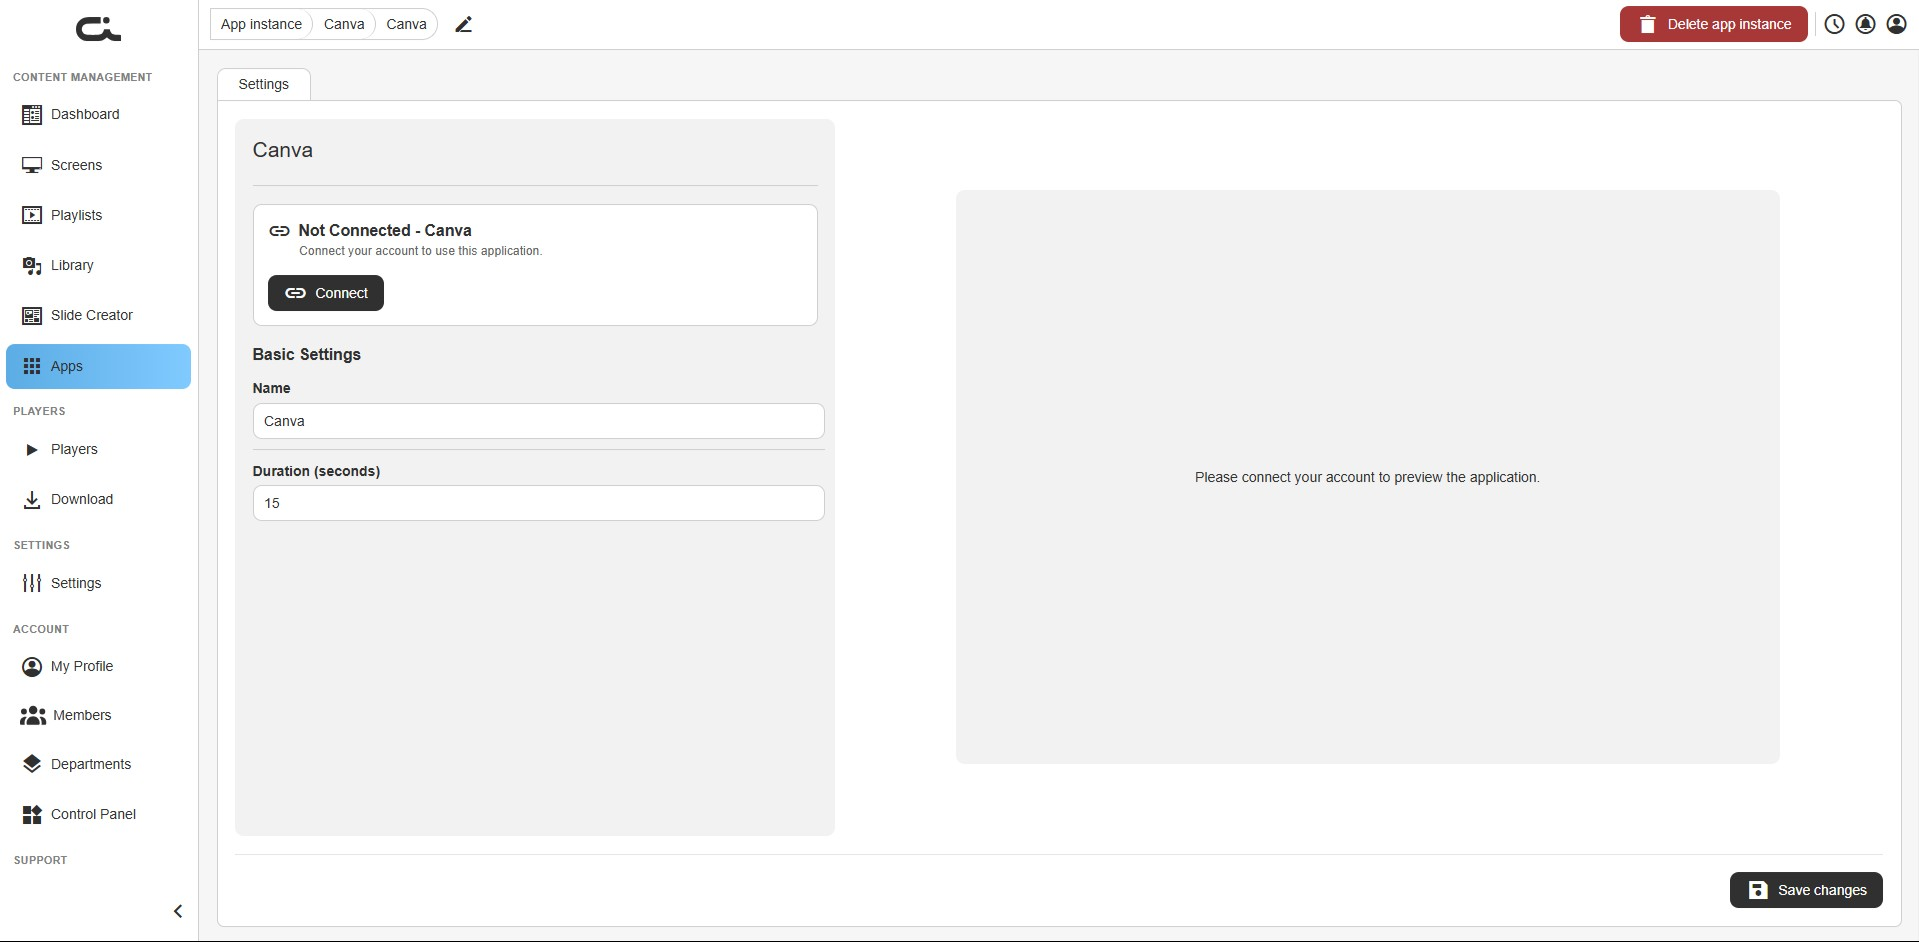
- Click Connect
- Sign in to Canva and authorize the connection when prompted
- When you return, the card turns green and reads Connected - Canva
You need a Canva account with the design you want to show. The connection only has to be made once per instance. To unlink later, use Disconnect on the same card.
Step 2: Set the basic settings and choose a design
Once connected, the Canva settings appear.
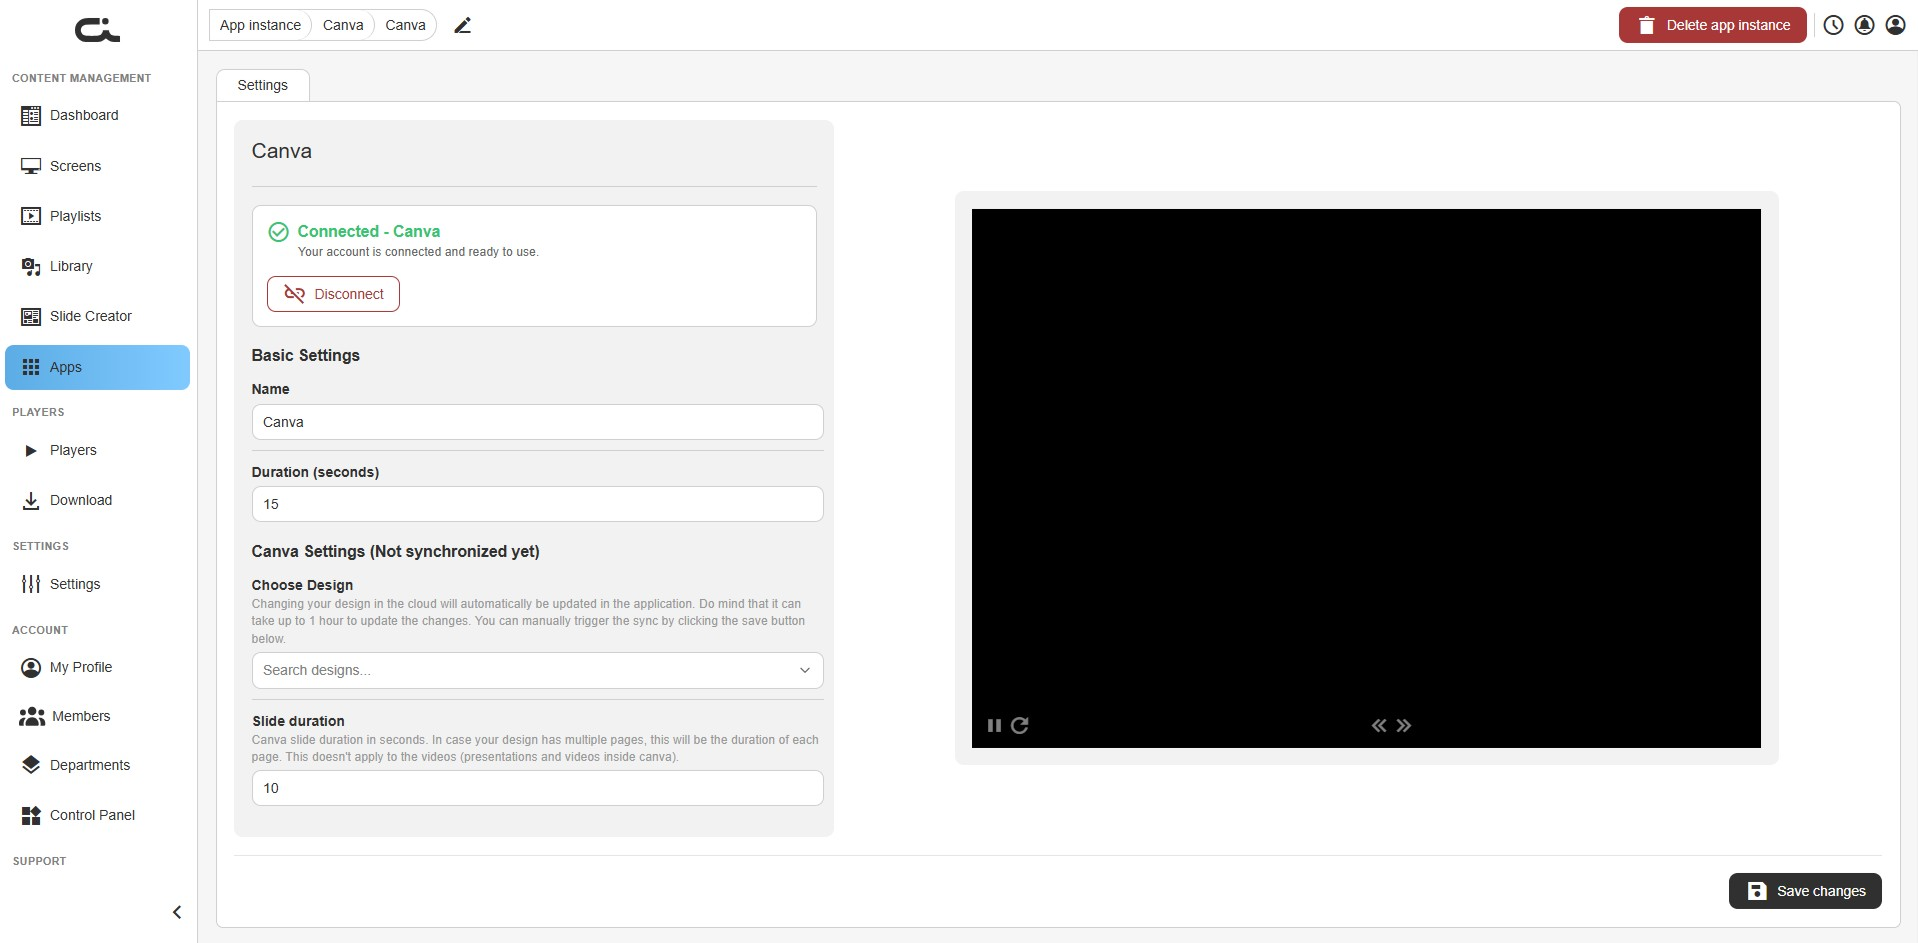
Set the following:
- Name: A label for this instance
- Duration (seconds): How long the app shows in total when it plays
- Choose Design: Click the dropdown and search for the design you want to display, then select it
- Slide duration: For a design with multiple pages, how long each page shows before moving to the next (default 10). This does not apply to videos inside the design
After choosing a design, click Save changes at the bottom-right. Saving also triggers a sync with Canva, and the preview then renders your design.
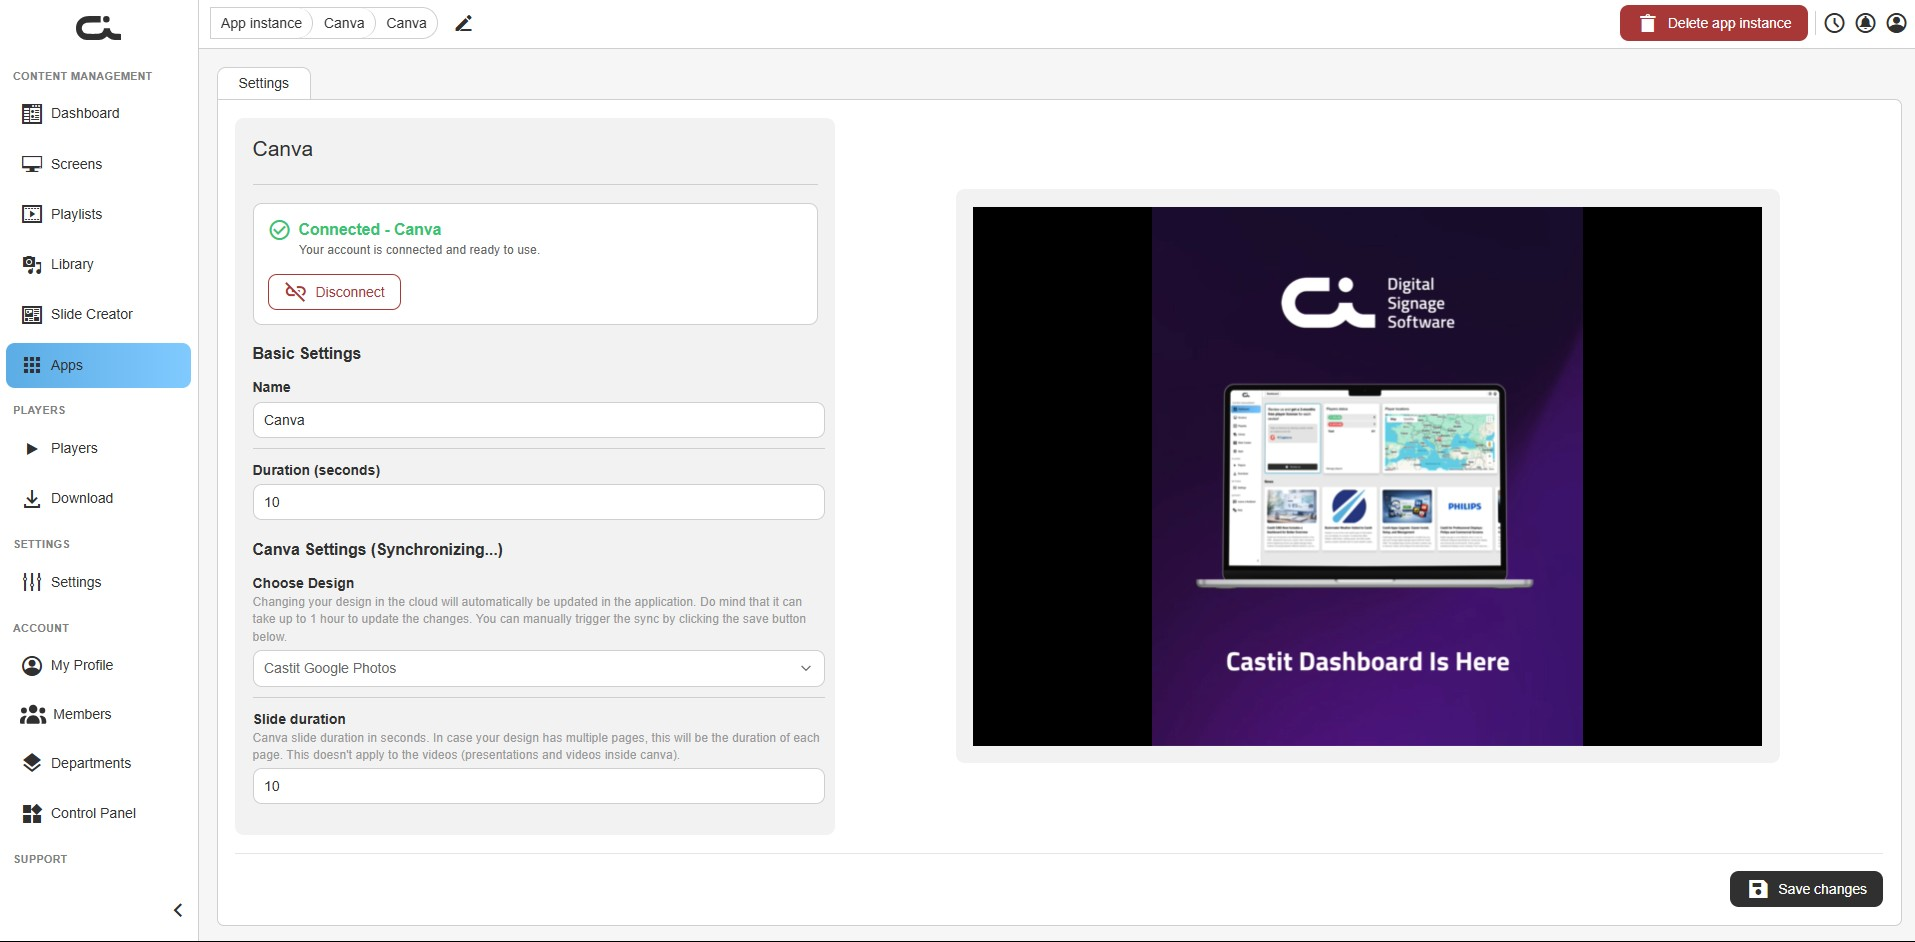
Changes you make to the design in Canva update on screen automatically, but it can take up to an hour. To apply an update right away, come back to this screen and click Save changes to sync manually.
Step 3: Use the app
Once saved and synced, add the instance to a screen or playlist just like any other app (see Using Apps in Your Content). The design stays linked to Canva, so you keep editing in Canva and the screen follows. Whenever you switch to a different design or change the slide duration, remember to click Save changes again.
Facebook
The Facebook app shows photos and posts from your Facebook page on screen. You connect your account, pick a page, and choose how many recent posts to show, and the app keeps pulling in new posts as you publish them.
The Facebook account you connect must be a Facebook Business account with a Page. Personal accounts cannot be connected and will fail to link.
Step 1: Connect your Facebook account
When you first open a Facebook instance, the Settings tab shows a Not Connected card, and the preview asks you to connect your account.
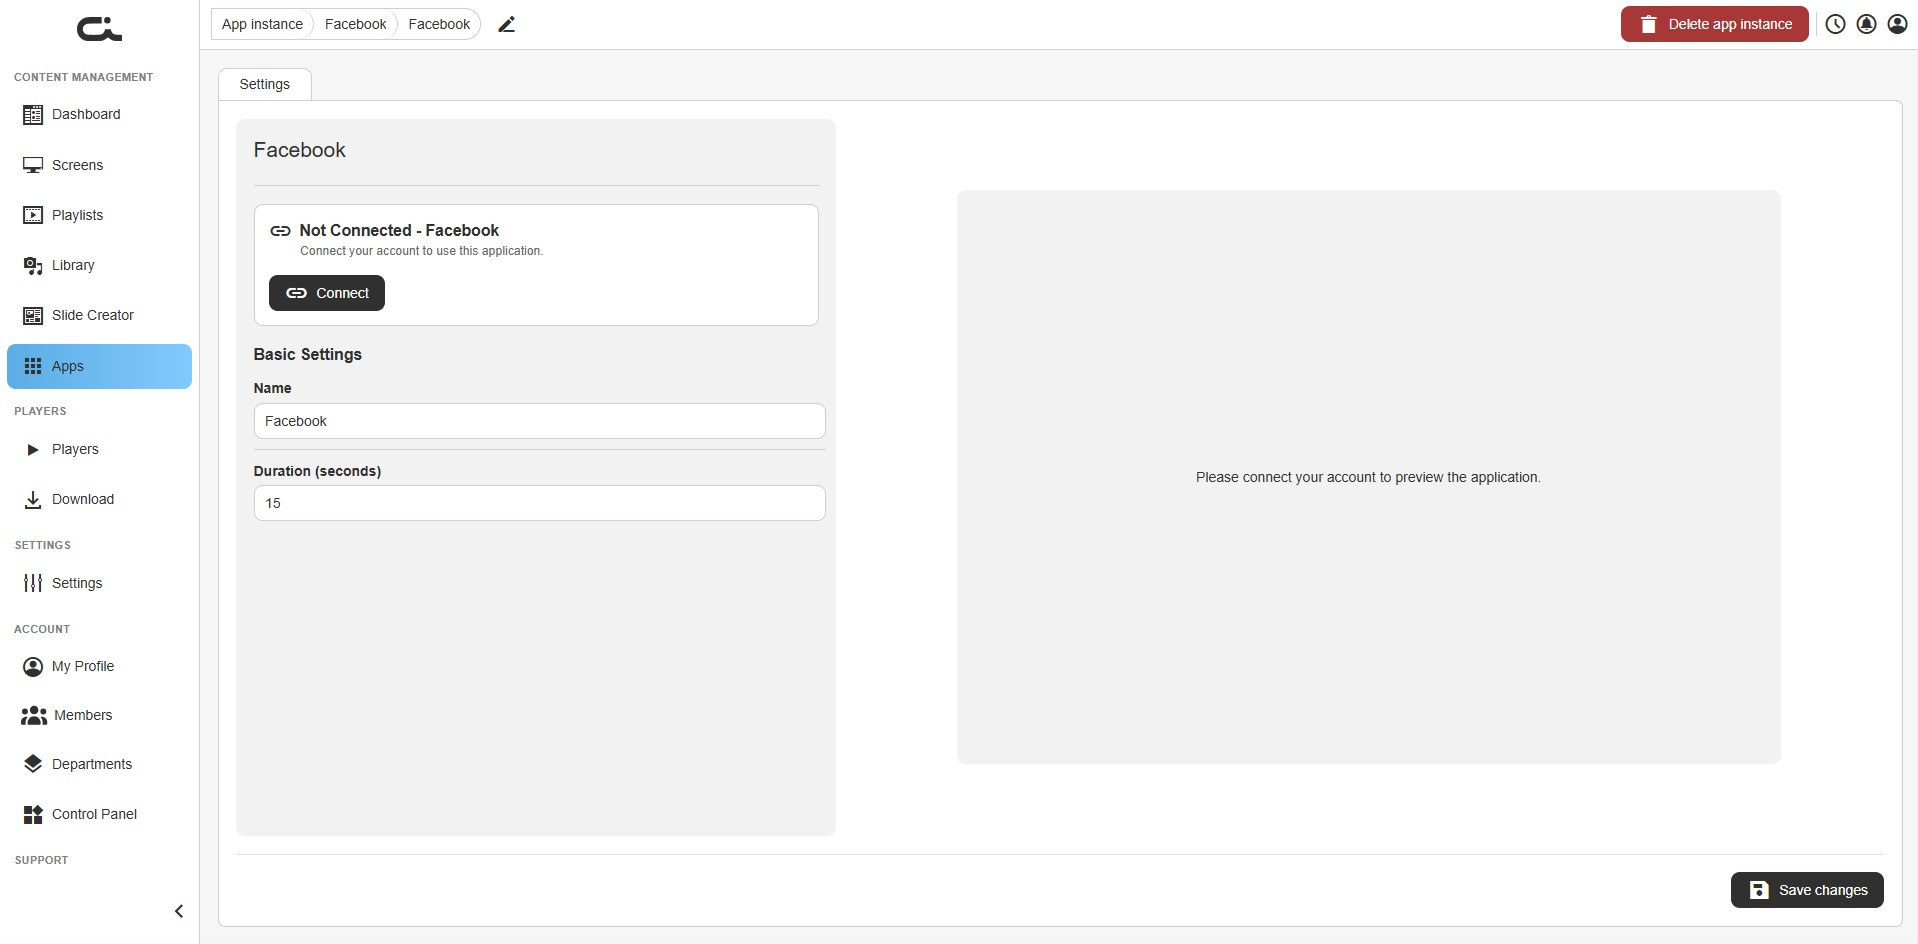
- Click Connect
- Sign in to Facebook and authorize the connection when prompted
- When you return, the card turns green and reads Connected - Facebook
The connection only has to be made once per instance. To unlink later, use Disconnect on the same card.
Step 2: Set the basic settings and choose a page
Once connected, the Facebook settings appear, and the preview shows a post from your page.
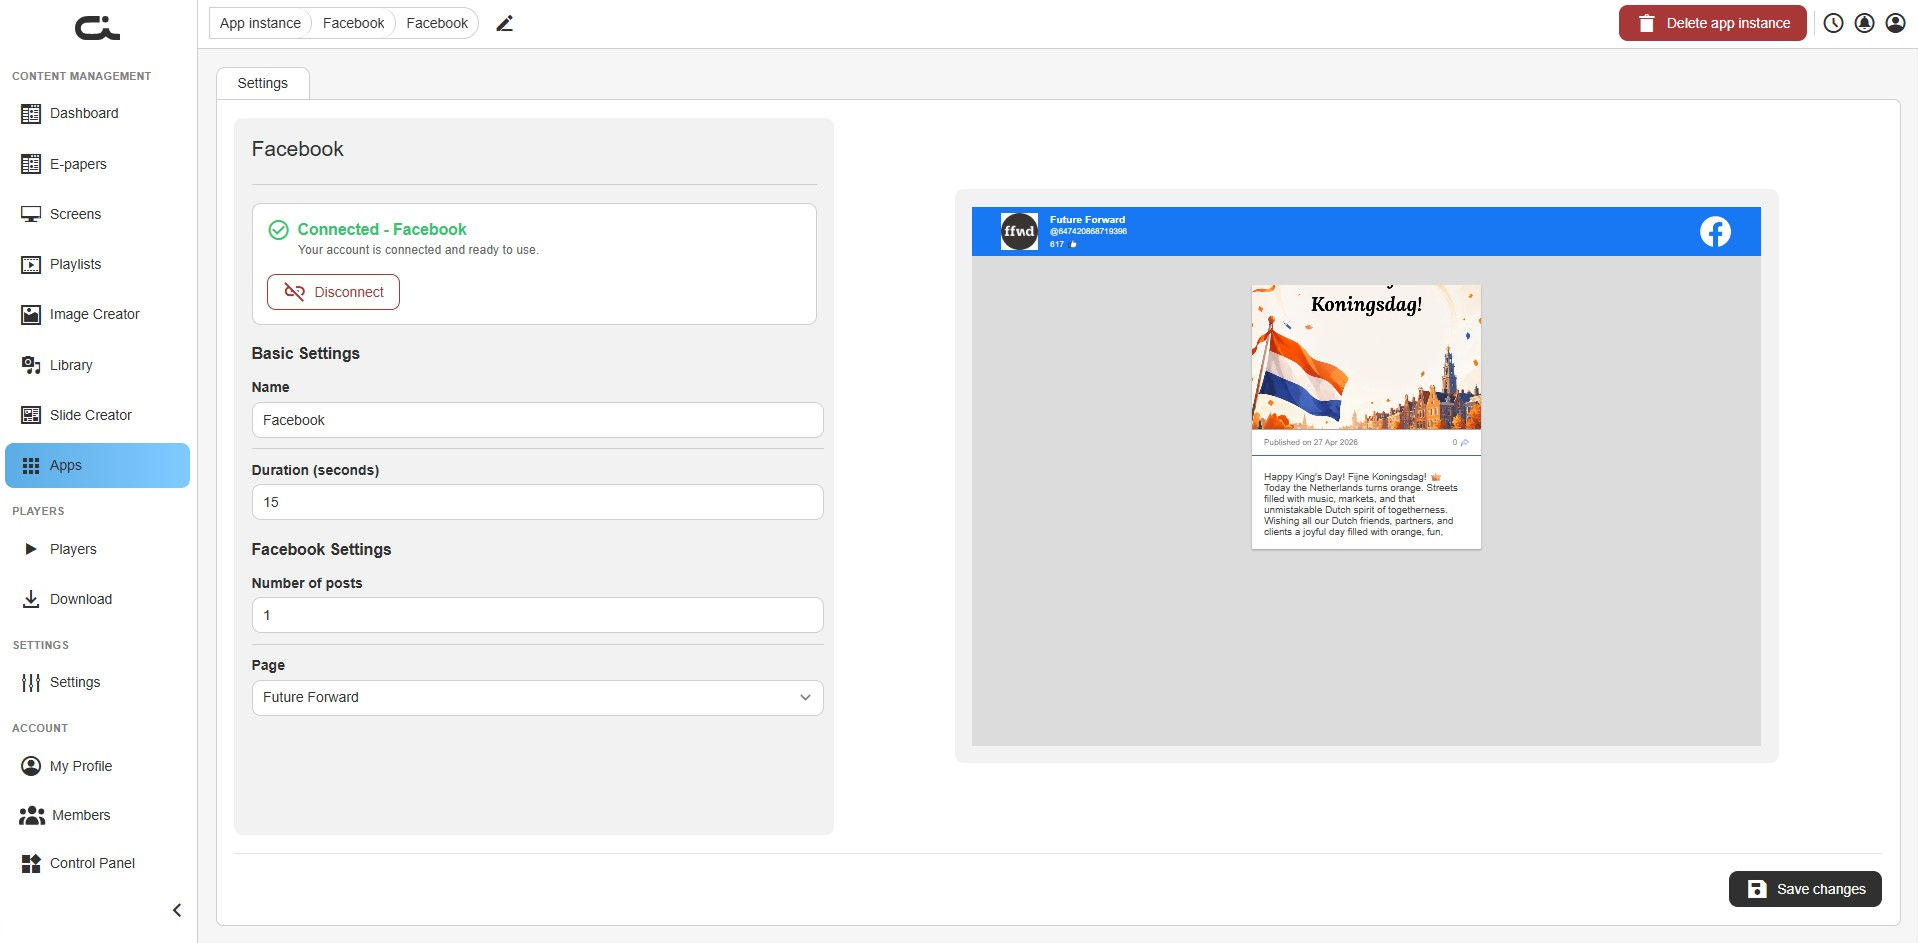
Set the following:
- Name: A label for this instance
- Duration (seconds): How long the app shows when it plays
- Number of posts: How many recent posts to cycle through
- Page: Choose which of your Facebook pages to show posts from
When the preview looks right, click Save changes at the bottom-right.
Step 3: Use the app
Once saved, add the instance to a screen or playlist just like any other app (see Using Apps in Your Content). The app refreshes on its own as you publish new posts, so there's nothing more to maintain. If you later change the page or the number of posts, remember to click Save changes again.
Flickr
The Flickr app turns a Flickr user's photos into a photo channel on your screen. There's no account to connect, you simply point it at a Flickr user and it shows their photos, refreshing as new ones are posted.
Step 1: Set the basic settings
After creating an instance, you land on the Settings tab. The left side holds the settings; the right side shows a live preview of the photo channel.
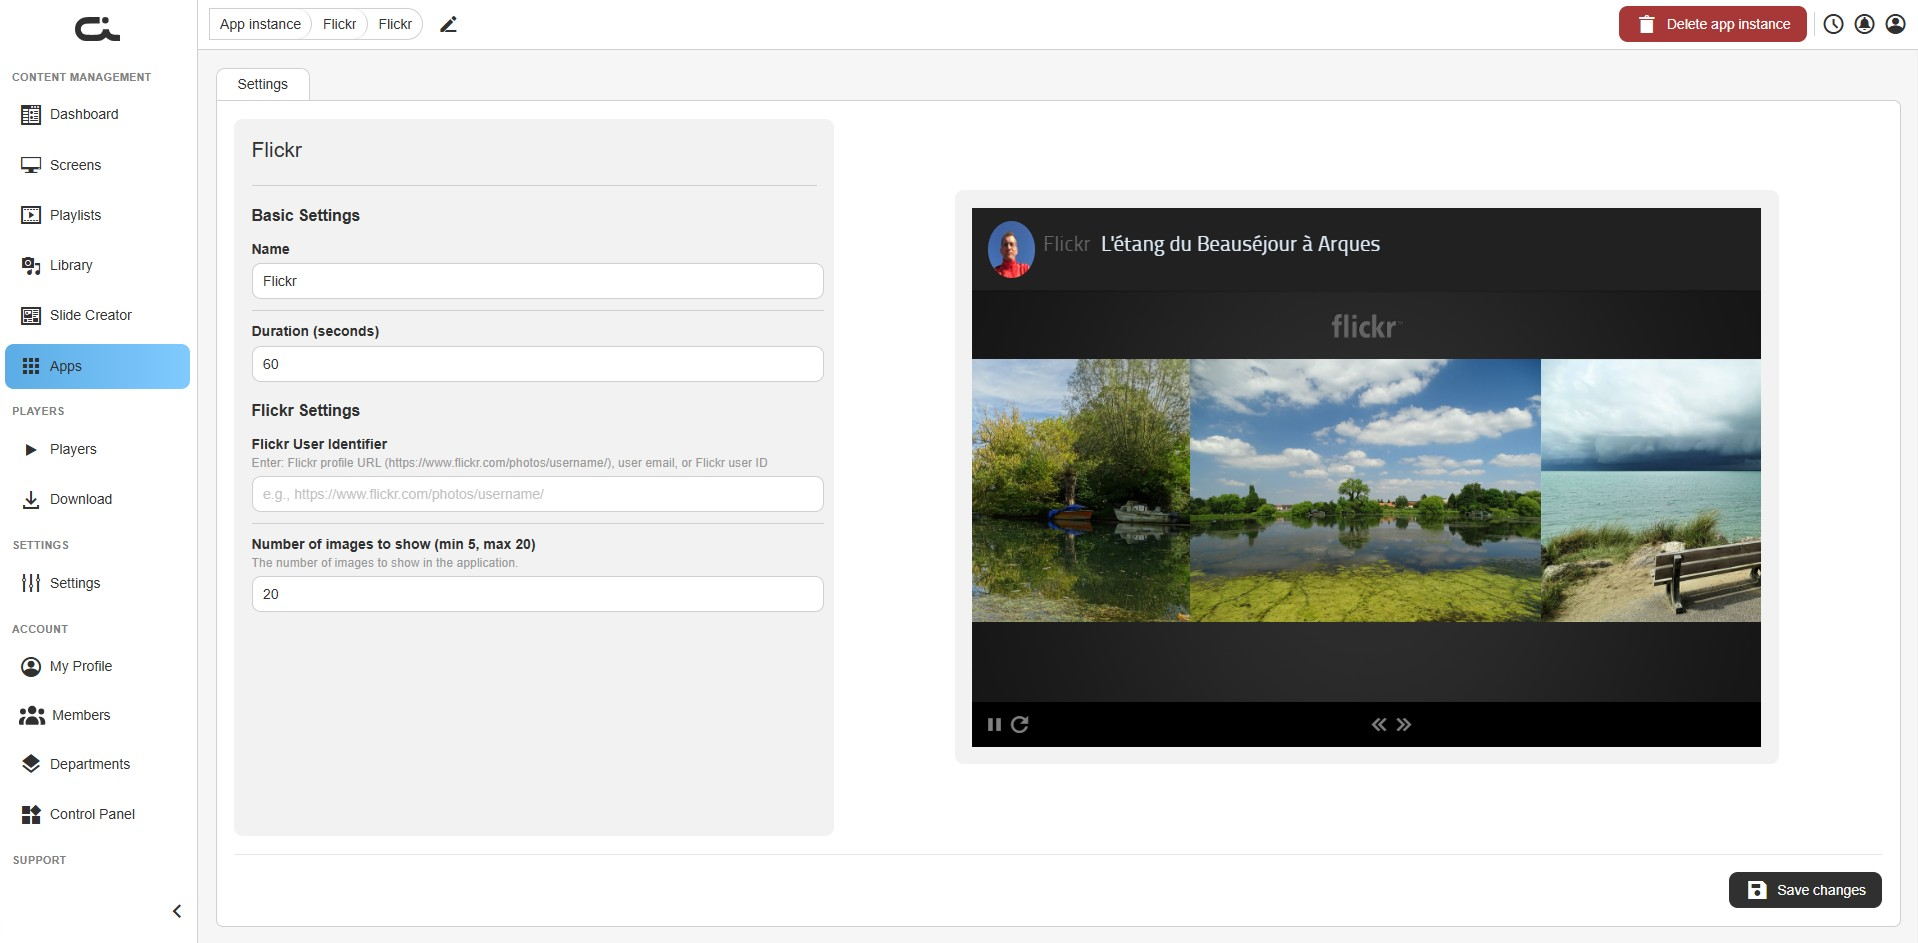
Set the following:
- Name: A label for this instance
- Duration (seconds): How long the app shows when it plays (default 60)
Step 2: Point it at a Flickr user
Under Flickr Settings, fill in:
- Flickr User Identifier: Identify whose photos to show. You can enter a Flickr profile URL (for example
https://www.flickr.com/photos/username/), the user's email, or their Flickr user ID - Number of images to show: How many photos to include, between 5 and 20
When the preview shows the right photos, click Save changes at the bottom-right.
The app shows the user's public photos and needs an internet connection on the player to load them.
Step 3: Use the app
Once saved, add the instance to a screen or playlist just like any other app (see Using Apps in Your Content). The channel keeps updating on its own as new photos are posted. If you later change the user or the number of images, remember to click Save changes again.
Image of the Week
The Image of the Week app shows a different photo for each calendar week of the year. You set one image per week (weeks 1 through 53), and the player automatically shows the right one for the current week, switching on its own as the weeks roll over.
Step 1: Set the basic settings
After creating an instance, you land on the Settings tab. The left side holds the settings; the right side shows a live preview of the current week's image.
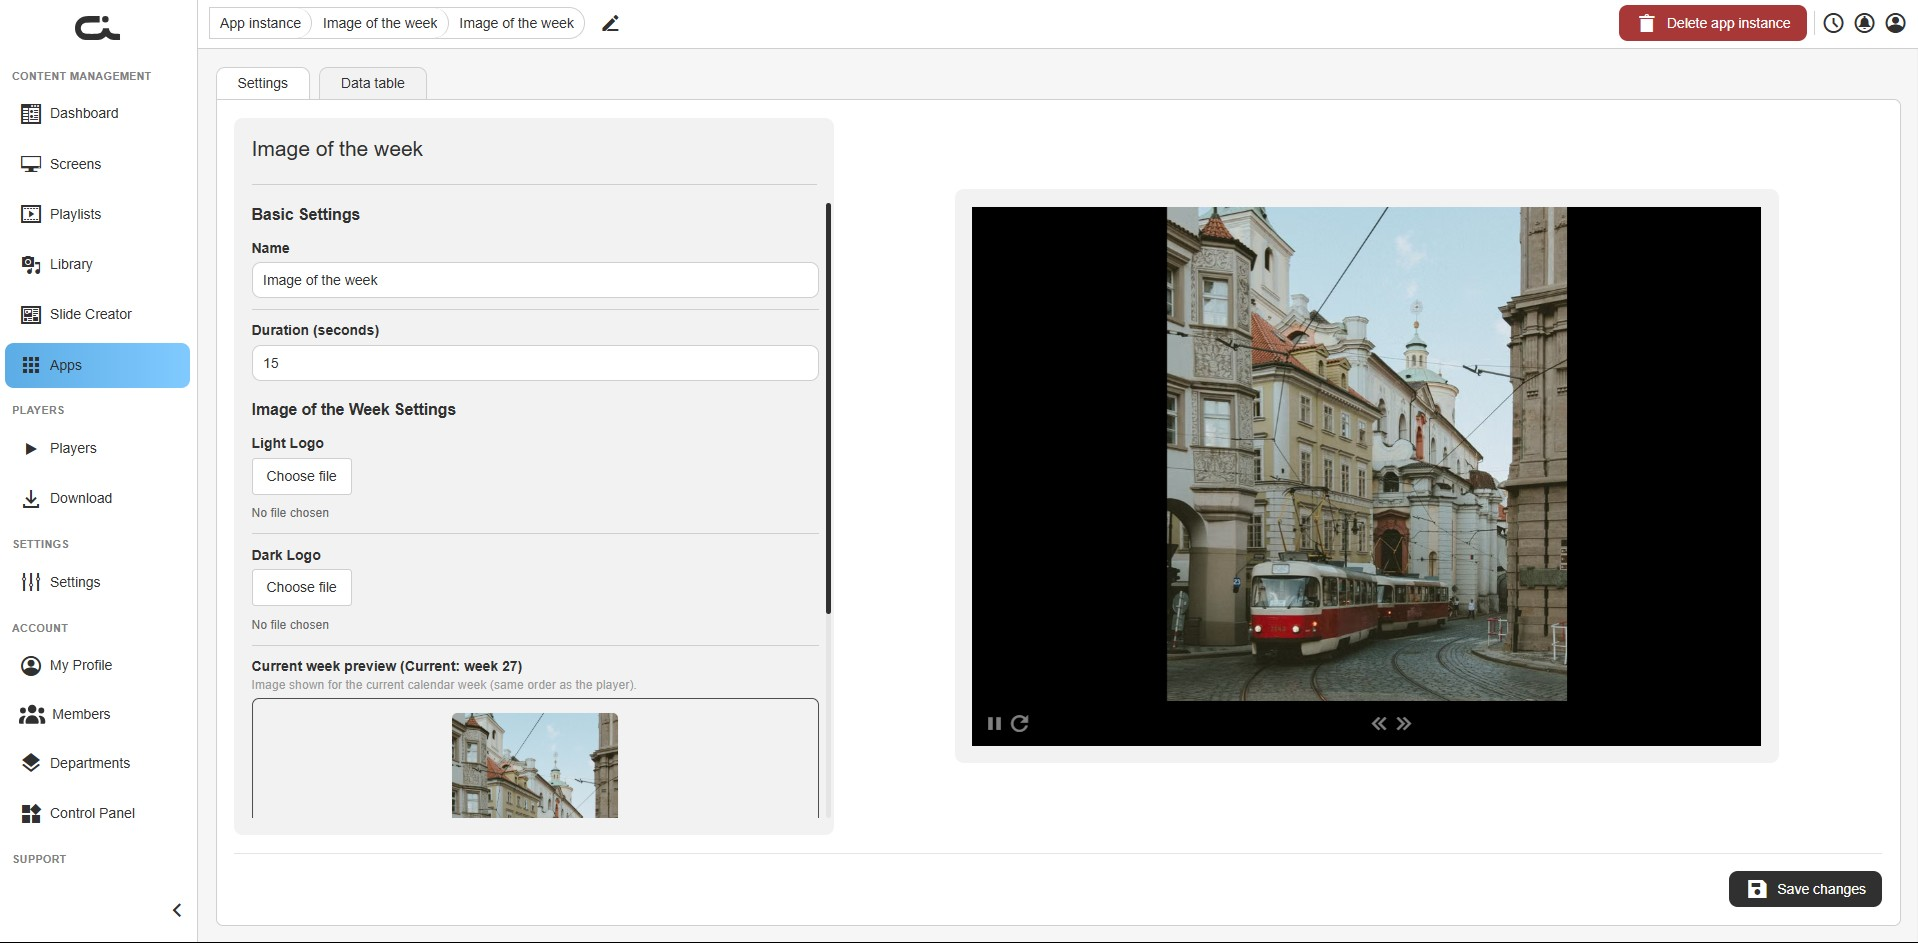
Set the following:
- Name: A label for this instance
- Duration (seconds): How long the app shows when it plays (default 15)
- Light Logo / Dark Logo (optional): Click Choose file to overlay your logo on the image. Provide both so the right version shows depending on the image's background
Step 2: Add an image for each week
Scroll down to Images of the week. The preview shows the image for the current week, and the section explains that the player picks one picture per calendar week.
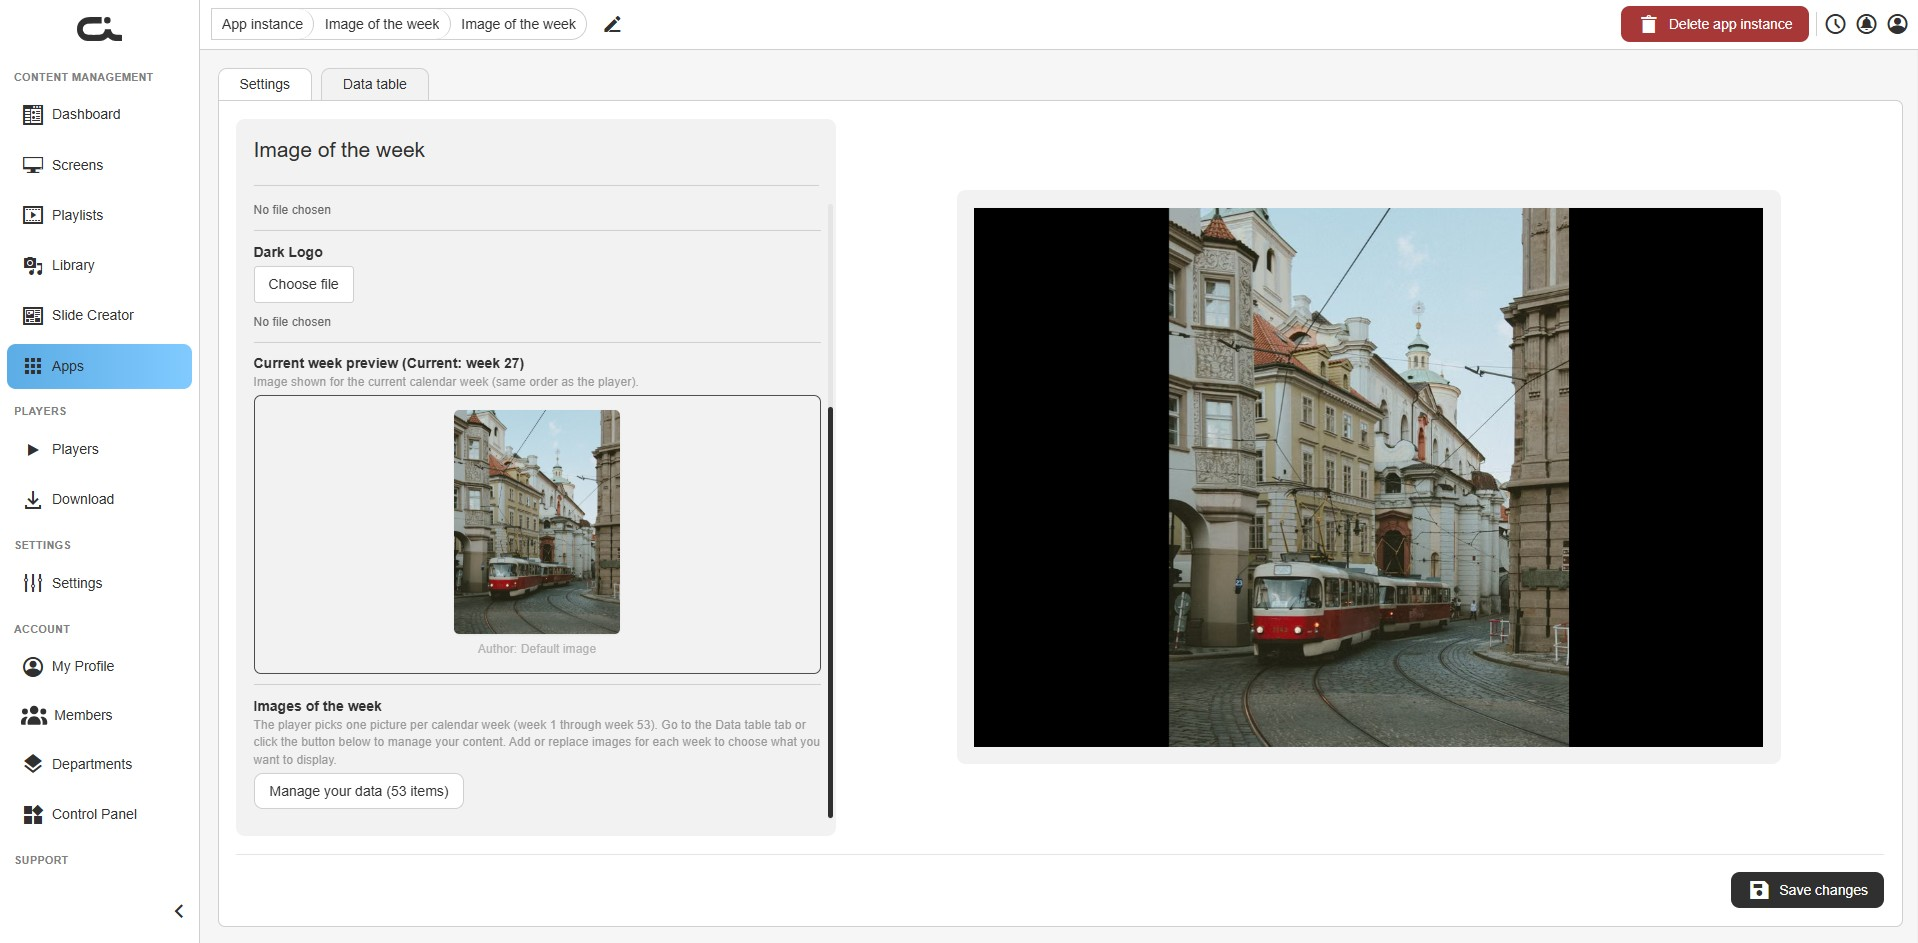
- Open the Data table tab, or click Manage your data under this section
- For each week (1 through 53), add or replace the image you want to show
- Choose Upload to add a new file, Library to pick existing media, or Stock for a stock image
Any week you leave empty falls back to the default image. When you're done, click Save changes at the bottom-right.
You don't have to fill in all 53 weeks at once. Set the weeks you care about now, and update the rest later. Just remember to click Save changes each time you make changes.
Step 3: Use the app
Once saved, add the instance to a screen or playlist just like any other app (see Using Apps in Your Content). The player shows the correct image for the current week and moves to the next week's image automatically, so there's nothing more to do until you want to change a week's picture.
Power BI
The Power BI app casts your Power BI reports and dashboards to your screens. You connect your Microsoft account, pick the report or dashboard you want, and choose how it's presented, and it stays connected to Power BI so the data stays current.
Step 1: Connect your Microsoft account
When you first open a Power BI instance, the Settings tab shows a Not Connected card, and the preview asks you to connect your account.
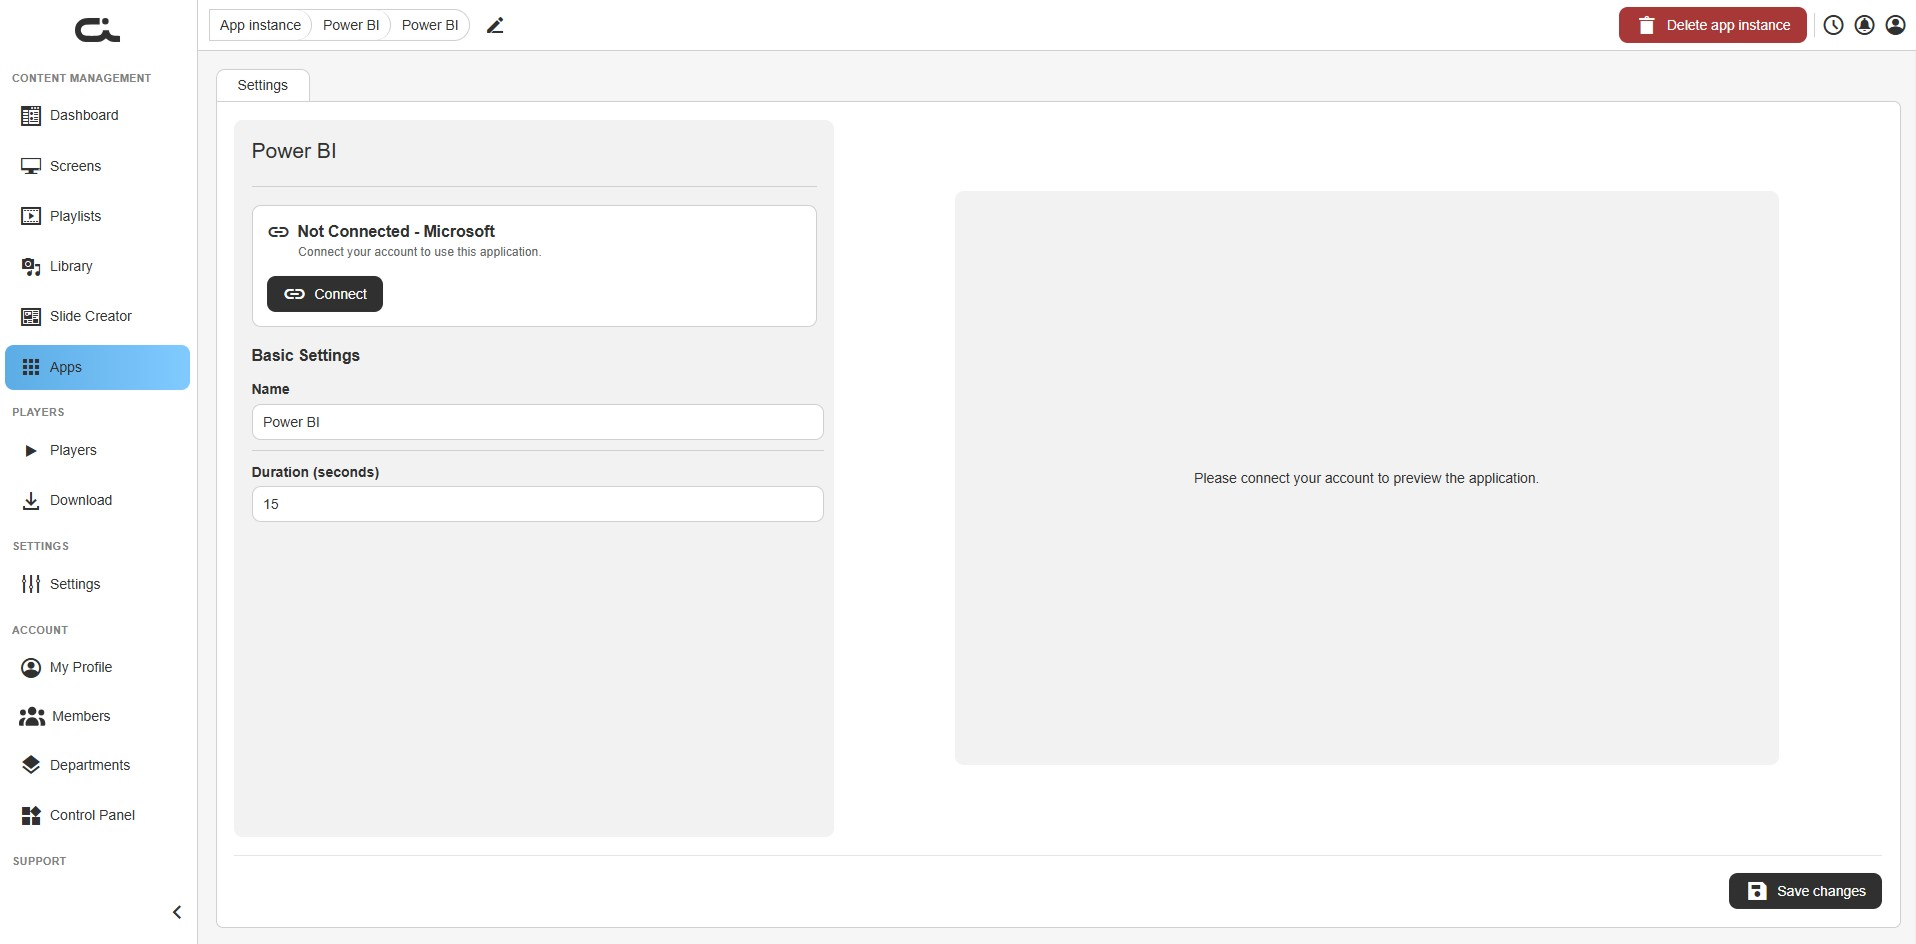
- Click Connect
- Sign in with the Microsoft account that has access to your Power BI content and authorize the connection
- When you return, the card turns green and reads Connected - Microsoft
Connect a Microsoft account that already has access to the reports or dashboards you want to show. The connection only has to be made once per instance. To unlink later, use Disconnect on the same card.
Step 2: Choose what to display
Once connected, the Power BI settings appear, and the preview shows your selected content.
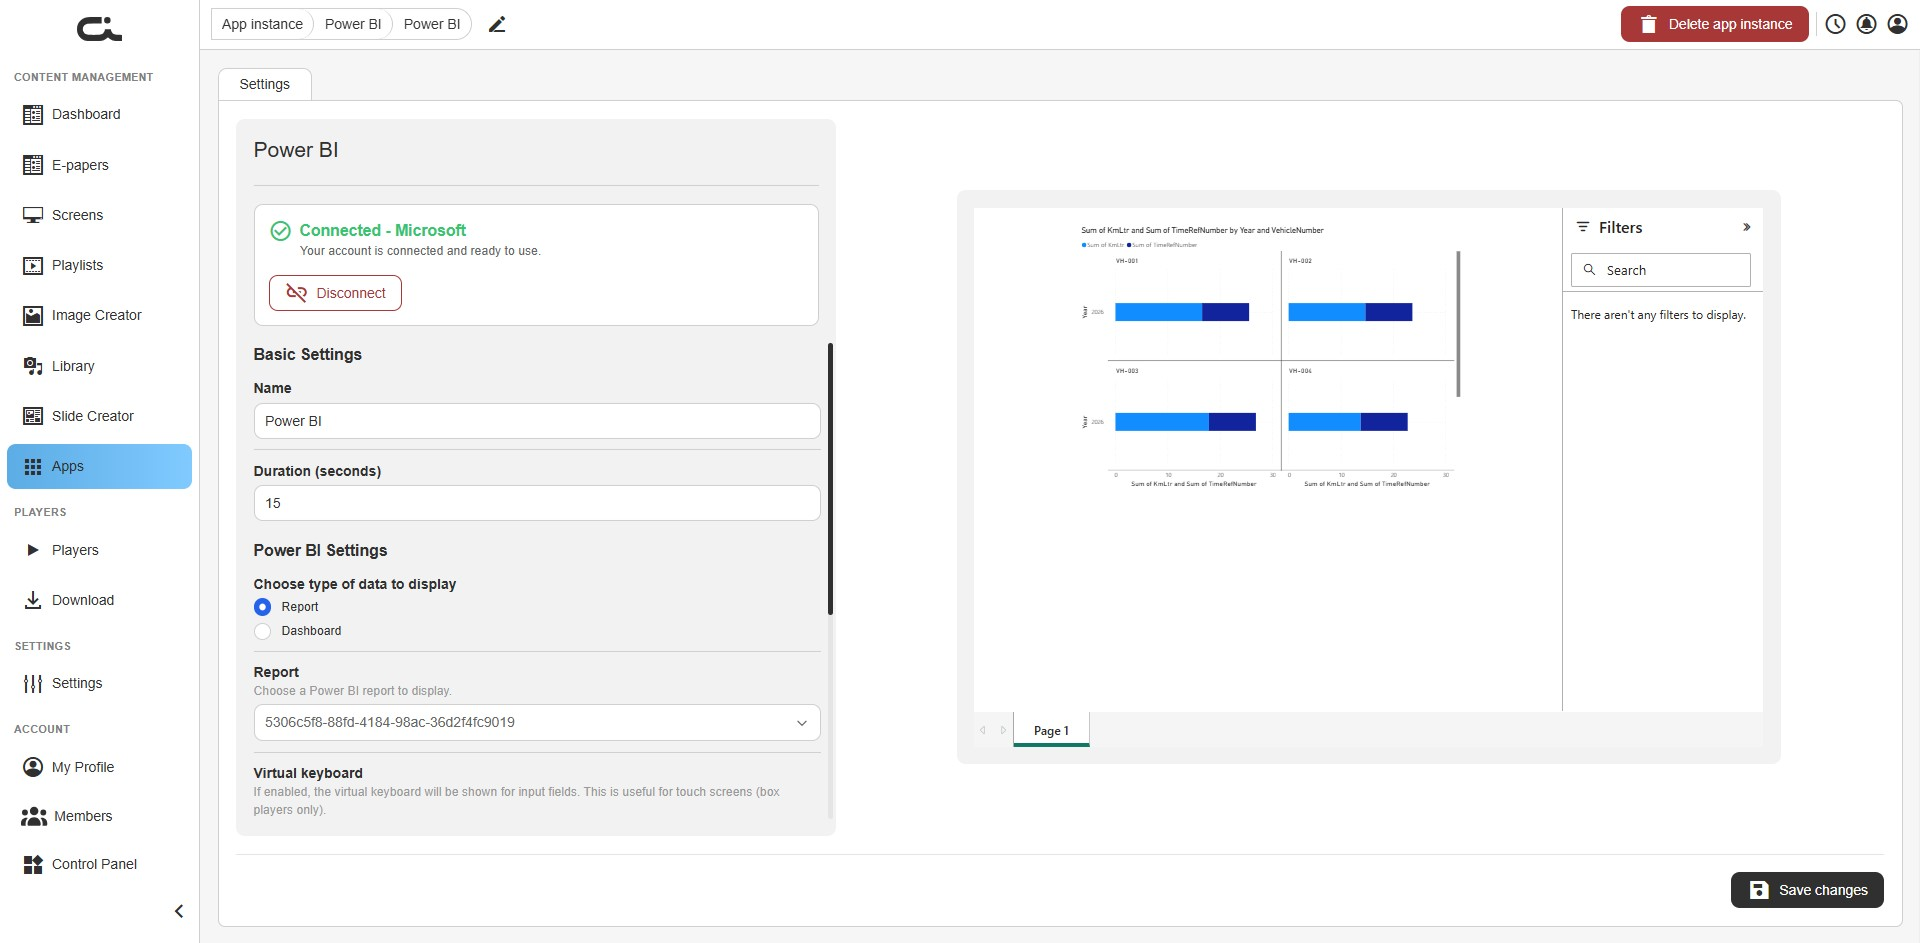
Set the following:
- Name: A label for this instance
- Duration (seconds): How long the app shows when it plays
- Choose type of data to display: Pick Report or Dashboard
- Report / Dashboard: From the dropdown, select the specific report or dashboard you want on screen
Step 3: Set the display options
Scroll down to fine-tune how the content is shown.
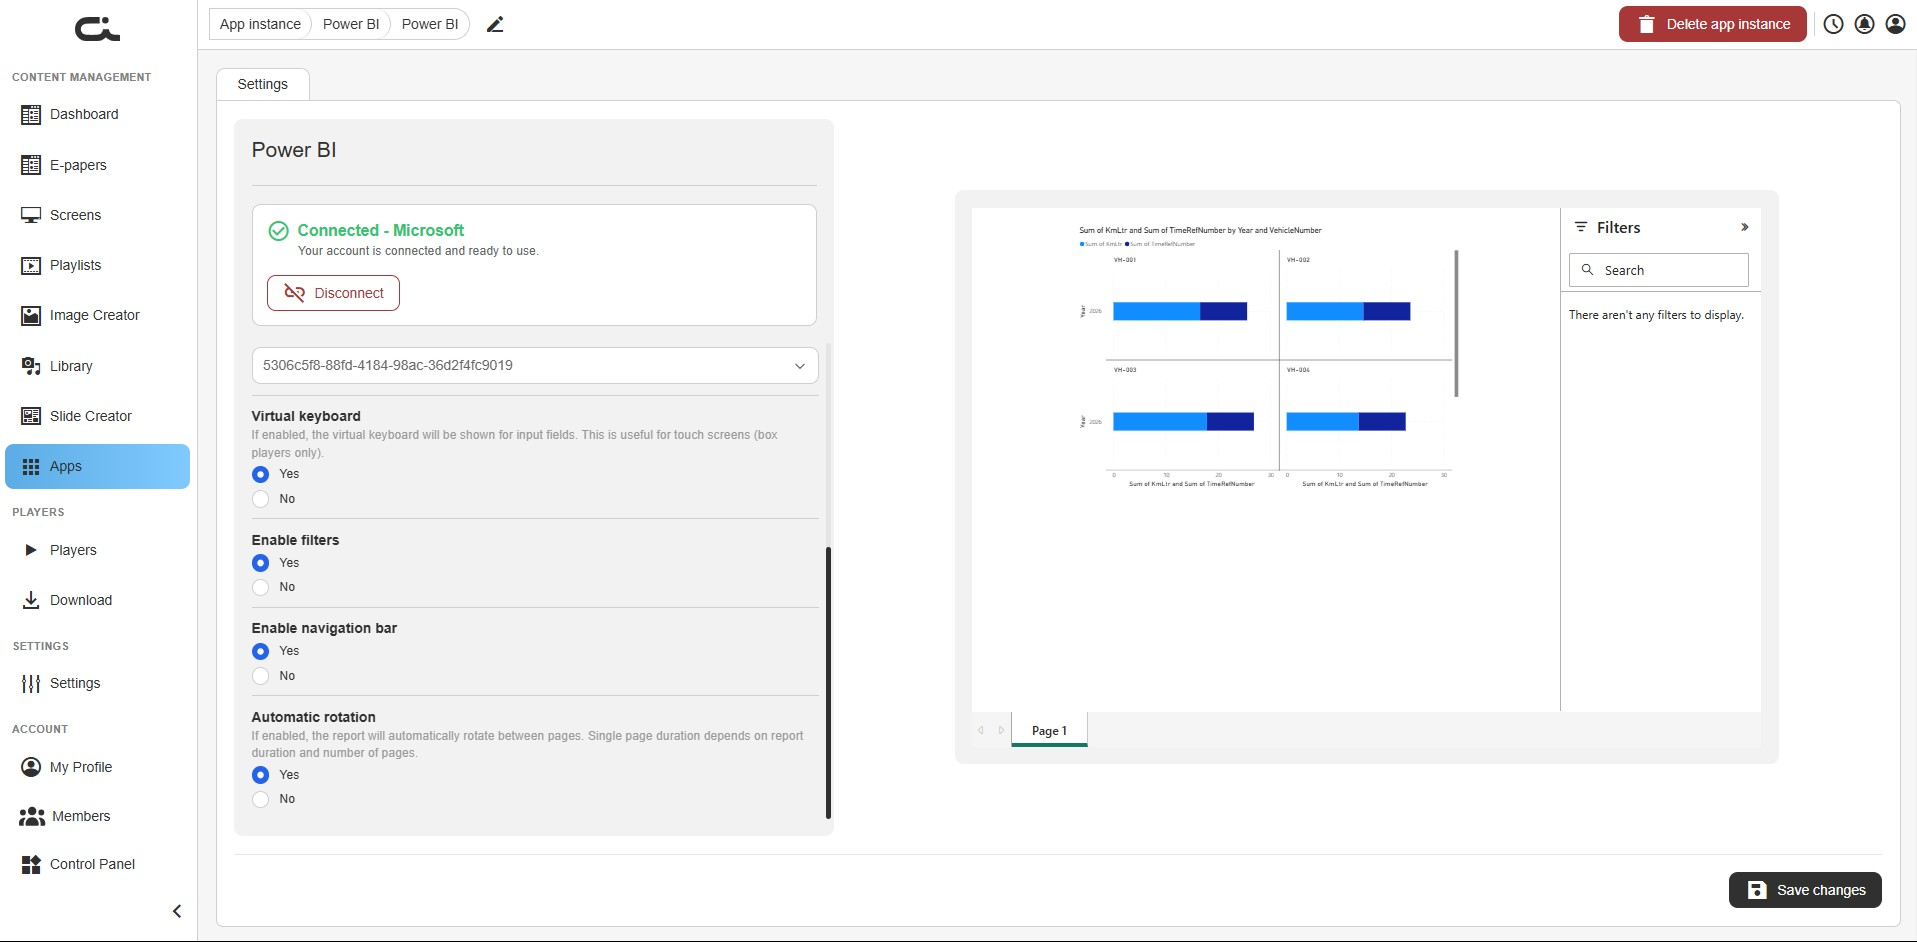
- Virtual keyboard: Show an on-screen keyboard for input fields. Useful for touch screens (box players only)
- Enable filters: Show or hide the Power BI filters panel
- Enable navigation bar: Show or hide the page navigation bar
- Automatic rotation: Automatically rotate between the report's pages. The time on each page depends on the report duration and the number of pages
When the preview looks right, click Save changes at the bottom-right.
The report data is pulled live from Power BI, so the player needs an internet connection to keep it current.
Step 4: Use the app
Once saved, add the instance to a screen or playlist just like any other app (see Using Apps in Your Content). The report stays linked to Power BI and keeps showing current data. If you later switch reports or change any display option, remember to click Save changes again.
PowerPoint Viewer
The PowerPoint Viewer app turns a PowerPoint presentation into digital signage content. There are two ways to use it: paste a public embed URL without signing in, or connect your Microsoft account and pick a presentation directly. The connected method also lets you control how slides advance and what navigation aids appear.
Option A: Use an embed URL (no account needed)
When you first open a PowerPoint Viewer instance and don't connect an account, the PowerPoint Settings show an Embed URL field.
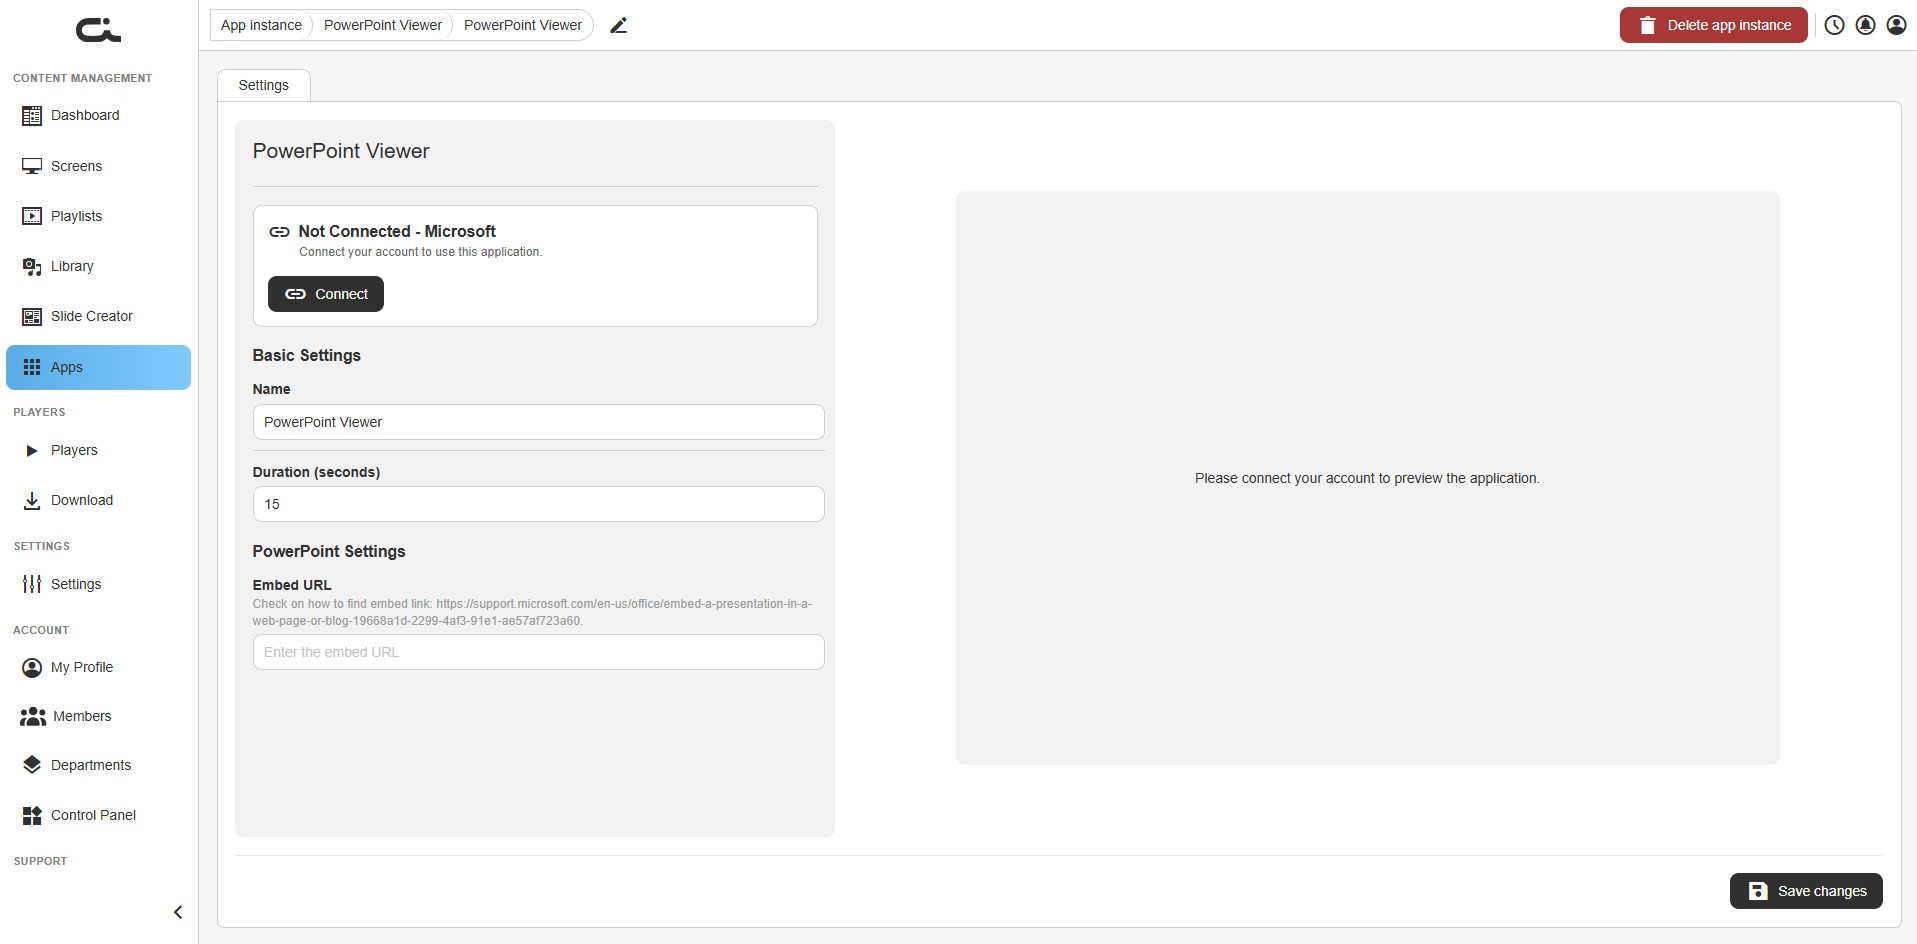
- In PowerPoint (or Office on the web), create an embed link for your presentation. The field includes a link to Microsoft's instructions for finding the embed link
- Paste it into Embed URL
- Set the Name and Duration (seconds)
- Click Save changes
Option B: Connect your Microsoft account
Connecting lets you choose a presentation from your account and unlocks the navigation options.
Step 1: Connect
- Click Connect on the Not Connected card
- Sign in with your Microsoft account and authorize the connection
- When you return, the card turns green and reads Connected - Microsoft
The connection only has to be made once per instance. To unlink later, use Disconnect on the same card.
Step 2: Choose the presentation
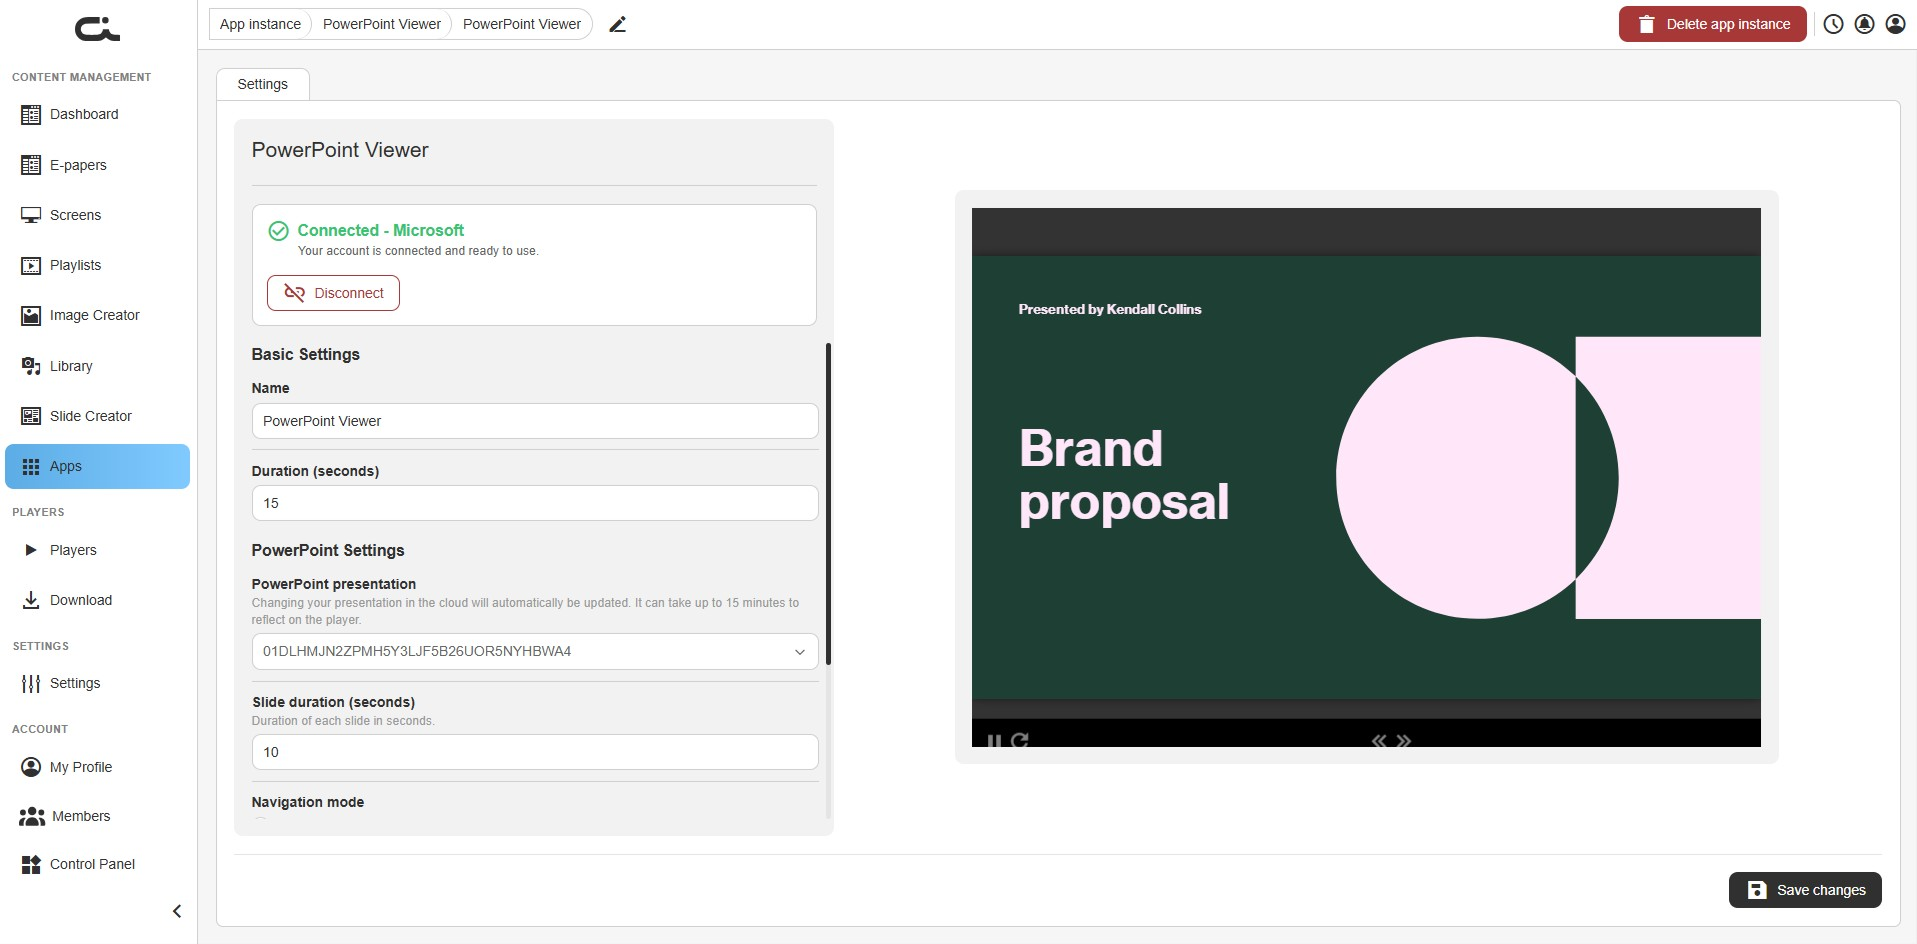
- Name: A label for this instance
- Duration (seconds): How long the app shows when it plays
- PowerPoint presentation: Select the presentation you want from the dropdown
- Slide duration (seconds): How long each slide shows before advancing (default 10)
Step 3: Set the navigation and display options
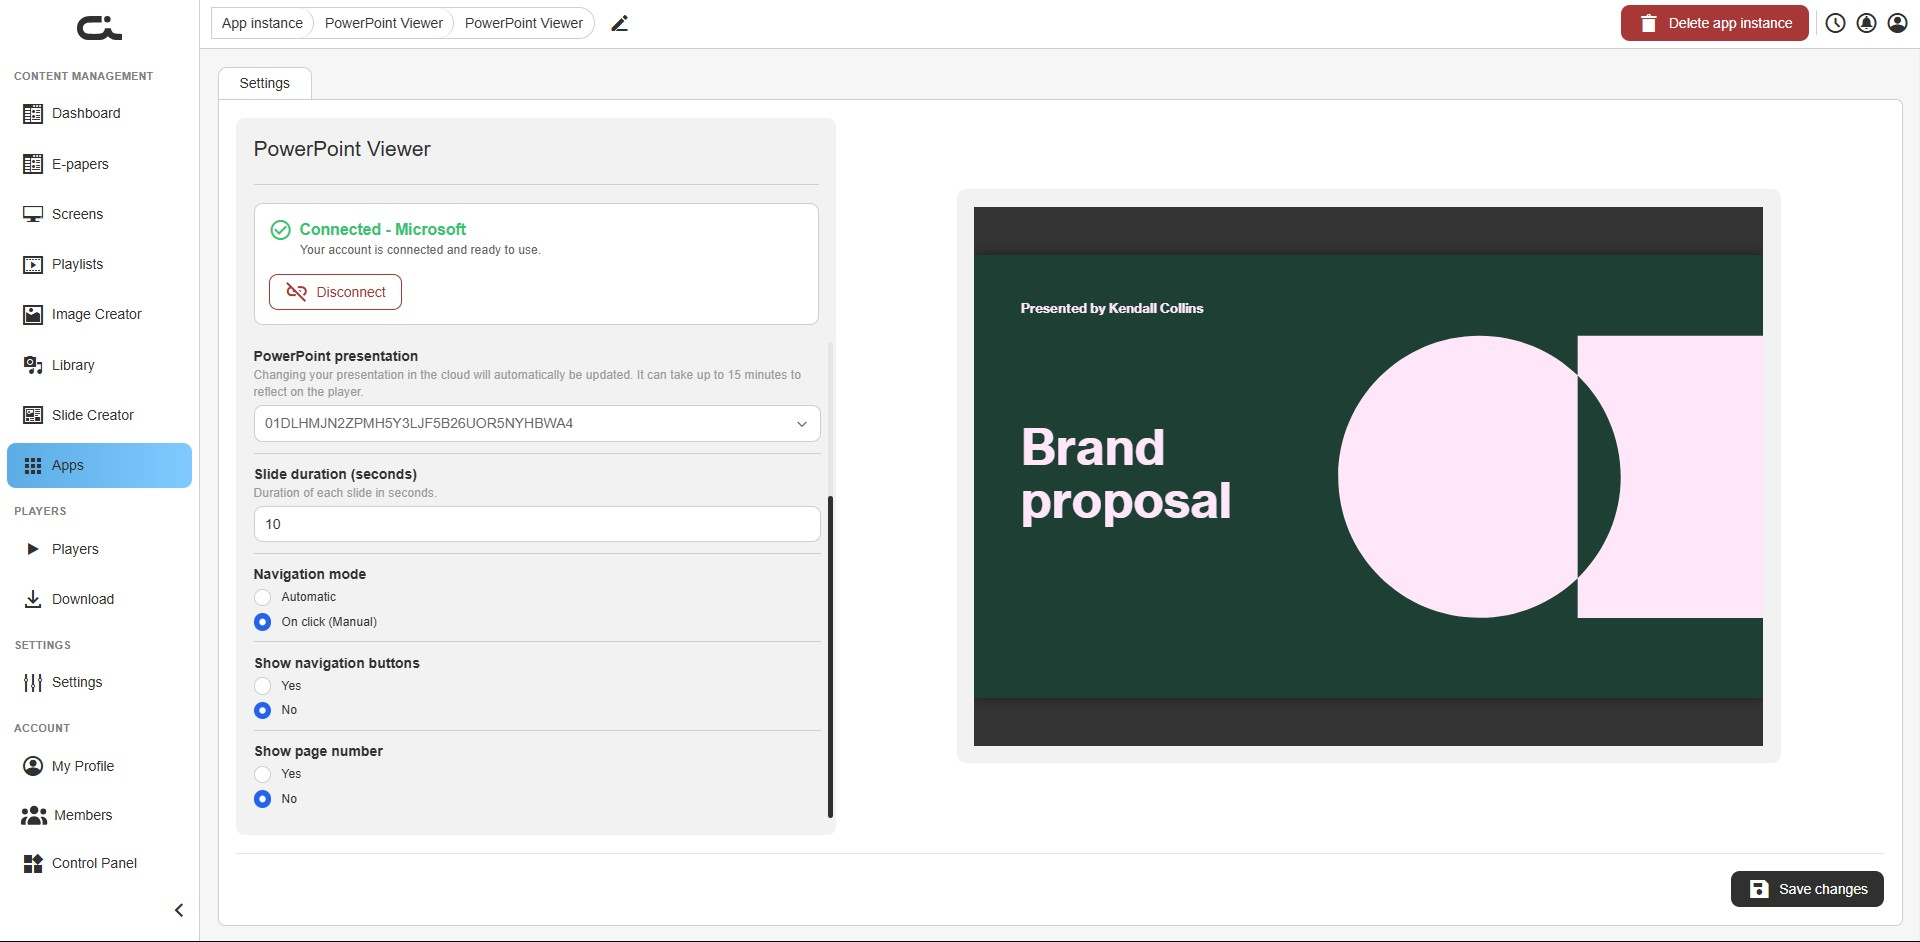
- Navigation mode: Automatic advances slides on its own; On click (Manual) waits for a tap or click (useful for touch screens)
- Show navigation buttons: Show or hide the on-screen previous/next buttons
- Show page number: Show or hide the current slide number
When the preview looks right, click Save changes at the bottom-right.
Changes you make to the presentation in the cloud update on screen automatically, but it can take up to 15 minutes to appear on the player.
Use the app
Once saved, add the instance to a screen or playlist just like any other app (see Using Apps in Your Content). Whenever you switch presentations or change any option, remember to click Save changes again.
Quote of the Day
The Quote of the Day app shows a rotating selection of inspirational quotes on your screen. The app supplies the quotes, so there's nothing to write or maintain. You just choose how many rotate and in which language.
Step 1: Set the basic settings
After creating an instance, you land on the Settings tab. The left side holds the settings; the right side shows a live preview of a quote.
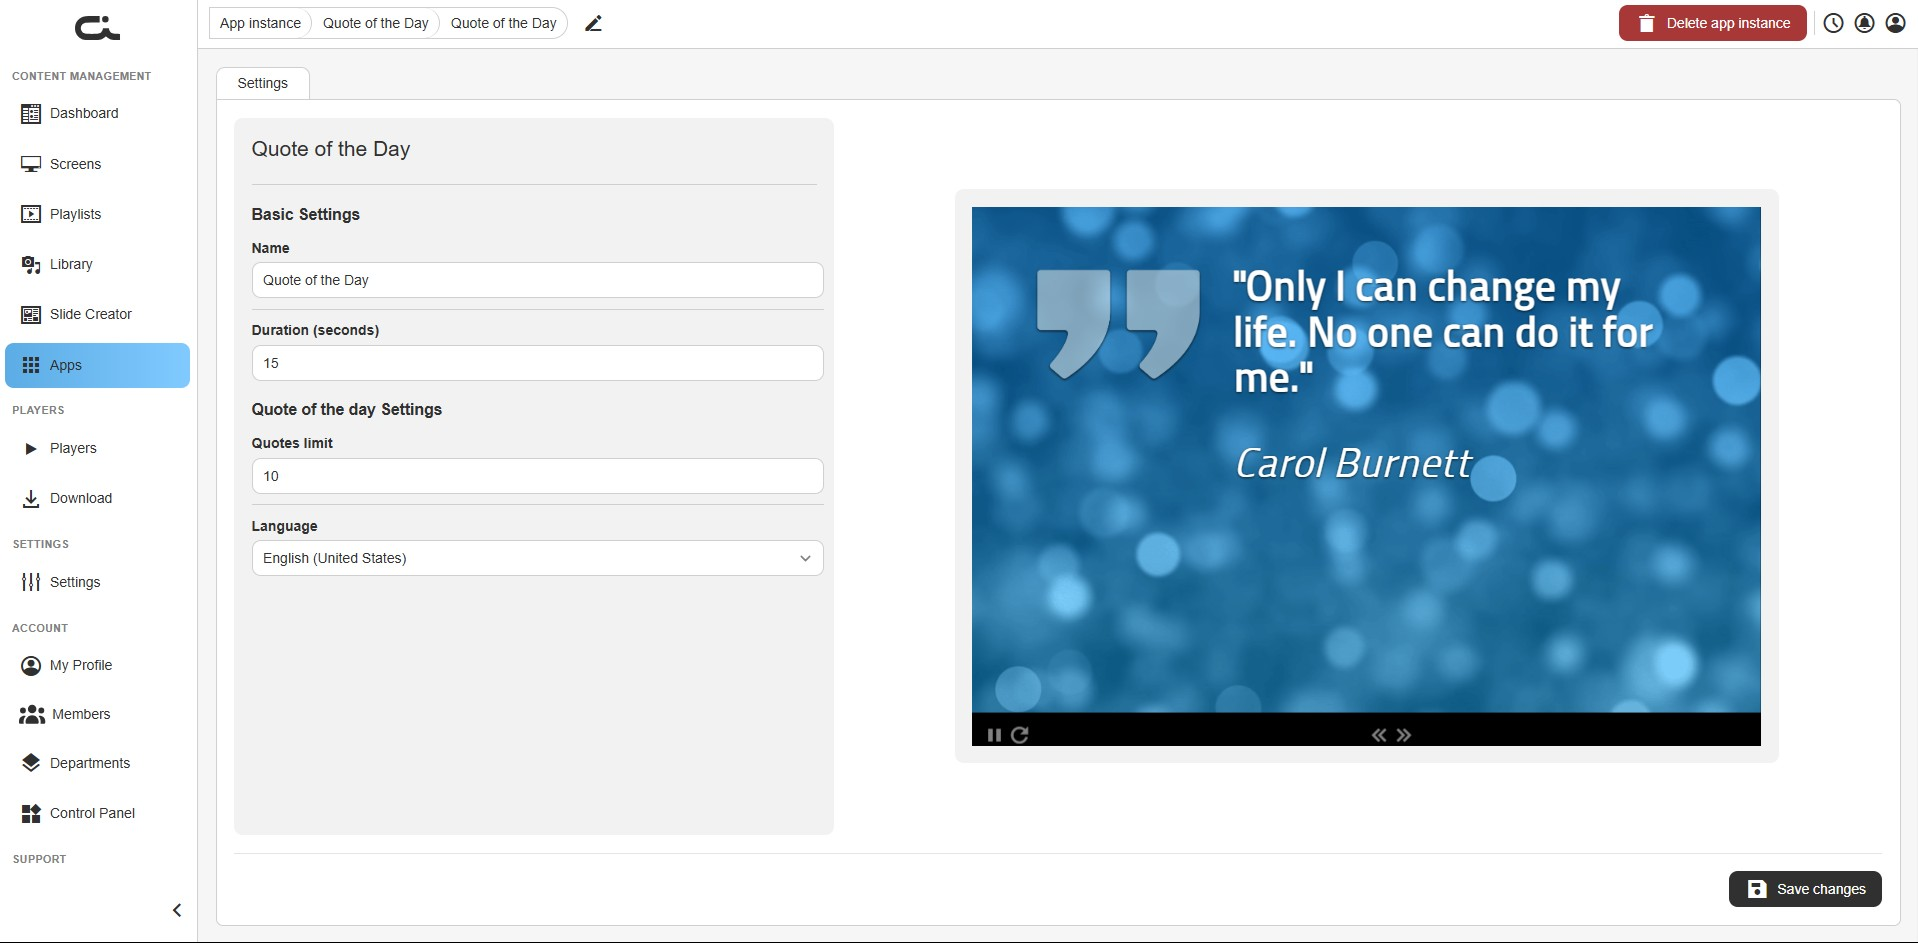
Set the following:
- Name: A label for this instance
- Duration (seconds): How long the app shows when it plays (default 15)
Step 2: Choose the quote options
Under Quote of the day Settings, set:
- Quotes limit: How many quotes to cycle through (default 10)
- Language: The language the quotes appear in
When the preview looks right, click Save changes at the bottom-right.
Step 3: Use the app
Once saved, add the instance to a screen or playlist just like any other app (see Using Apps in Your Content). The quotes rotate on their own, so there's nothing more to maintain. If you later change the quotes limit or language, remember to click Save changes again.
RSS Tickertape
The RSS Tickertape app shows a scrolling text bar (a "ticker") along the bottom of your screen, like the news crawls you see on TV. It can pull headlines from one or more RSS feeds, show your own custom text, or both, and you control how it slides in and how it looks.
Step 1: Set the basic settings
After creating an instance, you land on the Settings tab. The left side holds the settings; the right side shows a live preview with the ticker running along the bottom.
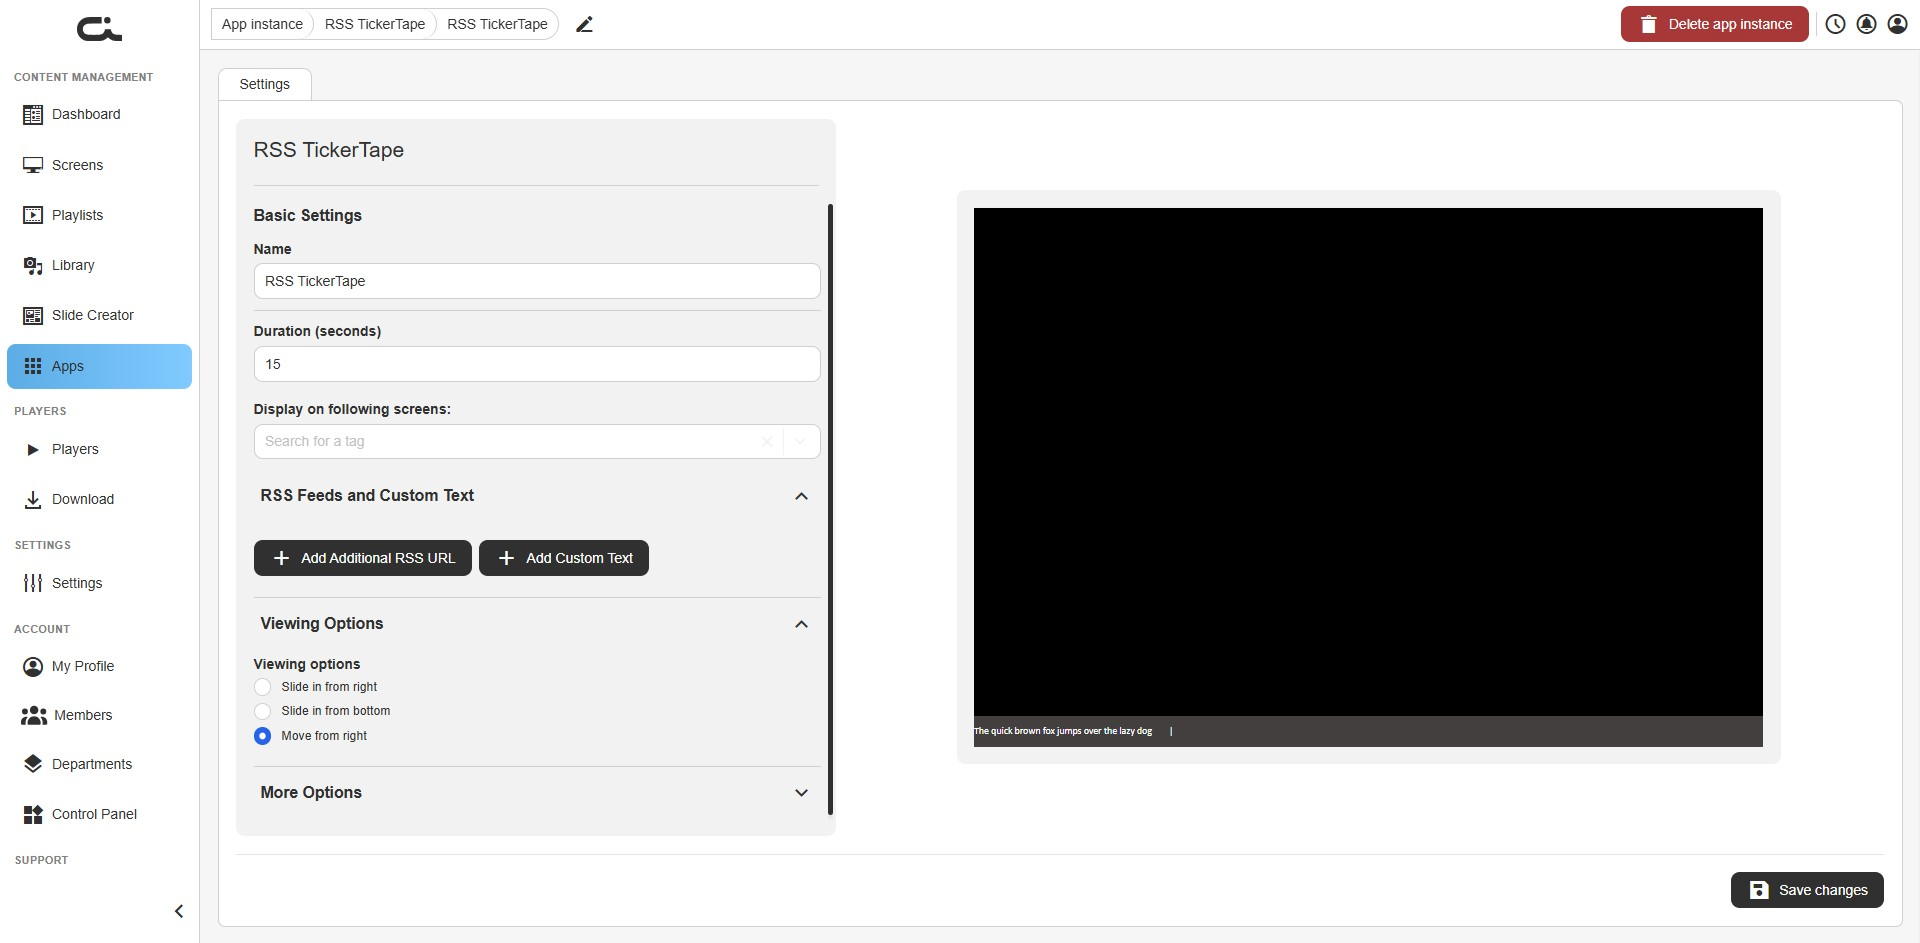
Set the following:
- Name: A label for this instance
- Duration (seconds): How long the app shows when it plays (default 15)
- Display on following screens (optional): Search for and select tags to target specific screens. Leave it empty to use the instance normally in any screen or playlist
Step 2: Add your feeds and text
Open the RSS Feeds and Custom Text section and build what the ticker shows:
- Add Additional RSS URL: Add the web address of an RSS feed. Add more than one to combine several sources in the same ticker
- Add Custom Text: Add your own message to scroll alongside (or instead of) the feeds
Step 3: Choose how it slides in
Open the Viewing Options section and pick the animation:
- Slide in from right: The ticker slides in from the right edge
- Slide in from bottom: The ticker slides up from the bottom
- Move from right: The text scrolls continuously from the right
Step 4: Style the ticker
Open the More Options section to control the look.
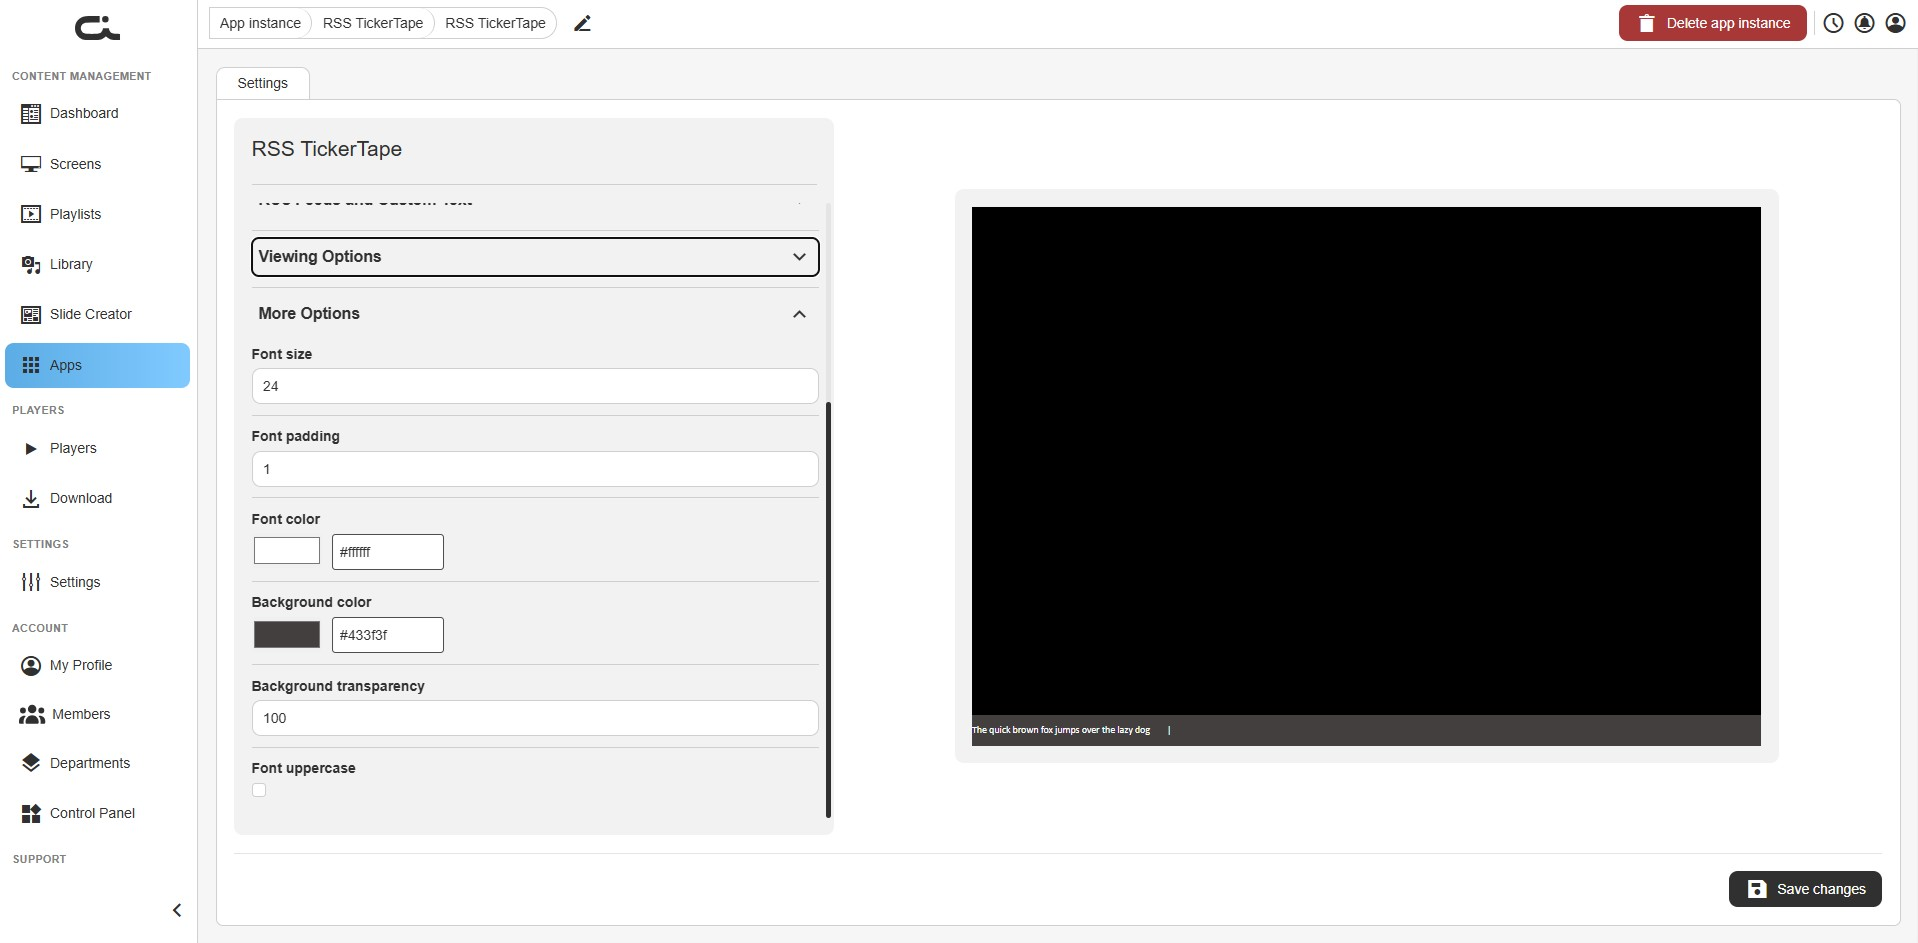
- Font size: Size of the ticker text
- Font padding: Spacing around the text
- Font color: Text color (swatch or hex value)
- Background color: Color of the ticker bar (swatch or hex value)
- Background transparency: How see-through the bar is (0 to 100)
- Font uppercase: Show all text in capitals
When the preview looks right, click Save changes at the bottom-right.
RSS feeds are pulled live, so the player needs an internet connection to keep the headlines current.
Step 5: Use the app
Once saved, add the instance to a screen or playlist just like any other app (see Using Apps in Your Content). The ticker keeps scrolling and refreshing on its own. If you later change the feeds, text, or styling, remember to click Save changes again.
LinkedIn
The LinkedIn app puts your company's LinkedIn page and its latest posts on screen, a simple way to promote your organization and share your activity. You connect your account, choose which company page to show, and set how many posts to display.
This app only works with LinkedIn business (organization) pages. You must be an admin of a LinkedIn Company Page. Personal or private profiles are not supported and cannot be connected.
Step 1: Connect your LinkedIn account
When you first open a LinkedIn instance, the Settings tab shows a Not Connected card, and the preview asks you to connect your account.
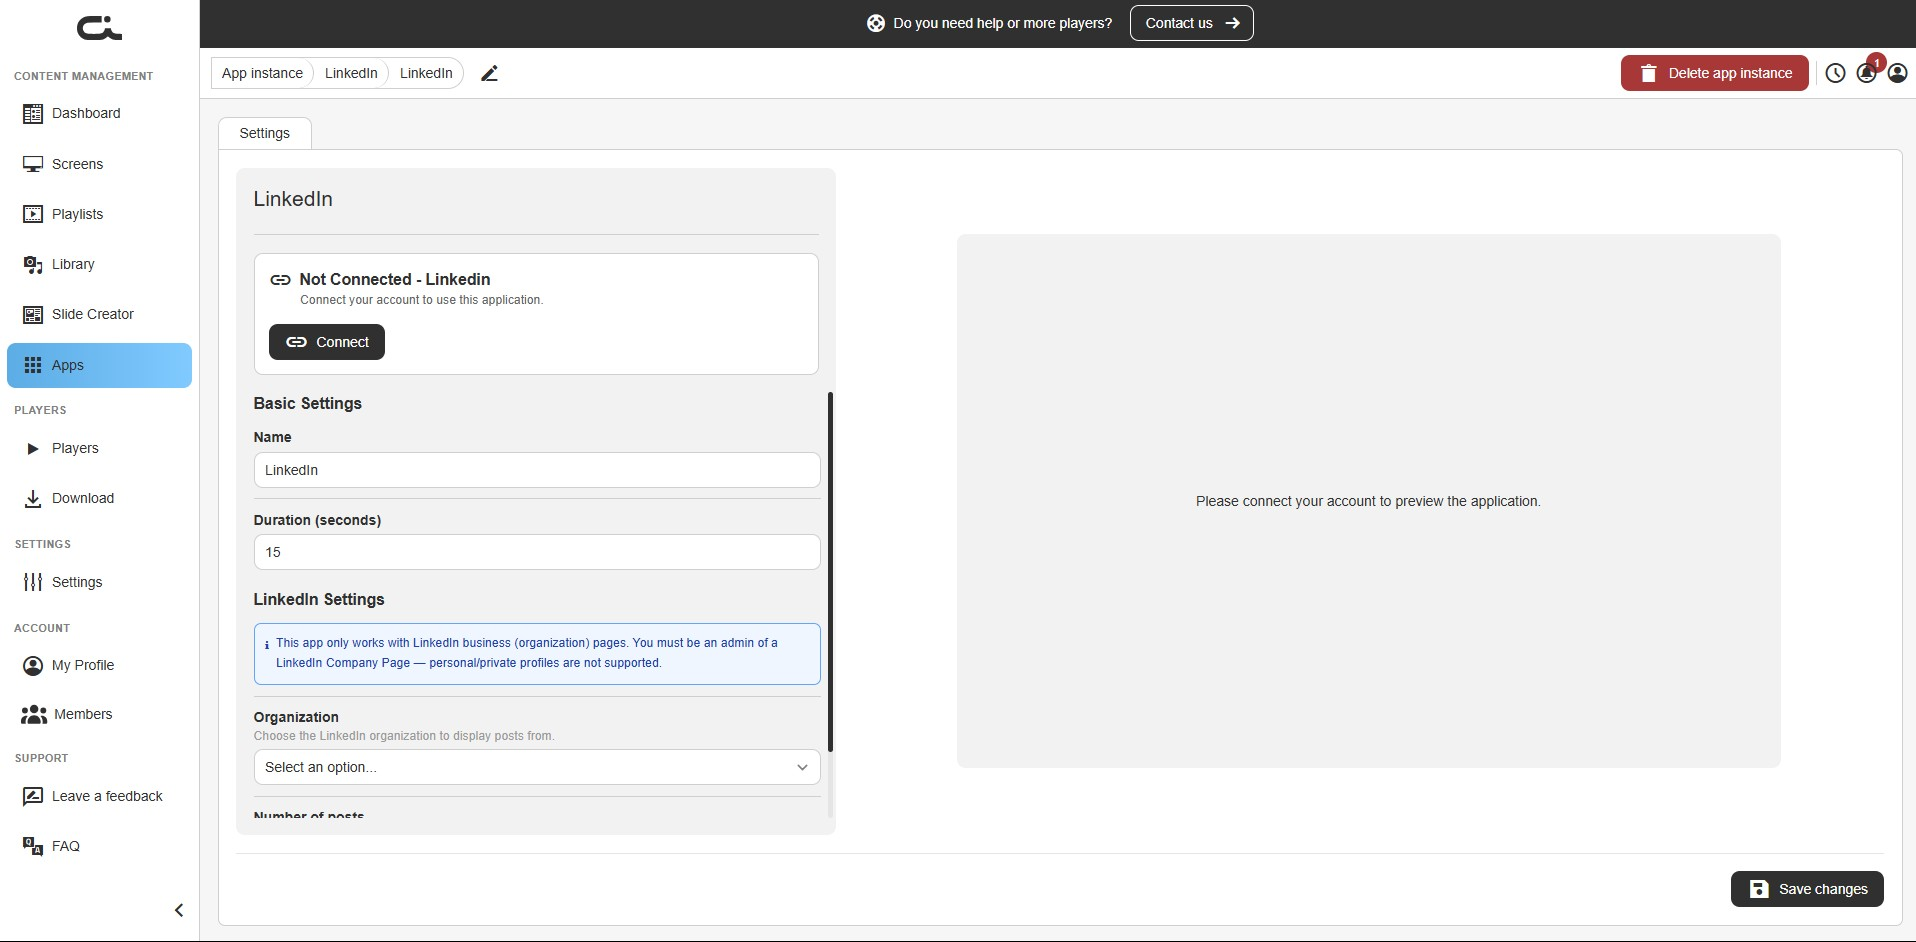
- Click Connect
- Sign in to LinkedIn with an account that is an admin of the Company Page you want to show, and authorize the connection
- When you return, the card turns green and reads Connected - Linkedin
The connection only has to be made once per instance. To unlink later, use Disconnect on the same card.
Step 2: Choose the organization and posts
Once connected, the LinkedIn settings appear, and the preview shows your page.
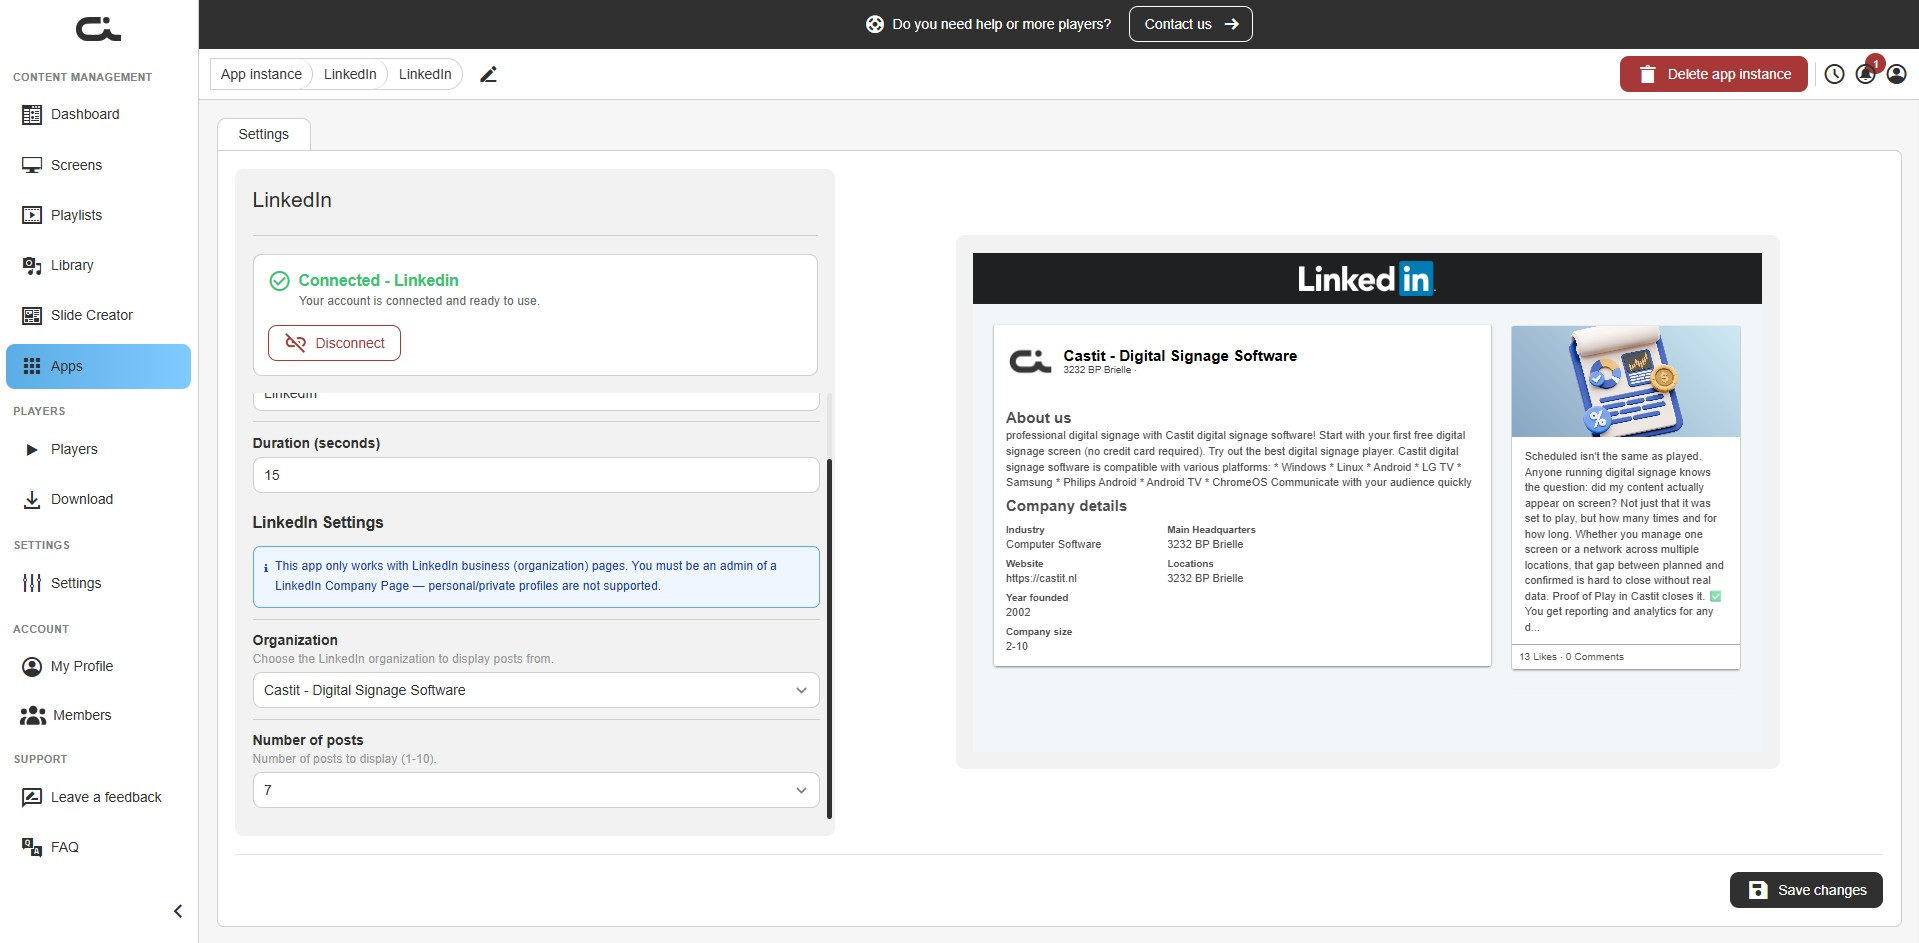
Set the following:
- Name: A label for this instance
- Duration (seconds): How long the app shows when it plays
- Organization: Choose which LinkedIn Company Page to display posts from
- Number of posts: How many recent posts to show, between 1 and 10
When the preview looks right, click Save changes at the bottom-right.
Step 3: Use the app
Once saved, add the instance to a screen or playlist just like any other app (see Using Apps in Your Content). The app refreshes on its own as you publish new posts, so there's nothing more to maintain. If you later change the organization or the number of posts, remember to click Save changes again.
Room Booking
The Room Booking app turns a screen or e-paper panel outside a meeting room into a live booking display. It shows whether the room is free or busy, what's coming up next, and lets people book it on the spot by scanning the on-screen QR code. It reads the room's calendar from Microsoft 365, so the panel always reflects real bookings.
Step 1: Connect your Microsoft account
When you first open a Room Booking instance, the Settings tab shows a Not Connected card, and the preview asks you to connect your account.
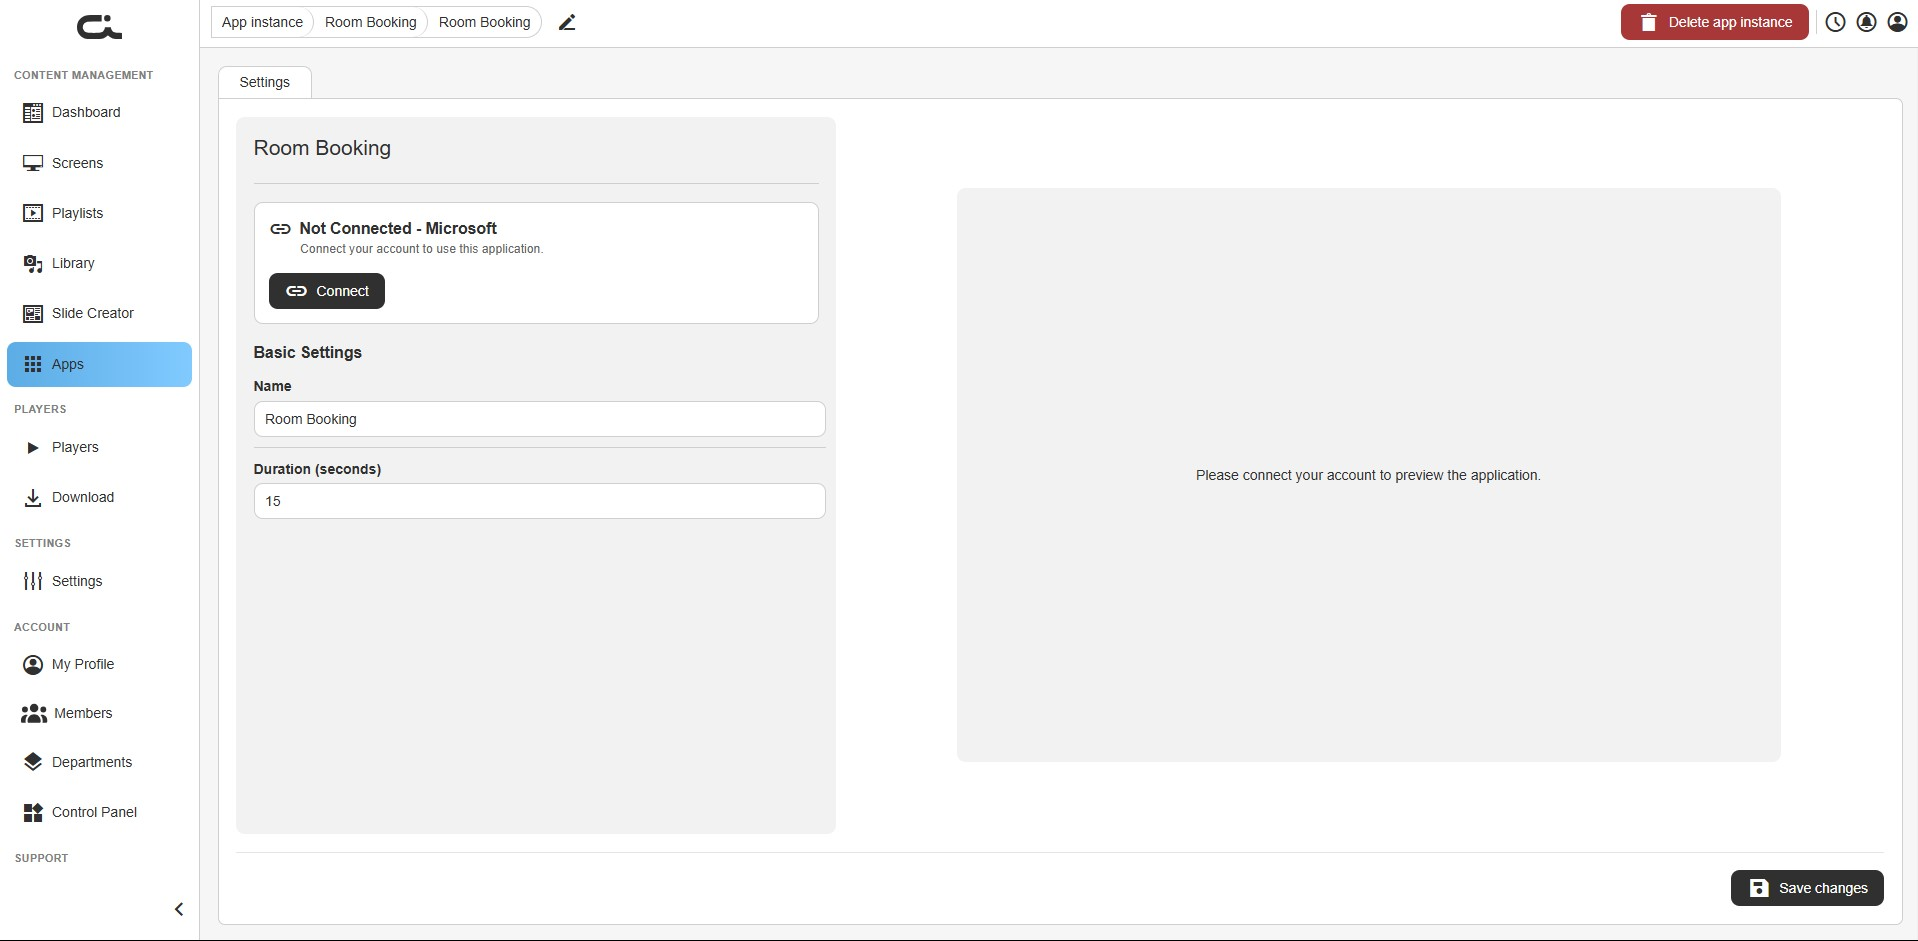
- Click Connect
- Sign in with the Microsoft account that has access to the room's calendar and authorize the connection
- When you return, the card turns green and reads Connected - Microsoft
The connection only has to be made once per instance. To unlink later, use Disconnect on the same card.
Step 2: Set up the room
Once connected, the Room Configuration section appears, along with a live preview of the room panel.
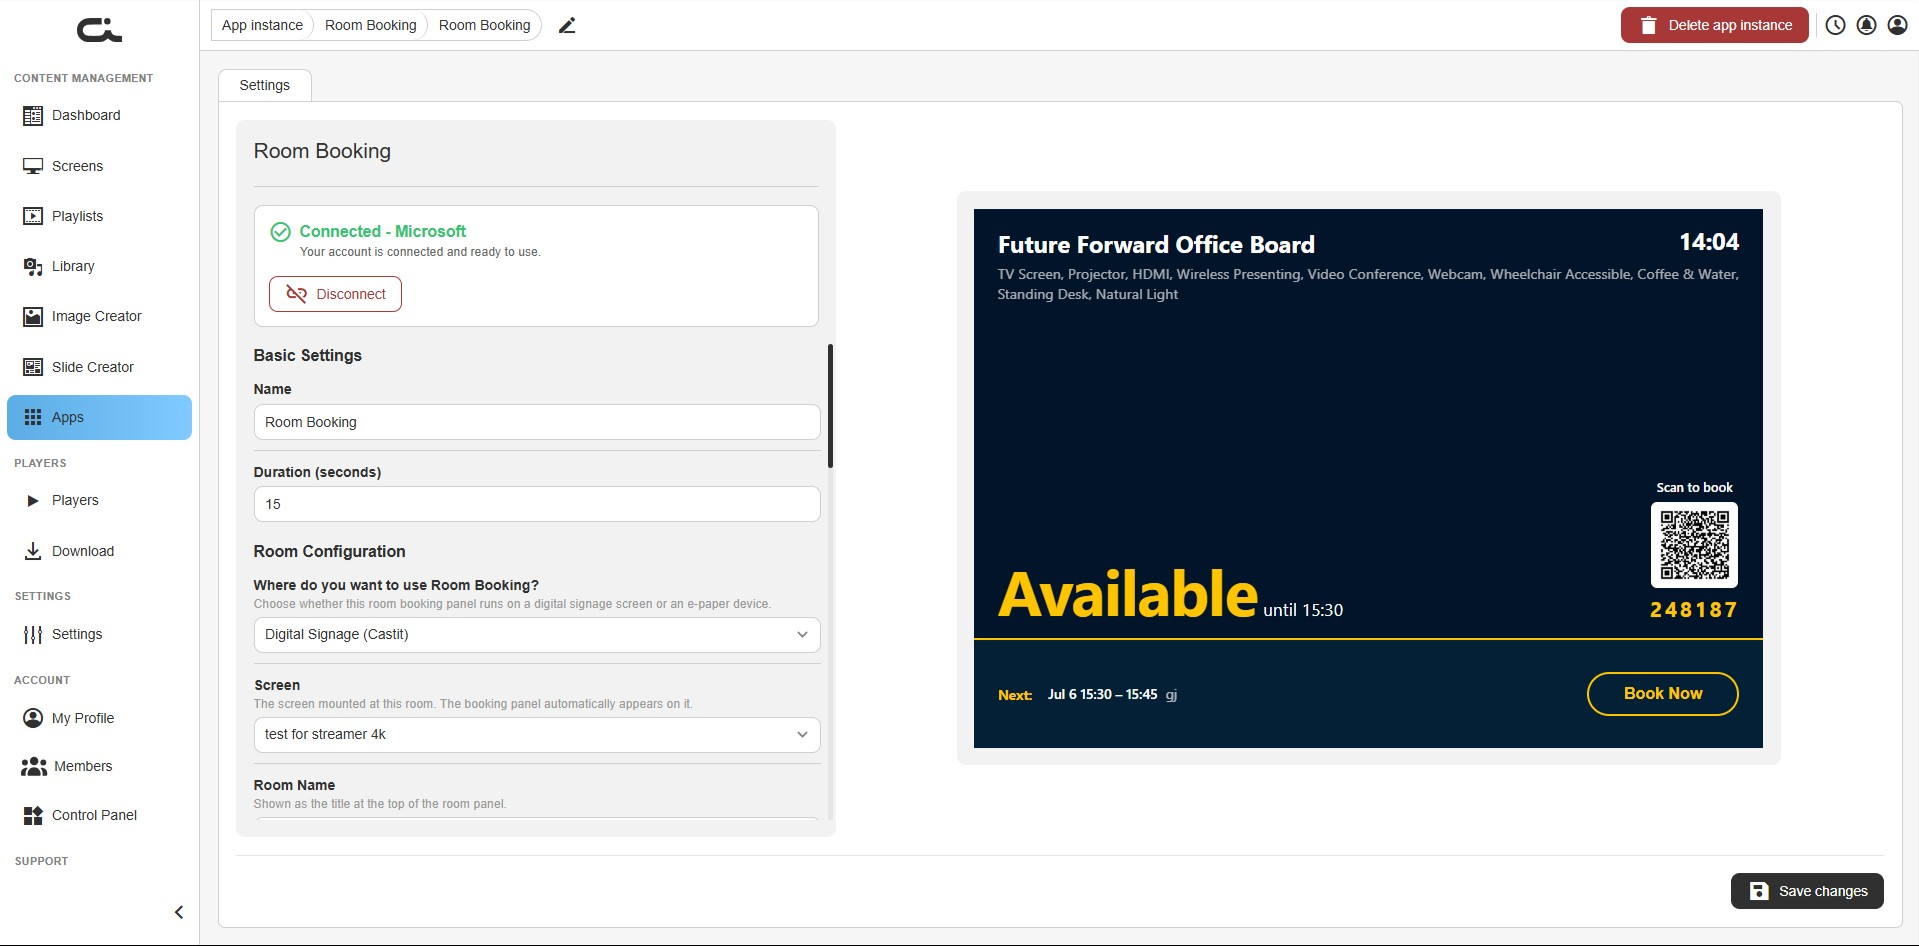
Start with the basics, then the room configuration:
- Name: A label for this instance
- Duration (seconds): How long the app shows when it plays
- Where do you want to use Room Booking?: This dropdown is the most important choice. It sets the device type the booking panel runs on, and you pick either Digital Signage (Castit) or an e-paper device. Choose the one that matches the hardware mounted at the room
- Screen: Select the screen mounted at this room. The booking panel automatically appears on it
- Room Name: The title shown at the top of the room panel (for example, Future Forward Office Board)
- Language: The language of all texts on the panel (status, booking popup, messages)
Step 3: Set the booking options
Scroll down to Room Details & Booking Options to define when and how the room can be booked:
- Slot length: The length of each bookable time slot. Visitors can book one or more back-to-back free slots
- Business hours start / Business hours end: The first and last bookable slot of the day, in the room's local 24-hour time (HH:MM)
- Business days: The days of the week the room can be booked. Slots are only offered on these days
- Room Equipment & Facilities: What the room offers (TV, whiteboard, video conferencing, and so on), shown under the room name so visitors know what's inside
- Capacity: The maximum number of people the room holds, shown next to the room name. This is auto-filled from Microsoft 365 when available. Leave it at 0 to hide it
- Building / Floor: Auto-filled from the room resource in Microsoft 365. Override only if needed
- Timezone: The timezone of the room's physical location. All meeting times on the panel are shown and booked in this timezone
- Room Mailbox (UPN/SMTP): Filled automatically from the connected Microsoft account. Only change this when the room calendar is a different (shared or resource) mailbox that the connected account has access to
- Hide private meeting titles: When enabled, meetings marked private or confidential in Outlook show as a generic "Meeting" on the panel instead of their real title
When the preview looks right, click Save changes at the bottom-right.
Room availability is read live from Microsoft 365, so the player or e-paper device needs an internet connection to stay accurate.
Step 4: Use the app
Once saved, the booking panel appears on the screen you selected. People passing by can see the room's status at a glance and scan the QR code to book it. Bookings made on the panel and changes made in Microsoft 365 keep each other in sync. If you later change any room setting, remember to click Save changes again.
Weather Forecast
The Weather Forecast app shows the local weather for a place you choose: the current conditions with a details panel (temperature, humidity, wind speed, and wind direction). It's the simpler of the two weather apps. If you also want a multi-hour forecast and a custom background, see Weather Forecast Application below.
Step 1: Set the basic settings
After creating an instance, you land on the Settings tab. The left side holds the settings; the right side shows a live preview of the local weather.
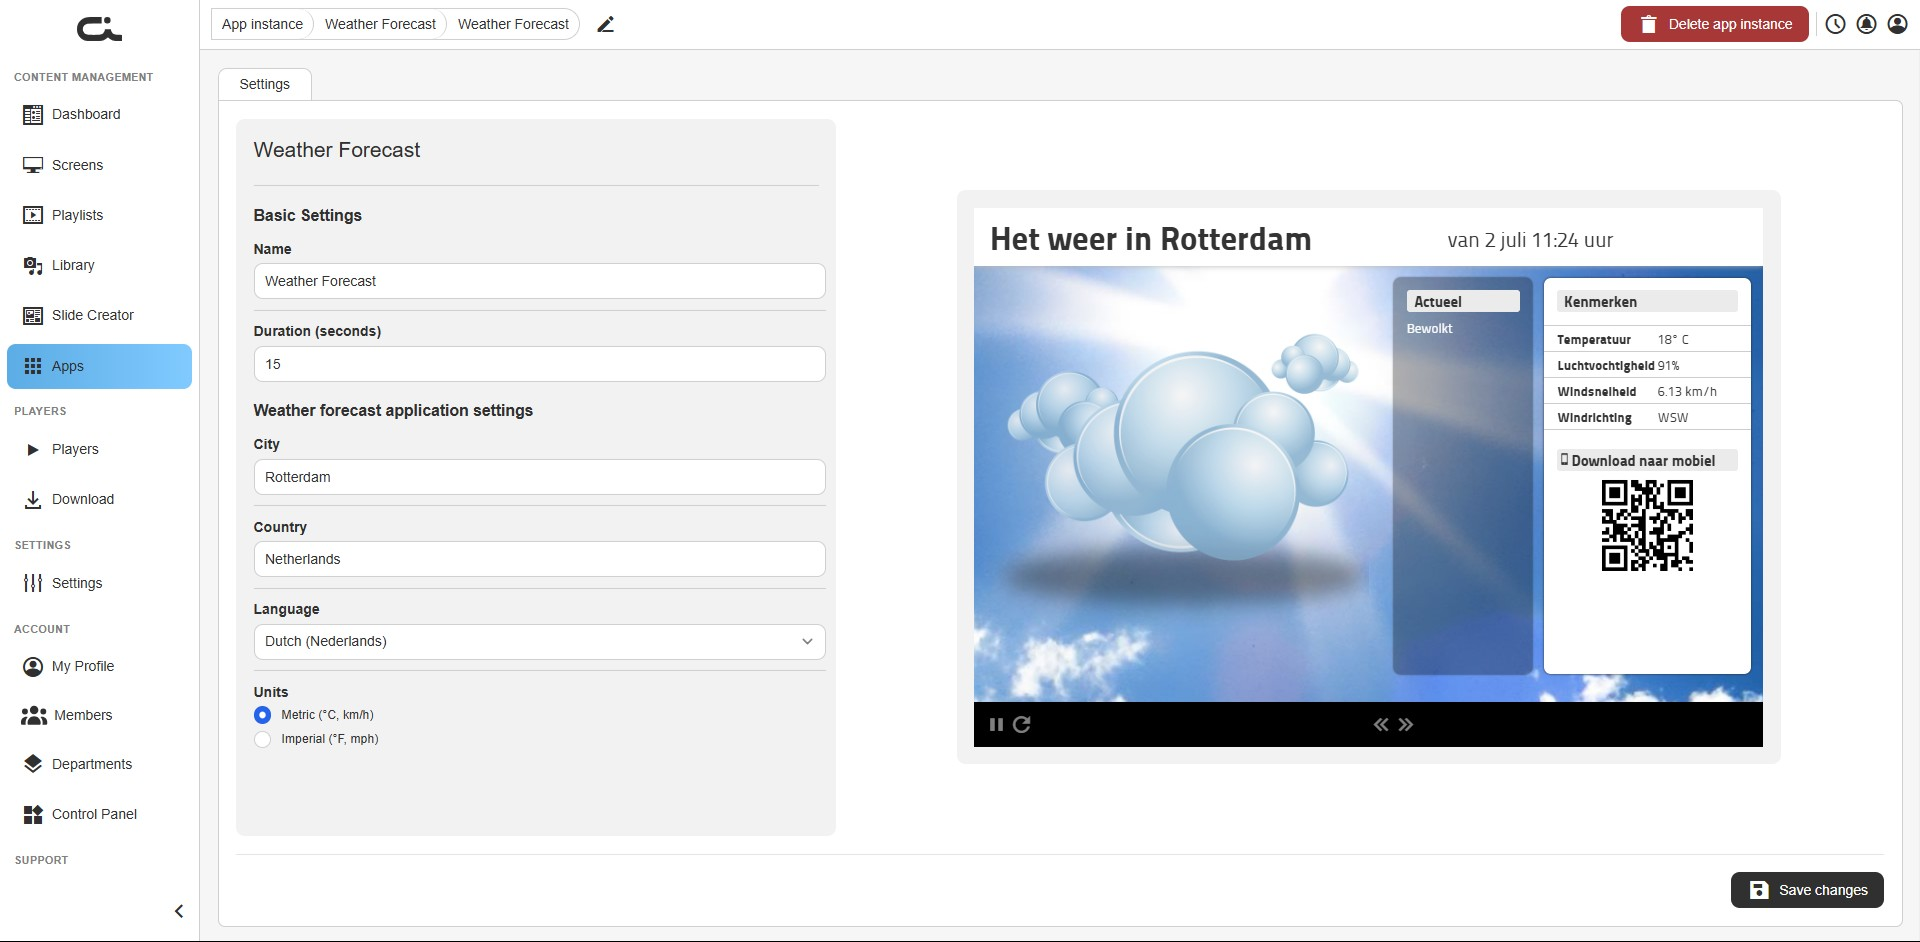
- Name: A label for this instance (helpful if you run more than one, for example one per location)
- Duration (seconds): How long the app shows when it plays (default 15)
Step 2: Set the location, language, and units
Under the weather settings:
- City: The city to show the weather for (for example,
Rotterdam) - Country: The country the city is in (for example,
Netherlands). Setting both makes sure the right location is matched - Language: The language of the text on the panel
- Units: Choose Metric (°C, km/h) or Imperial (°F, mph)
When the preview shows the right place, click Save changes at the bottom-right.
The weather is pulled live, so the player needs an internet connection to keep it current.
Step 3: Use the app
Once saved, add the instance to a screen or playlist just like any other app (see Using Apps in Your Content). The conditions keep updating on their own. If you later change the location or units, remember to click Save changes again.
Weather Forecast Application
The Weather Forecast Application shows the current weather and the forecast for the coming hours over a background of your choice. You set a location, and it keeps the conditions and forecast up to date on their own. For a simpler current-conditions-only version without backgrounds, see Weather Forecast above.
Step 1: Set the basic settings
After creating an instance, you land on the Settings tab. The left side holds the settings; the right side shows a live preview that updates as you change them.
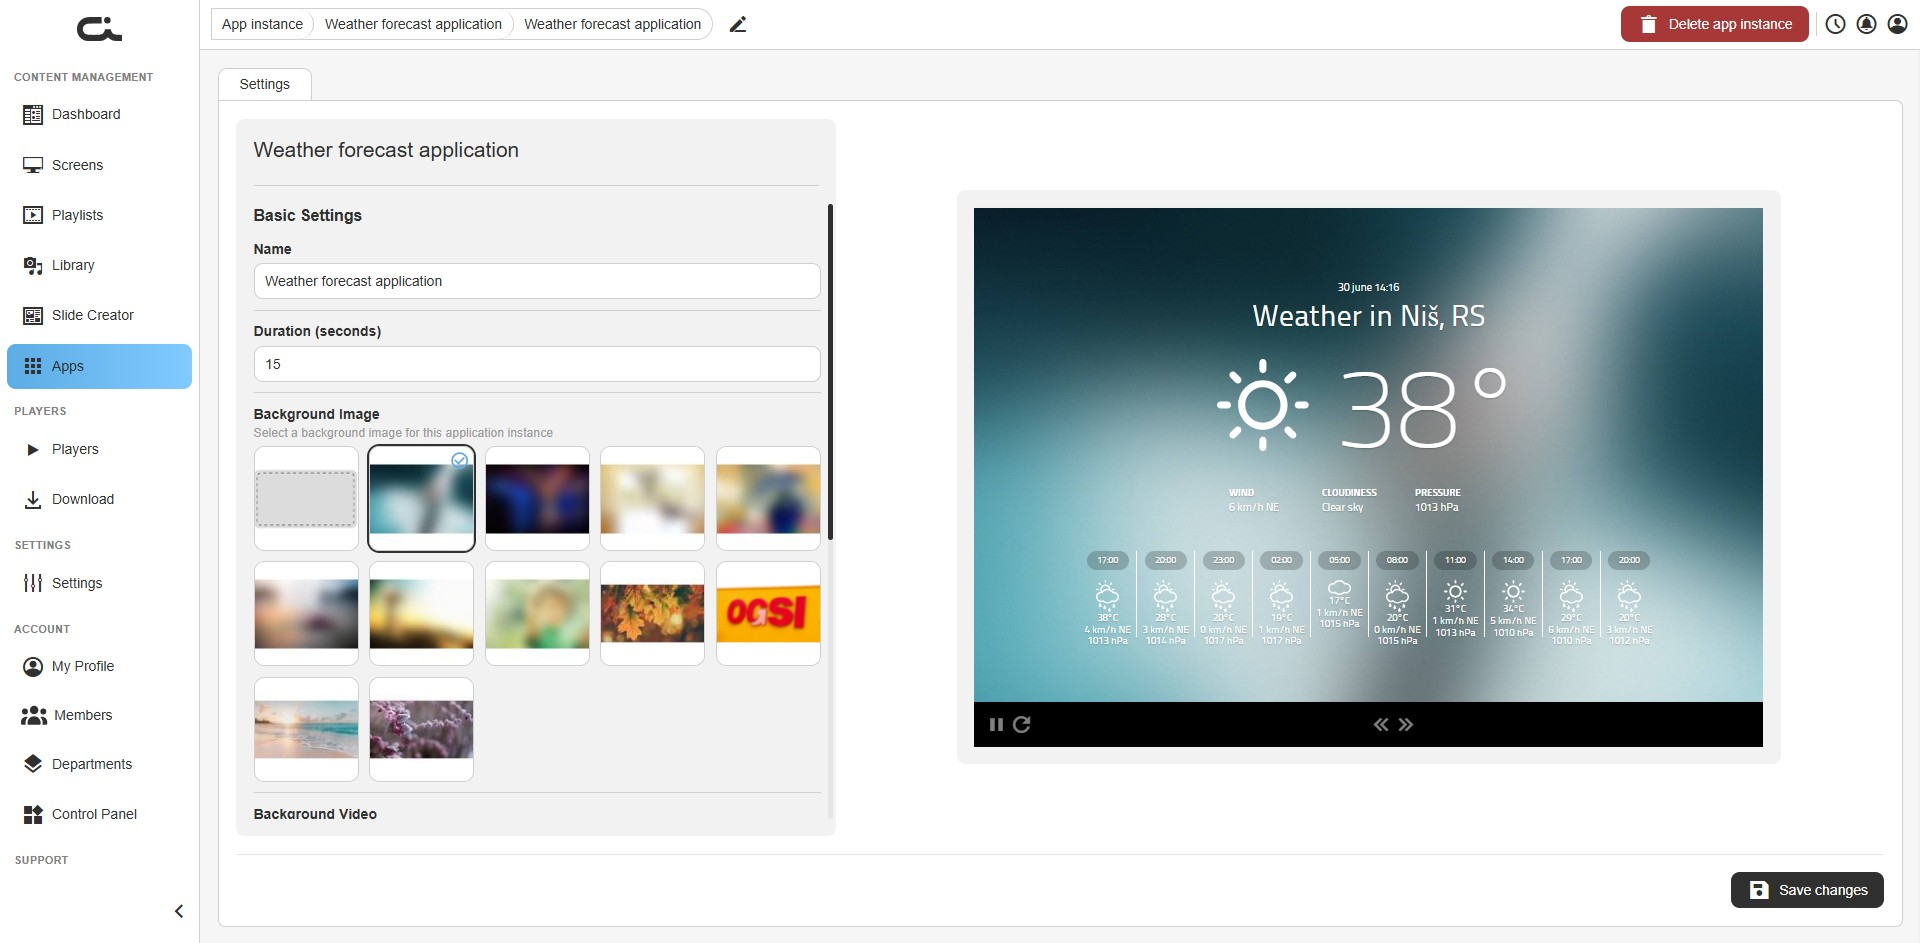
Set the following:
- Name: A label for this instance (helpful if you run more than one, for example one per location)
- Duration (seconds): How long the app shows when it plays (default 15)
Step 2: Choose a background
Pick the look of the weather screen. You can use either a background image or a background video, not both:
- Background Image: Click one of the preset images in the grid. The first (blank) option means no image
- Background Video: Scroll down past the images to the video grid and click a preset video for an animated background. The first (blank) option means no video
Step 3: Set the location, language, and units
Scroll down to Weather Forecast Settings:
- City: The city to show the weather for (for example,
Niš) - Country: The country the city is in (for example,
Serbia). Setting both makes sure the right location is matched - Language: The language of the text on the panel
- Units: Choose Metric (°C, km/h) or Imperial (°F, mph)
When the preview looks right, click Save changes at the bottom-right.
The forecast is pulled live, so the player needs an internet connection to keep it current.
Step 4: Use the app
Once saved, add the instance to a screen or playlist just like any other app (see Using Apps in Your Content). The conditions and forecast keep updating on their own. If you later change the location, background, or units, remember to click Save changes again.
World Cup
The World Cup app shows a live tournament bracket with scores and updates. It rotates through the standings on its own, and when a match kicks off it switches to that live match, returning to the standings when the match ends. You choose the tournament and how it looks.
Step 1: Set the basic settings and competition
After creating an instance, you land on the Settings tab. The left side holds the settings; the right side shows a live preview of the bracket.
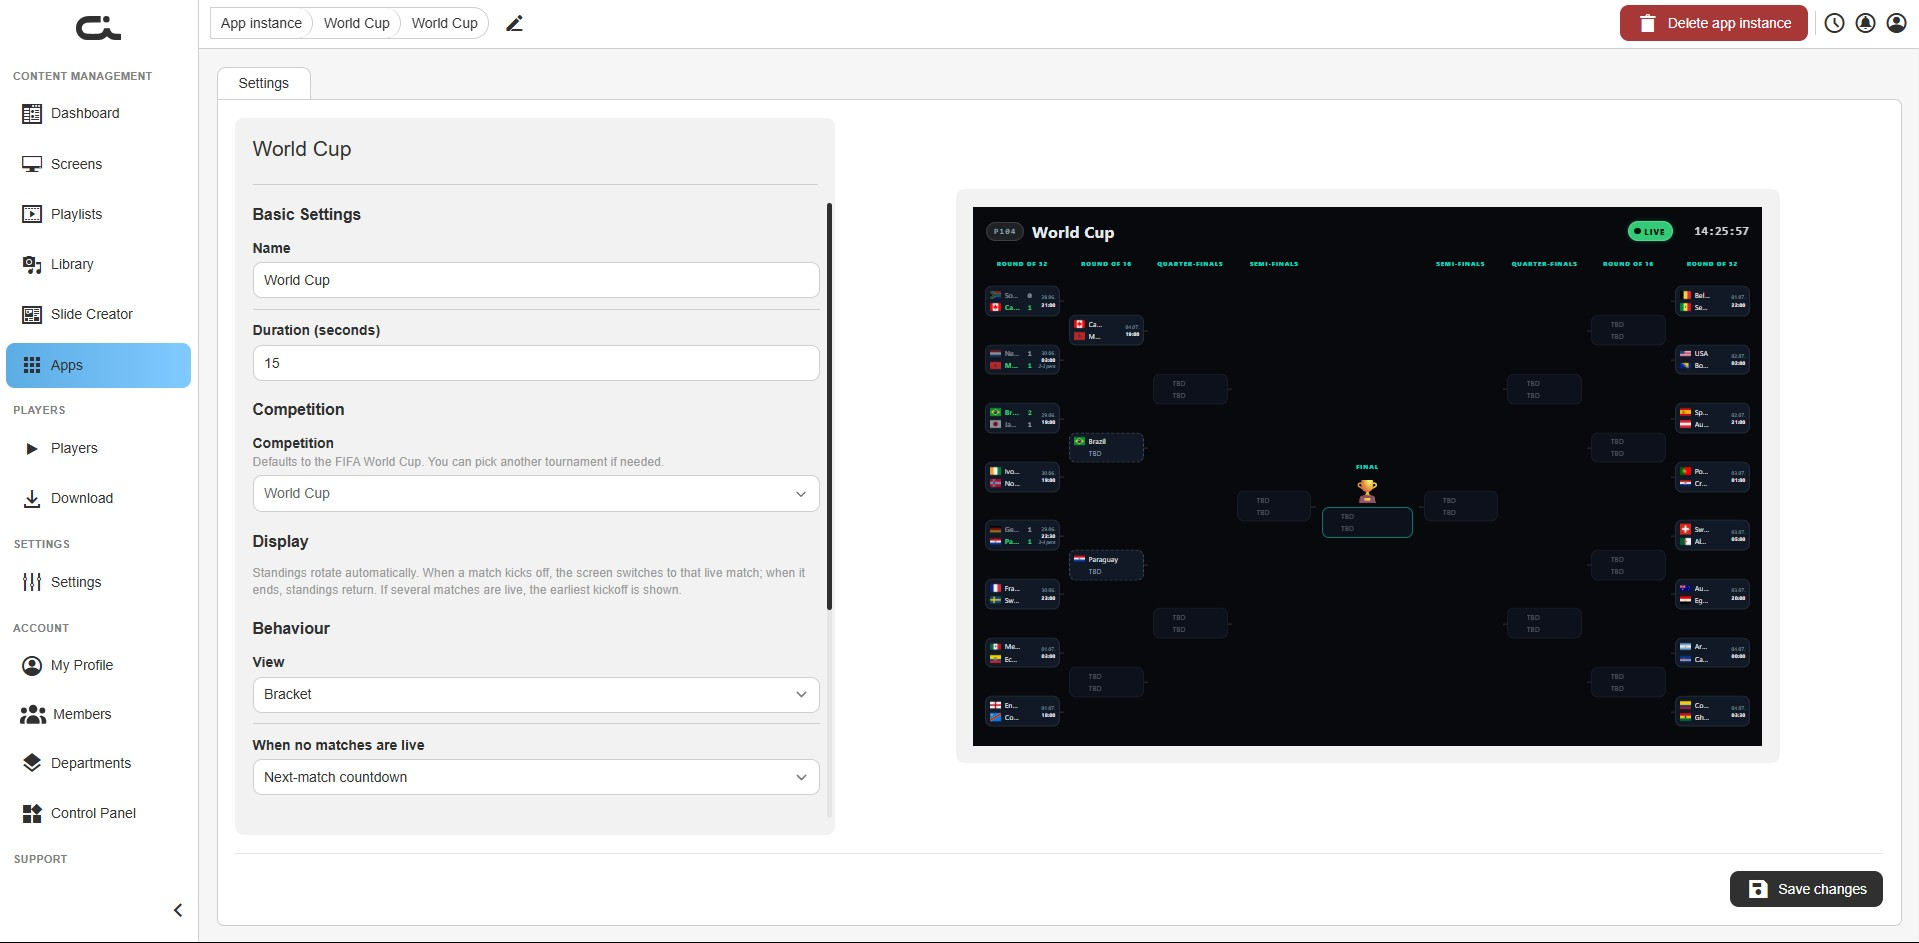
Set the following:
- Name: A label for this instance
- Duration (seconds): How long the app shows when it plays (default 15)
- Competition: The tournament to follow. It defaults to the FIFA World Cup, but you can pick another tournament if needed
Step 2: Set the display behaviour
Under Display, control how the app reacts to live matches. Standings rotate automatically; when a match kicks off the screen switches to that live match, and when it ends the standings return. If several matches are live, the earliest kickoff is shown.
- View: How the tournament is shown (for example, Bracket)
- When no matches are live: What to show between matches (for example, Next-match countdown)
Step 3: Set the appearance and timezone
Scroll down to fine-tune the look and times.
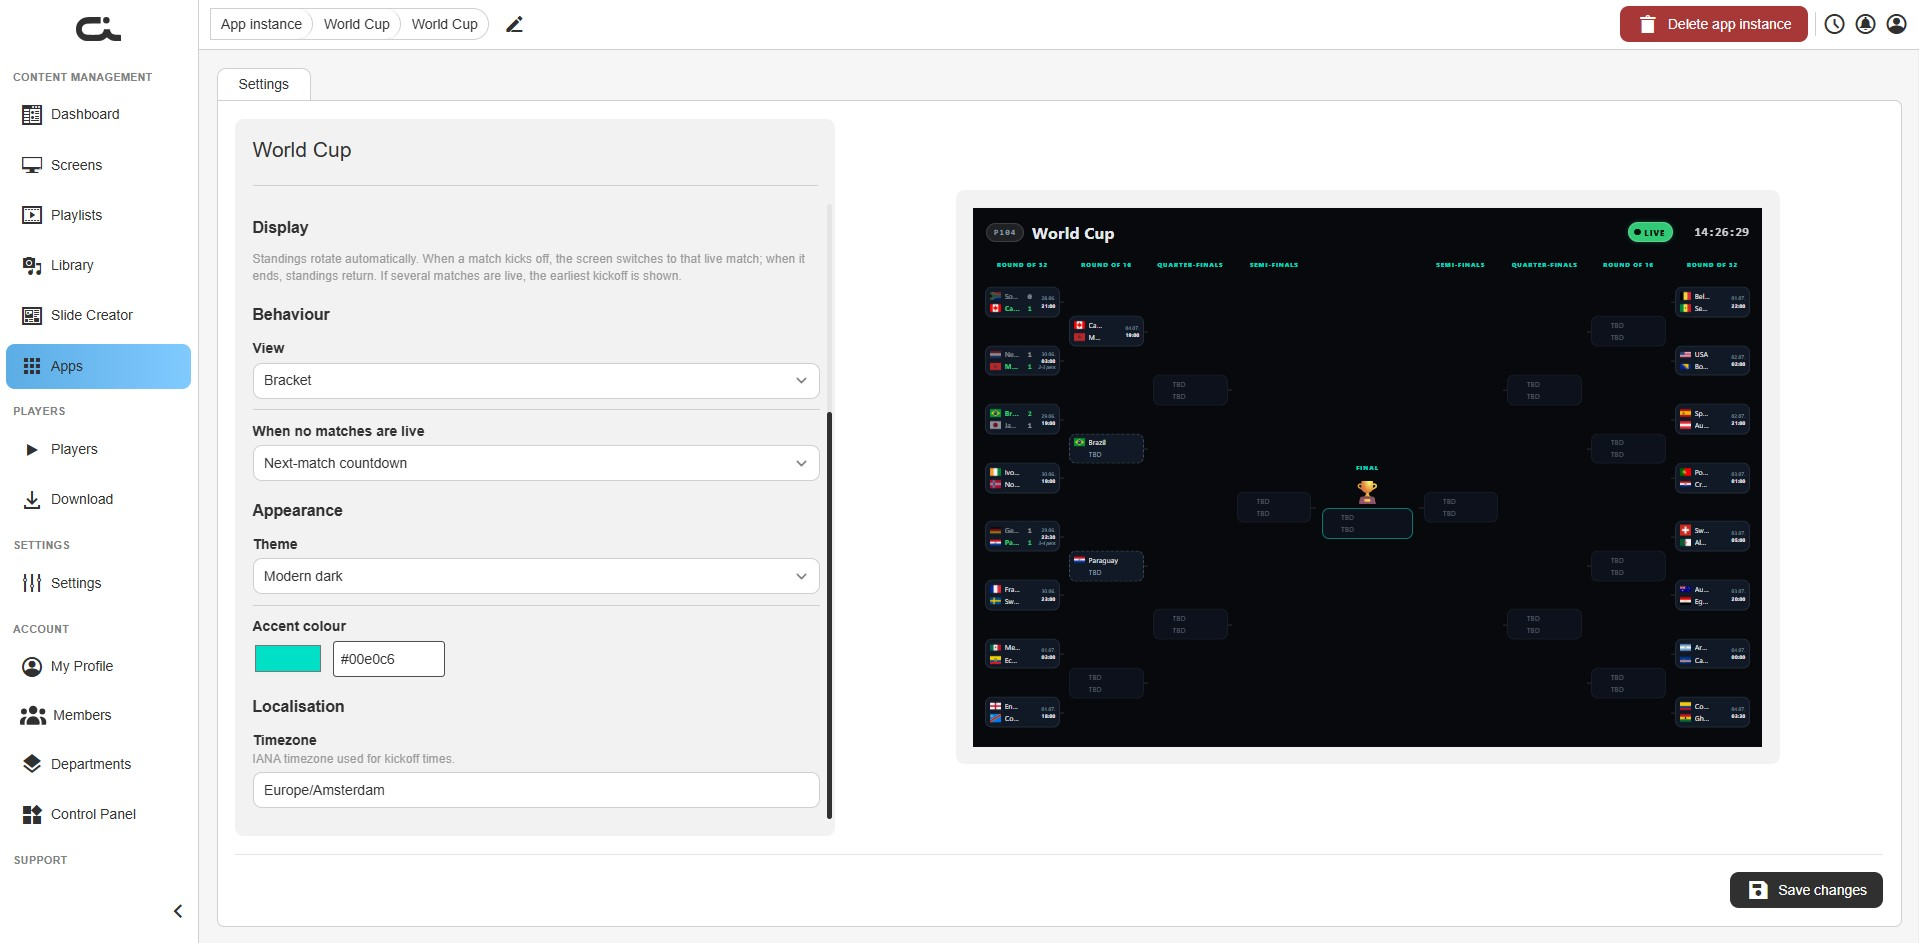
- Theme: The overall visual style (for example, Modern dark)
- Accent colour: The highlight color used on the panel. Click the swatch or type a hex value (for example,
#00e0c6) - Timezone: The timezone used for kickoff times, so match times show correctly for your location (for example,
Europe/Amsterdam)
When the preview looks right, click Save changes at the bottom-right.
Scores and match status are pulled live, so the player needs an internet connection to stay current.
Step 4: Use the app
Once saved, add the instance to a screen or playlist just like any other app (see Using Apps in Your Content). The bracket, scores, and live matches update on their own. If you later change the competition or any display option, remember to click Save changes again.
YouTube Embedded
The YouTube Embedded app plays a YouTube video on your screen. Setup is as simple as pasting a link, the app fills in the video's name and length for you.
Step 1: Set the basic settings
After creating an instance, you land on the Settings tab. The left side holds the settings; the right side shows a live preview.
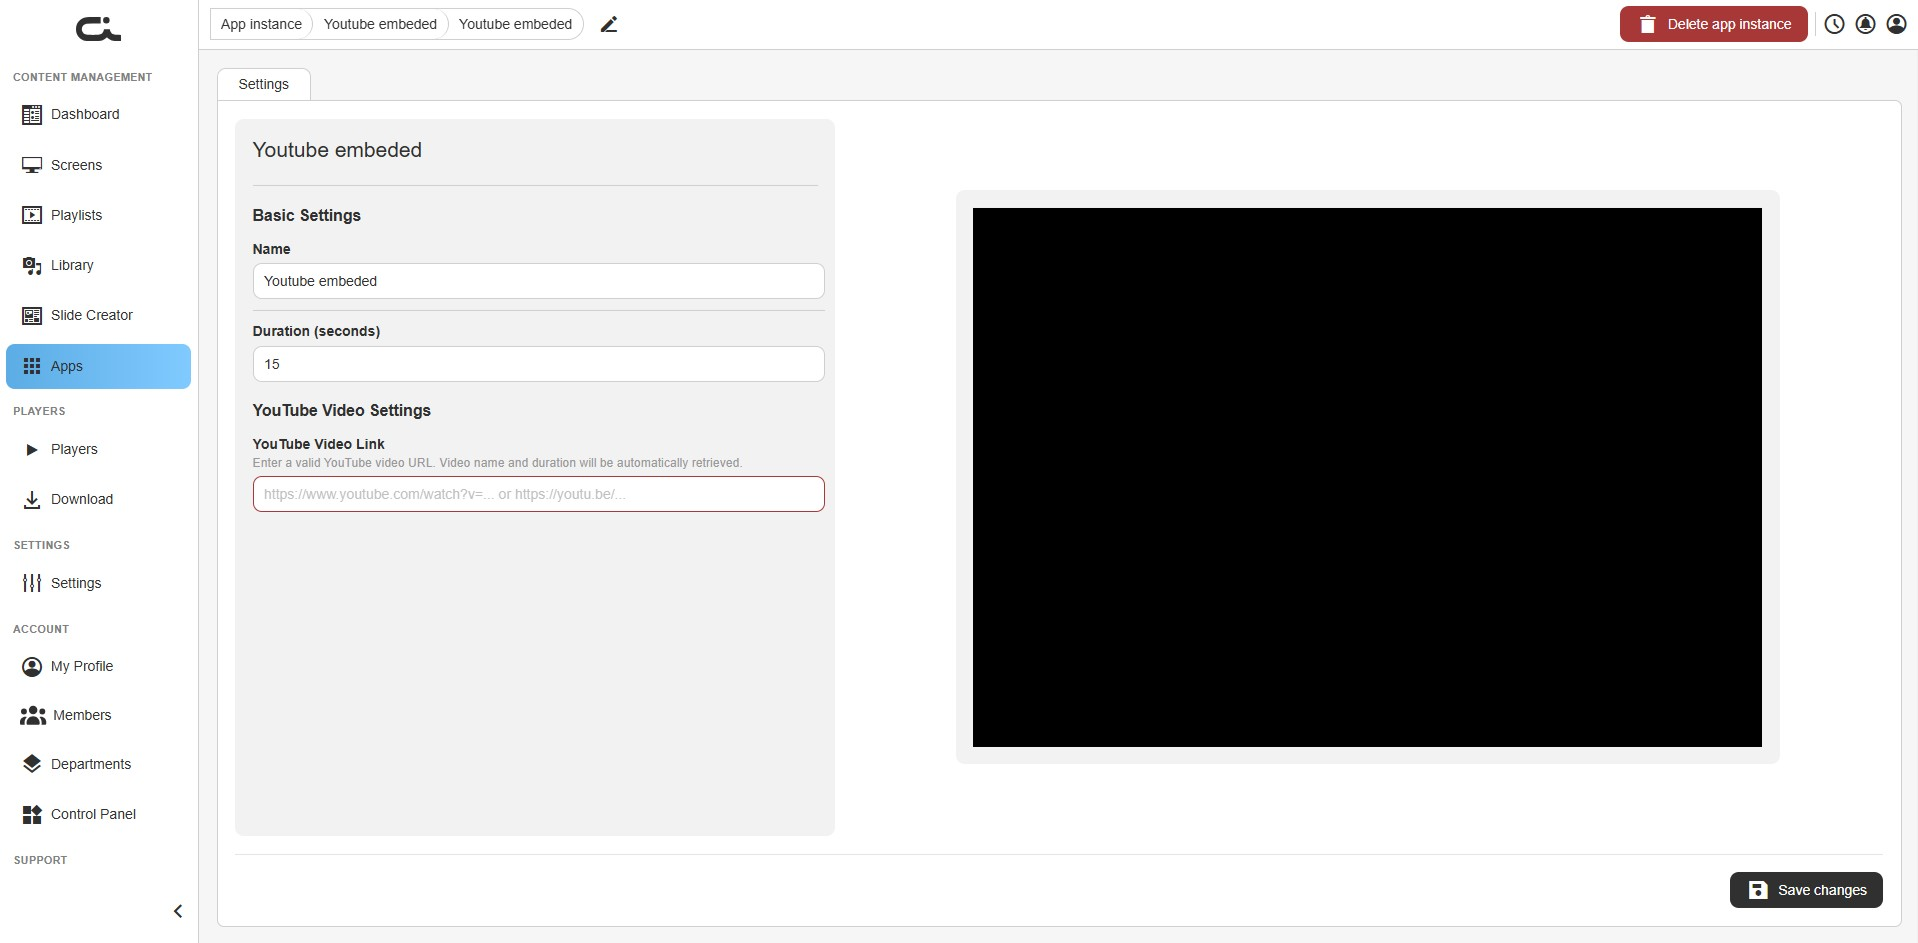
- Name: A label for this instance. You can leave it as is, it fills in automatically once you add a link
- Duration (seconds): How long the app shows when it plays. This also updates automatically to match the video length
Step 2: Paste the YouTube link
Under YouTube Video Settings, paste the video address into YouTube Video Link. You can use either format:
https://www.youtube.com/watch?v=...https://youtu.be/...
As soon as you enter a valid link, the app retrieves the video's name and duration, and the preview starts playing it.
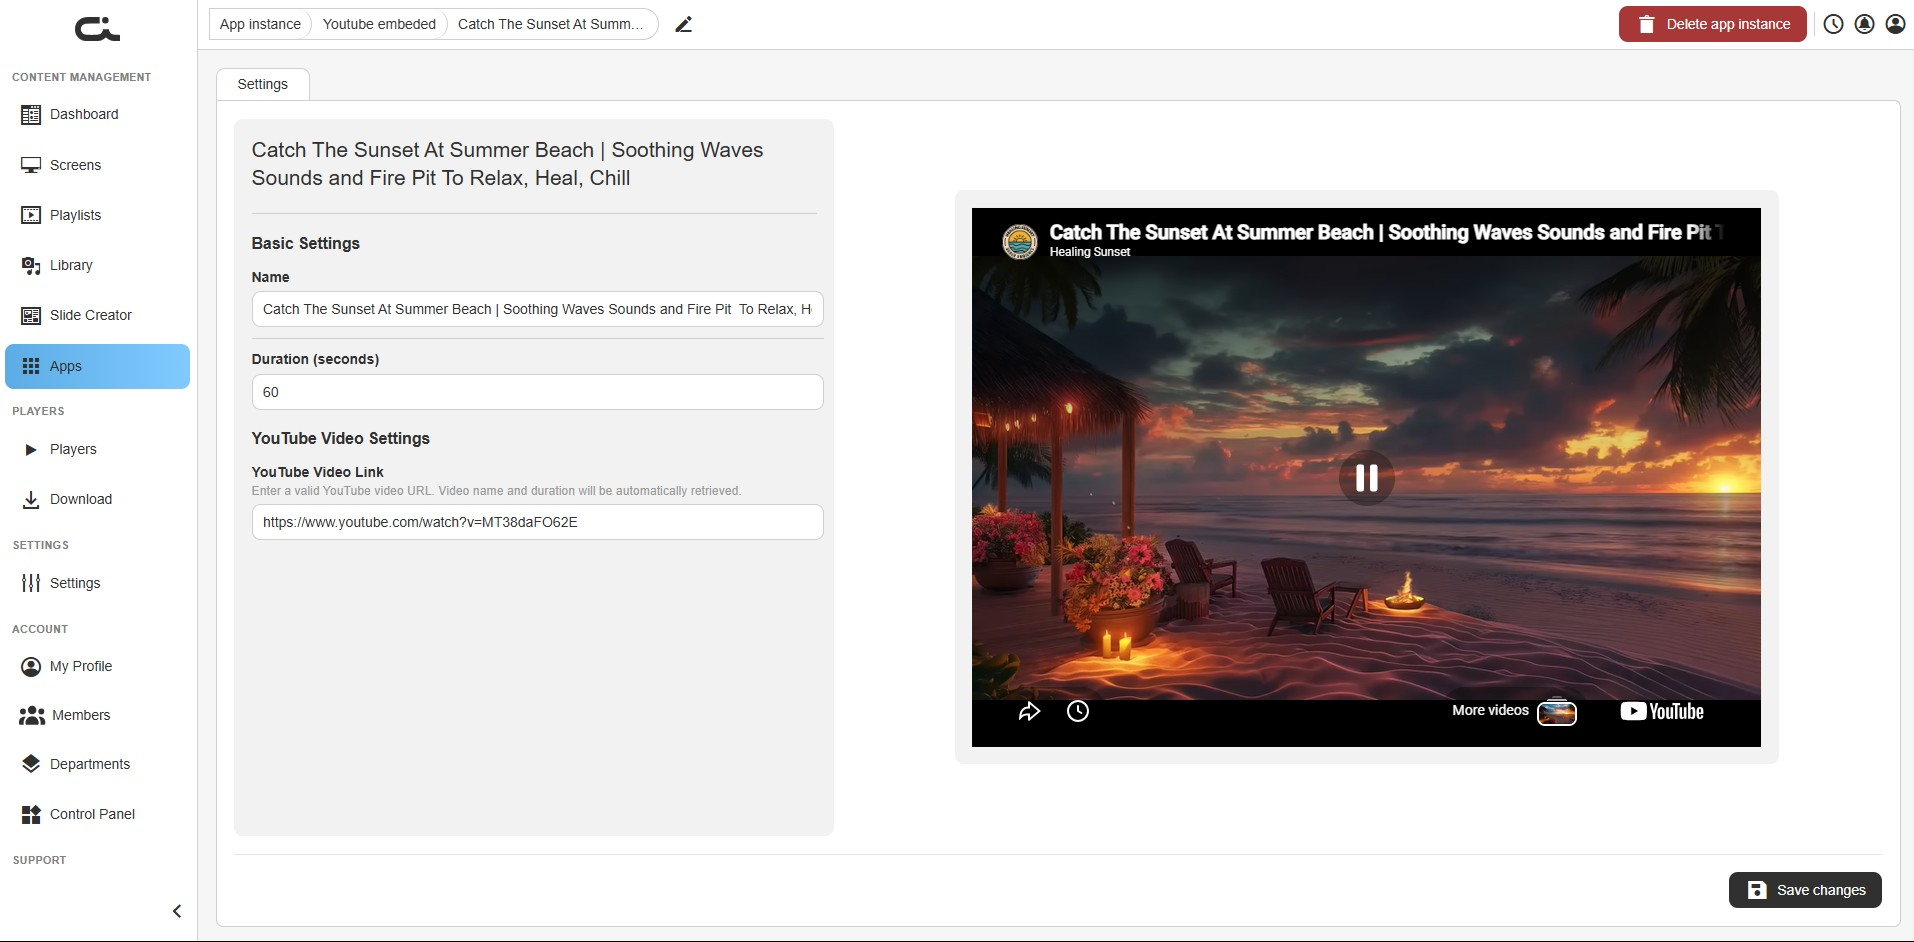
When the preview shows the right video, click Save changes at the bottom-right.
The video streams from YouTube, so the player needs an internet connection to play it.
Step 3: Use the app
Once saved, add the instance to a screen or playlist just like any other app (see Using Apps in Your Content). To show a different video, paste a new link and click Save changes again.
Spiegel Online
The Spiegel Online app shows the latest news from Germany via Spiegel Online. The app supplies the headlines, so there's nothing to write or maintain. You just choose how many stories to show and in which language.
Step 1: Set the basic settings
After creating an instance, you land on the Settings tab. The left side holds the settings; the right side shows a live preview of the news feed.
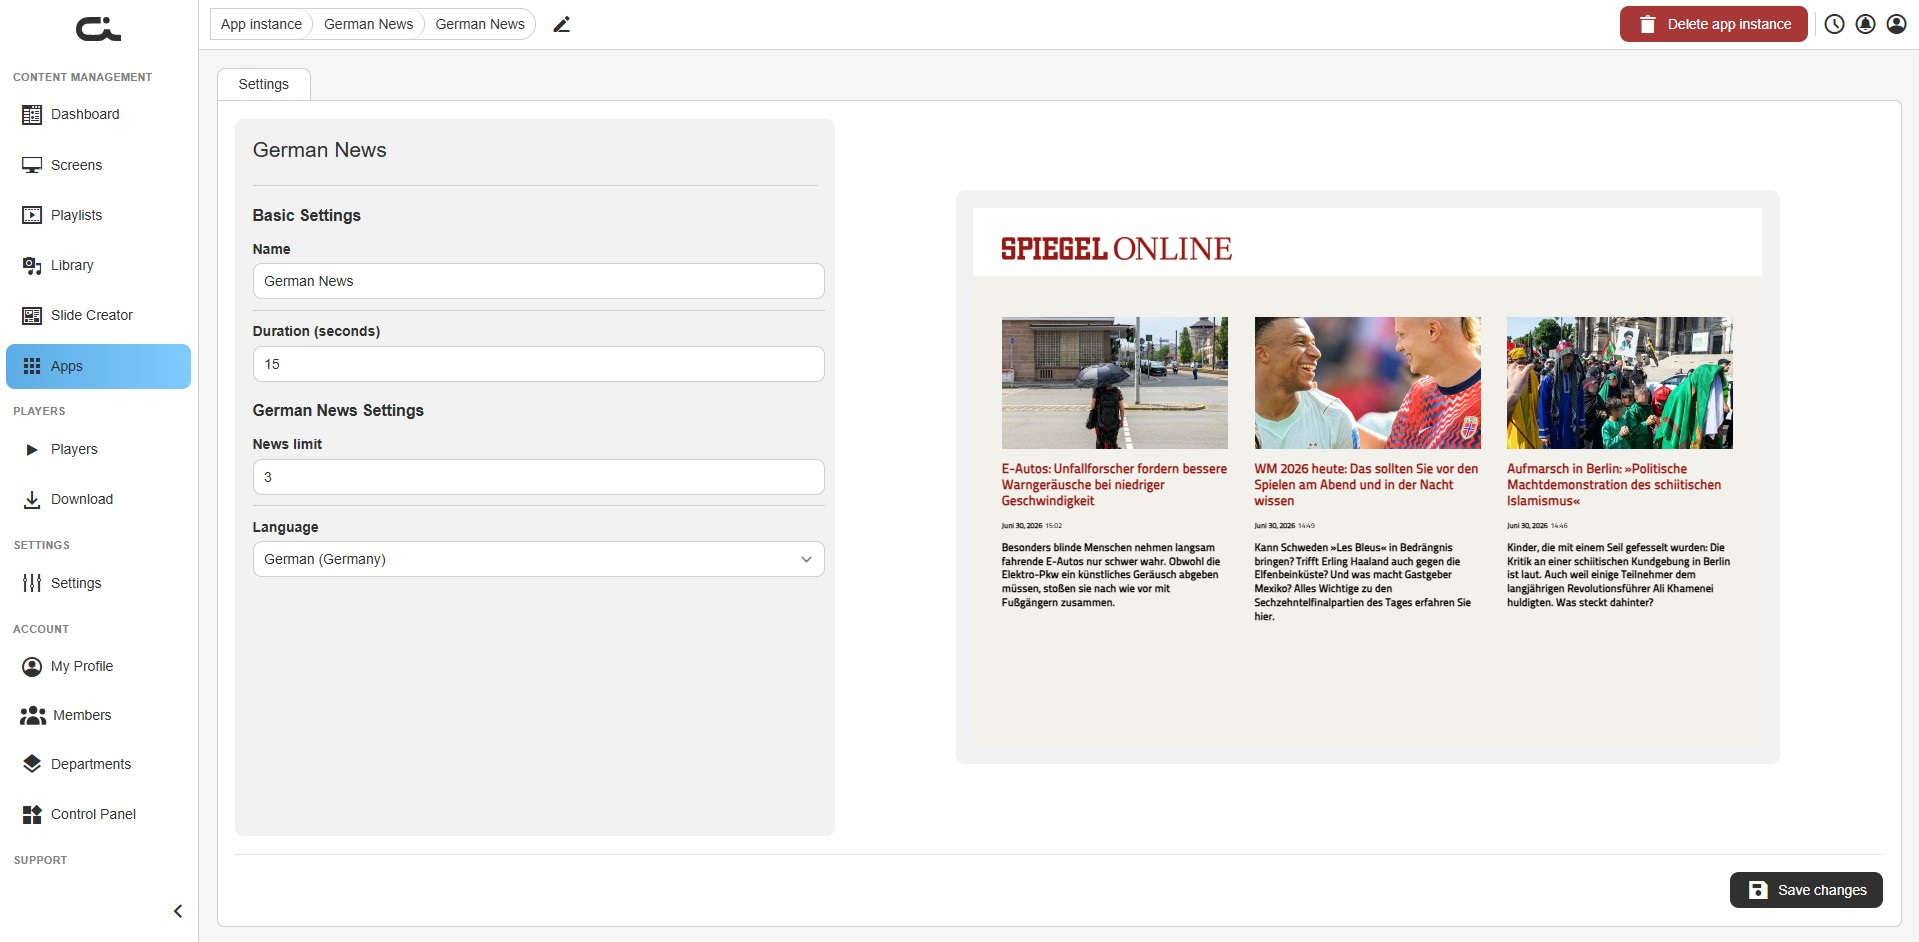
Set the following:
- Name: A label for this instance
- Duration (seconds): How long the app shows when it plays (default 15)
Step 2: Choose the news options
Under the news settings, set:
- News limit: How many news items to show
- Language: The language the news appears in
When the preview looks right, click Save changes at the bottom-right.
The headlines are pulled live, so the player needs an internet connection to keep them current.
Step 3: Use the app
Once saved, add the instance to a screen or playlist just like any other app (see Using Apps in Your Content). The news refreshes on its own. If you later change the news limit or language, remember to click Save changes again.
LinkedIn Posts
The LinkedIn Posts app shows a feed of your company's latest LinkedIn posts on screen. It's closely related to the LinkedIn app: where LinkedIn shows your company page, LinkedIn Posts focuses on a running feed of your most recent posts. You connect your account, choose the company page, and set how many posts to show.
This app only works with LinkedIn business (organization) pages. You must be an admin of a LinkedIn Company Page. Personal or private profiles are not supported and cannot be connected.
Step 1: Connect your LinkedIn account
When you first open a LinkedIn Posts instance, the Settings tab shows a Not Connected card, and the preview asks you to connect your account.
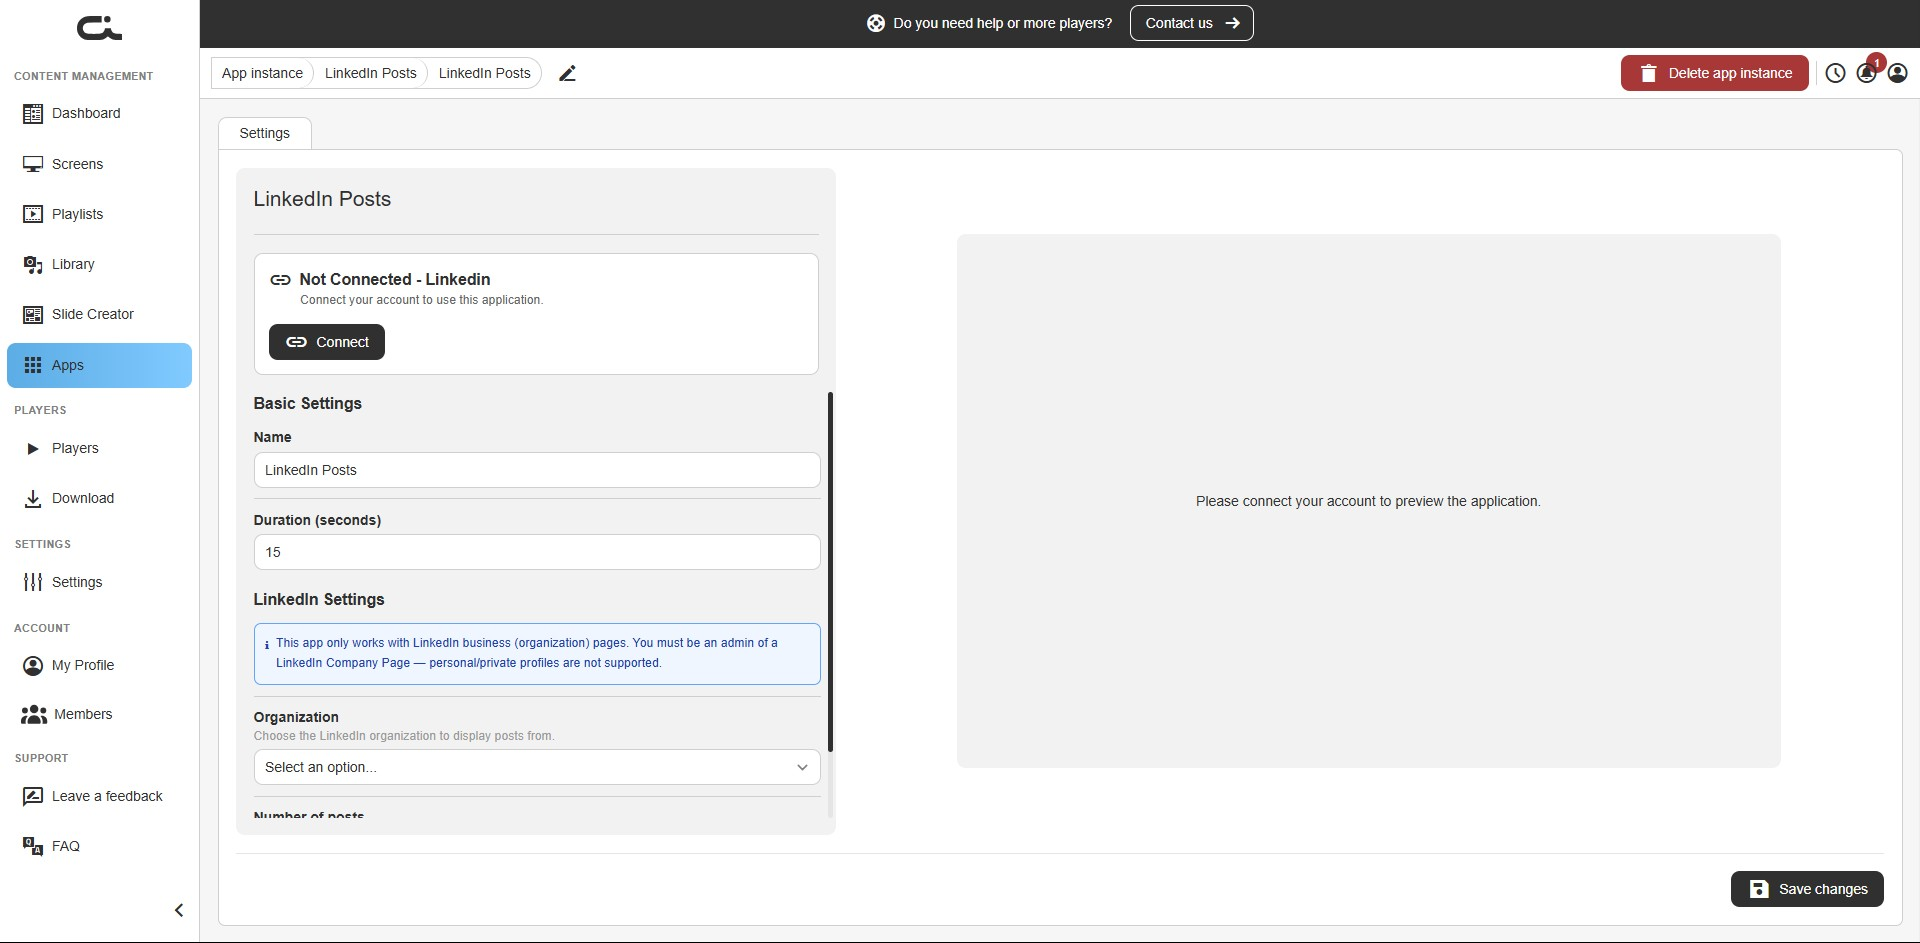
- Click Connect
- Sign in to LinkedIn with an account that is an admin of the Company Page you want to show, and authorize the connection
- When you return, the card turns green and reads Connected - Linkedin
The connection only has to be made once per instance. To unlink later, use Disconnect on the same card.
Step 2: Choose the organization and posts
Once connected, the LinkedIn settings appear, and the preview shows your latest posts.
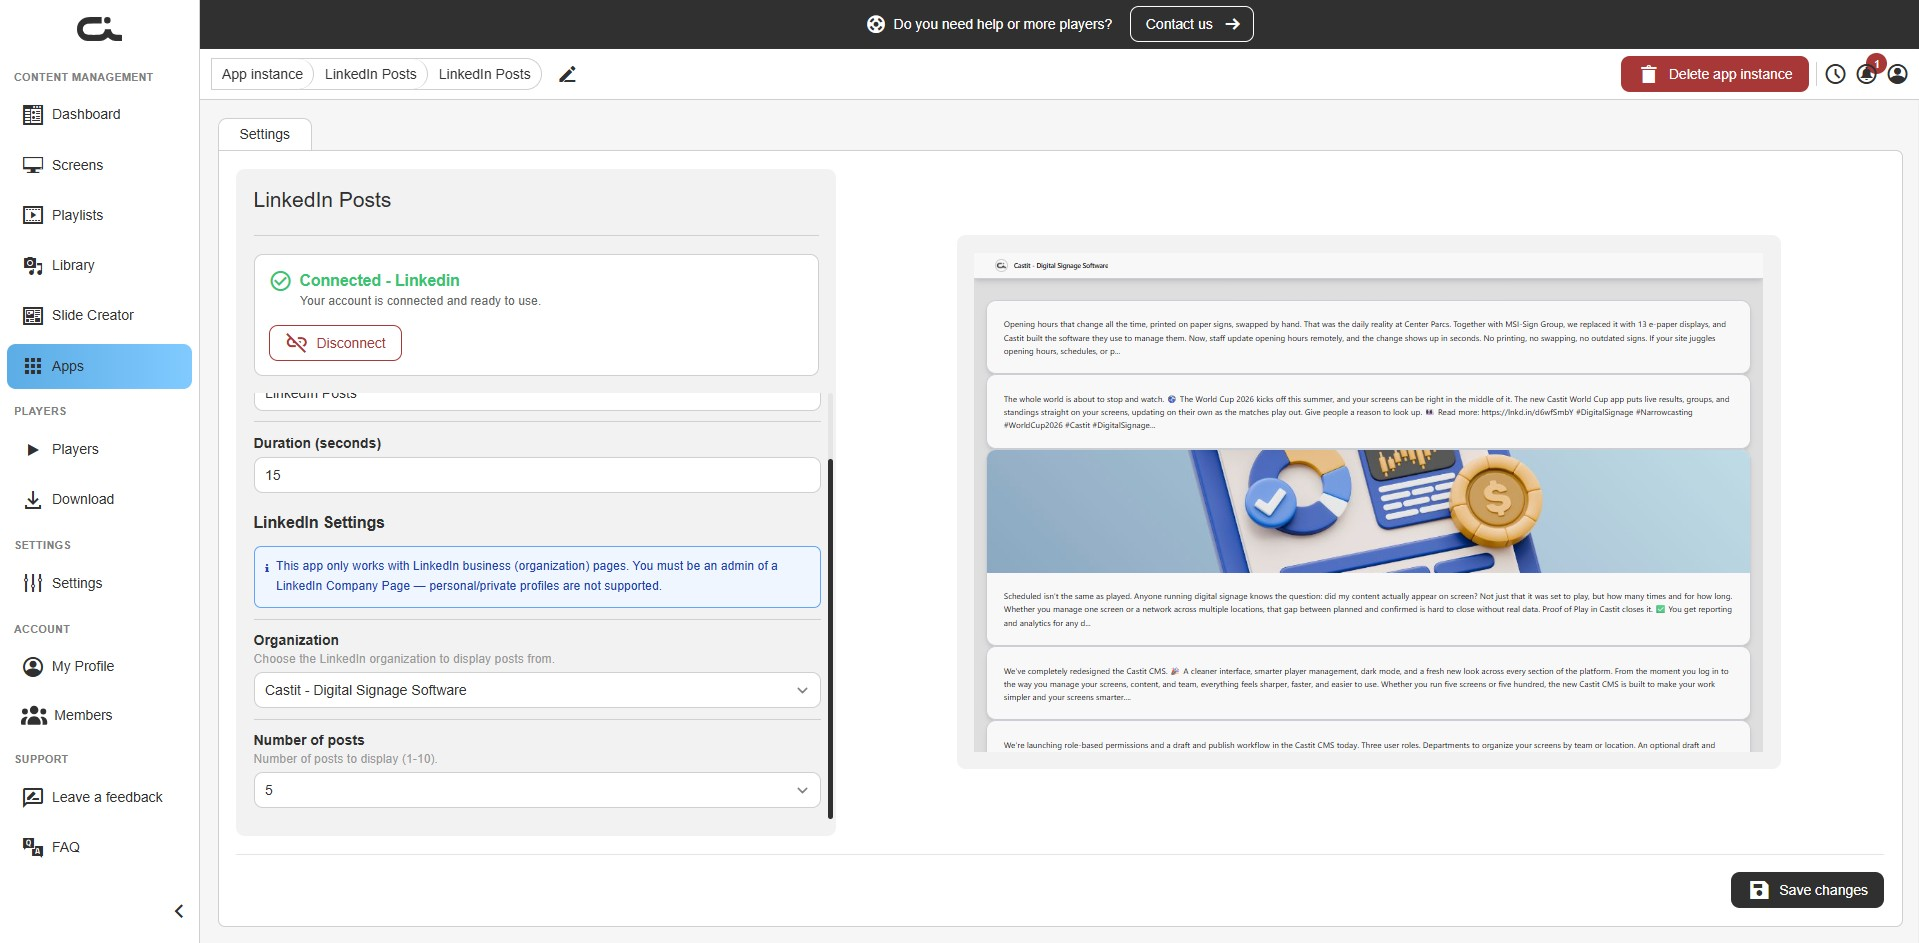
Set the following:
- Name: A label for this instance
- Duration (seconds): How long the app shows when it plays
- Organization: Choose which LinkedIn Company Page to display posts from
- Number of posts: How many recent posts to show, between 1 and 10
When the preview looks right, click Save changes at the bottom-right.
Step 3: Use the app
Once saved, add the instance to a screen or playlist just like any other app (see Using Apps in Your Content). The feed refreshes on its own as you publish new posts, so there's nothing more to maintain. If you later change the organization or the number of posts, remember to click Save changes again.
Multi App
The Multi App combines several apps into one split-screen layout, so a single screen can show more than one thing at once, for example a clock, the weather, a quote, and an image side by side. You choose how to divide the screen, then pick which app fills each region.
Step 1: Set the basic settings
After creating an instance, you land on the Settings tab. The left side holds the settings; the right side shows a live preview that fills in as you assign apps.
- Name: A label for this instance
- Duration (seconds): How long the app shows when it plays (default 15)
Step 2: Choose a layout
Under Multi App Settings, pick a Layout. Each option divides the screen a different way, for example two or three columns, or a 2x2 grid.
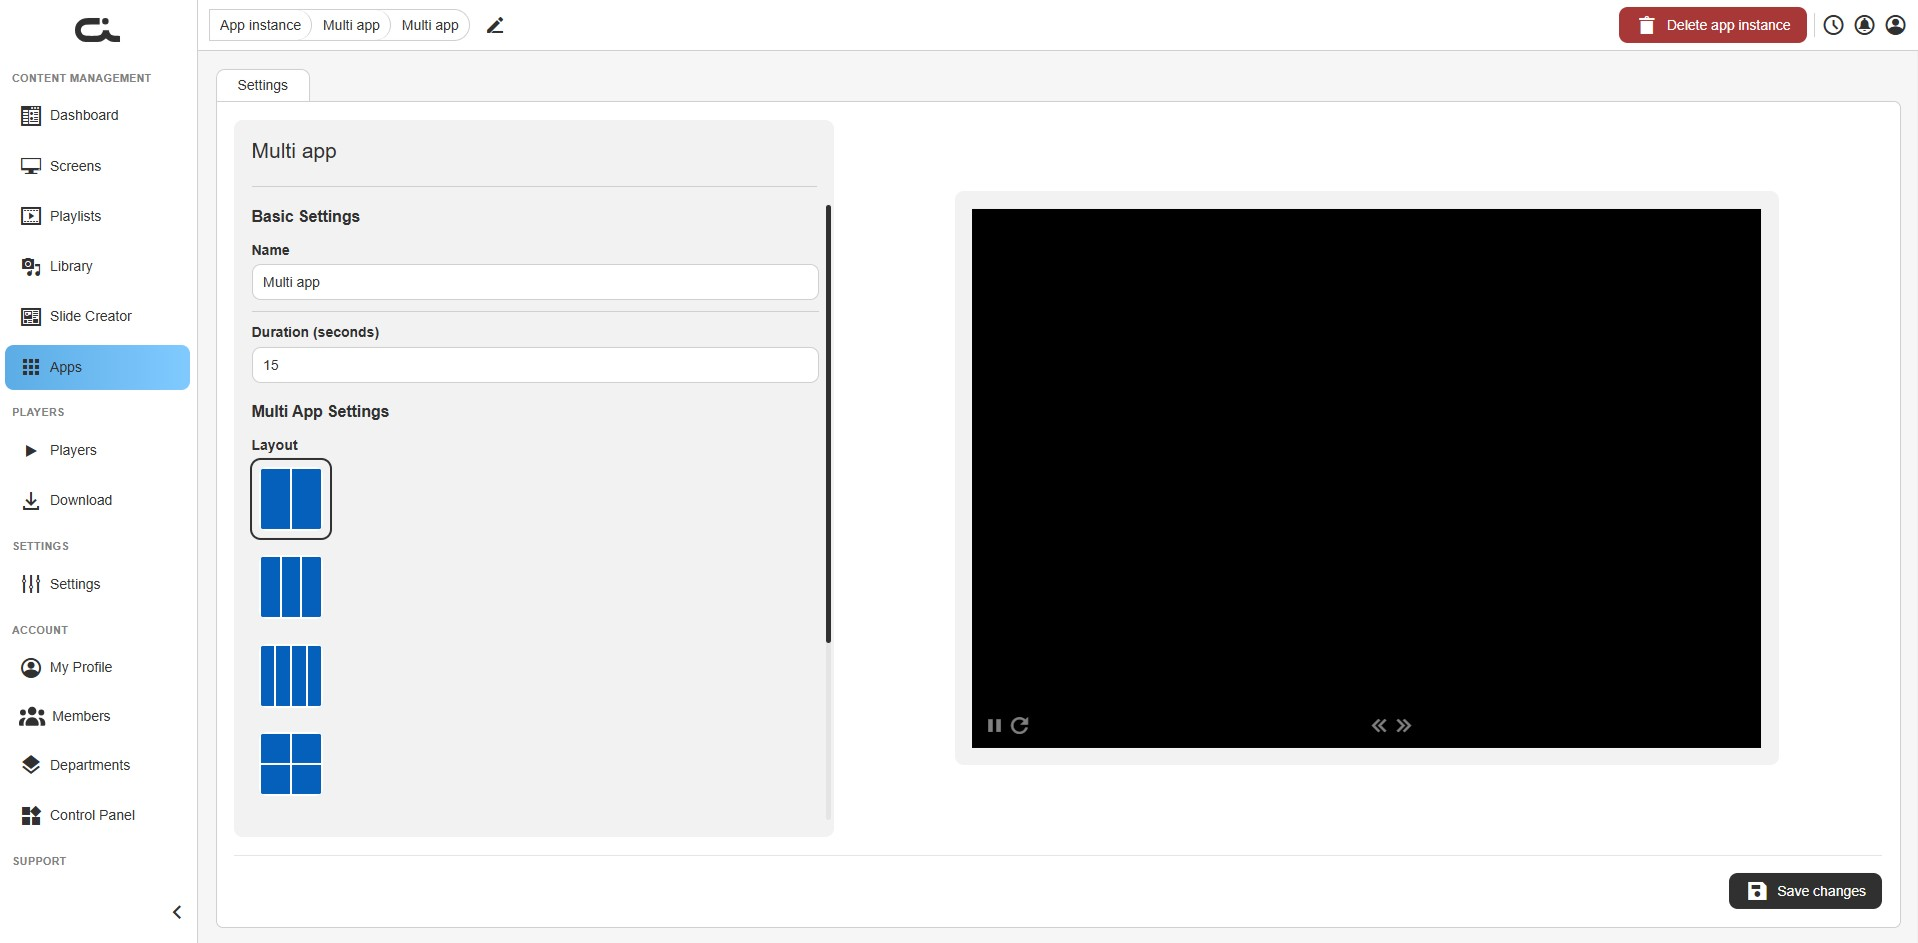
The layout you choose decides how many regions (fields) you'll fill and how they're arranged on screen.
Step 3: Assign an app to each field
Once you've picked a layout, a Field dropdown appears for each region. The fields are labeled by their position in the grid (for example, Field X:0 Y:0 is the top-left region, Field X:1 Y:1 is the bottom-right).
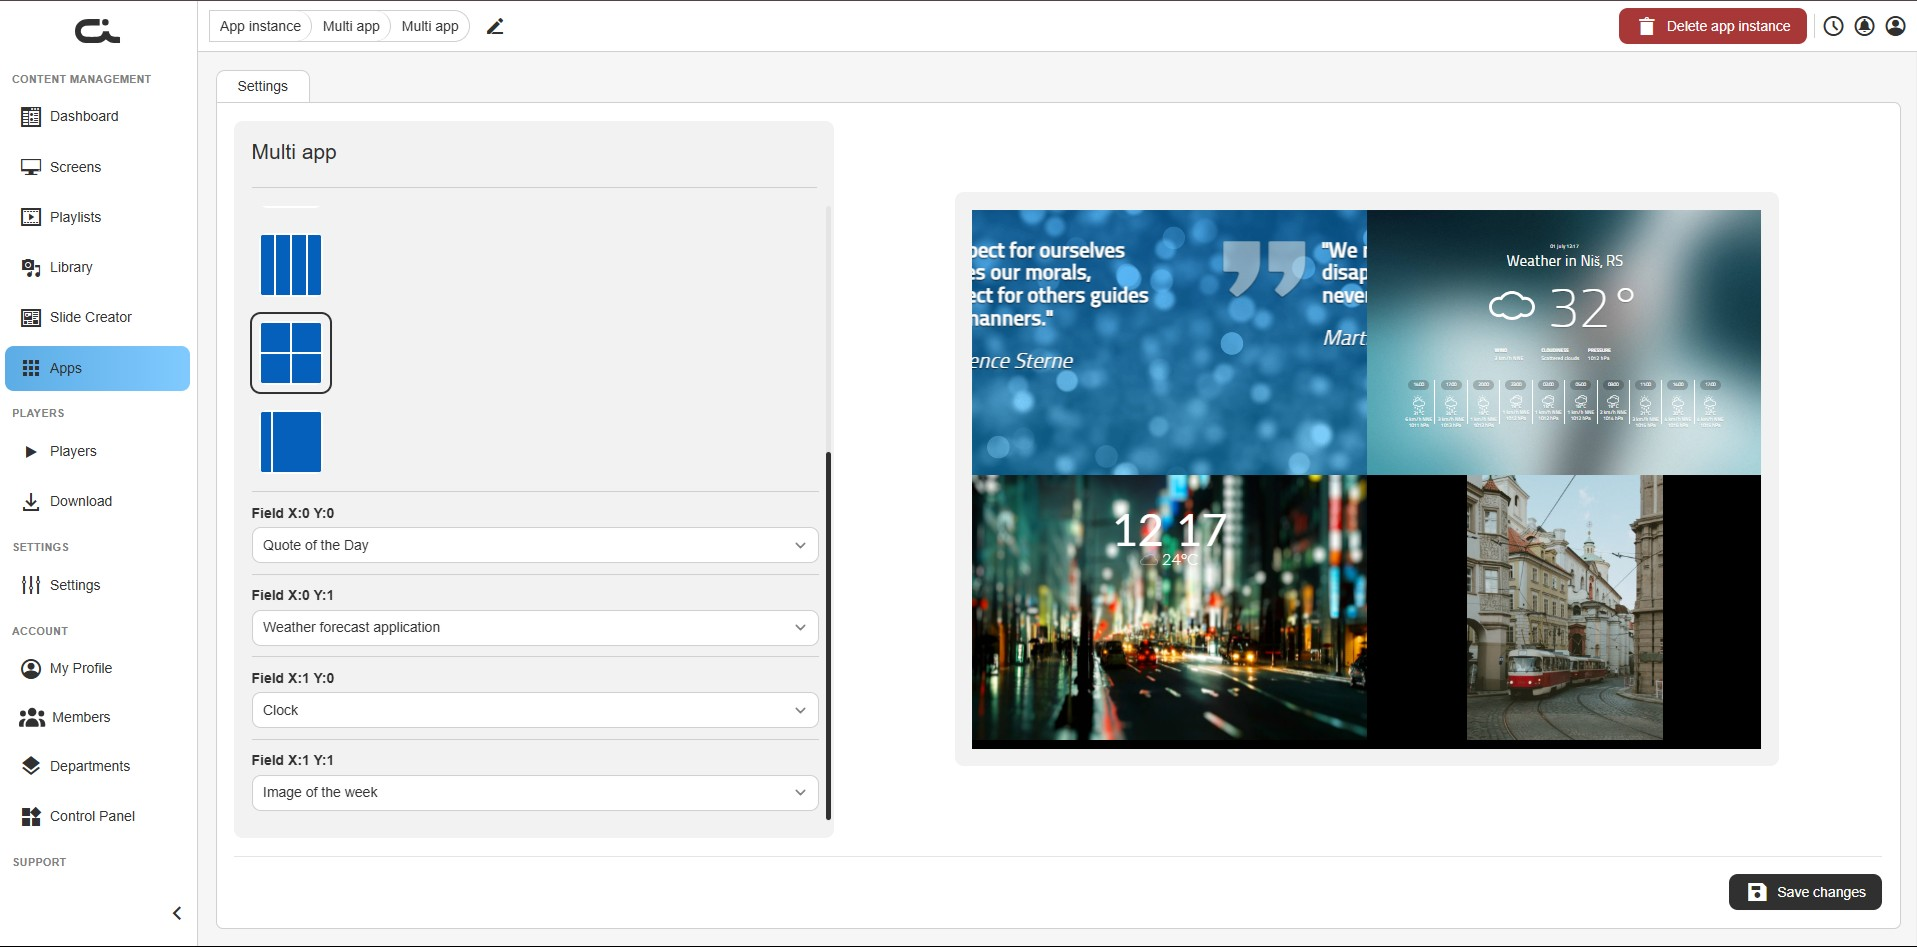
For each field, choose the app you want to show there. The preview tiles the apps together so you can see the whole screen come together.
The apps you assign here are the other apps available to you, such as Clock, Weather Forecast Application, Quote of the Day, and Image of the Week. Set up those apps the way you want them first, then place them into the Multi App layout.
When the preview looks right, click Save changes at the bottom-right.
Step 4: Use the app
Once saved, add the instance to a screen or playlist just like any other app (see Using Apps in Your Content). The combined layout plays as a single item. If you later change the layout or swap an app in any field, remember to click Save changes again.
NOS Cycling
The NOS Cycling app shows the latest cycling news from NOS. The app supplies the articles, so there's nothing to write or maintain. You just choose how many stories to show.
Step 1: Set the basic settings
After creating an instance, you land on the Settings tab. The left side holds the settings; the right side shows a live preview of the news feed.
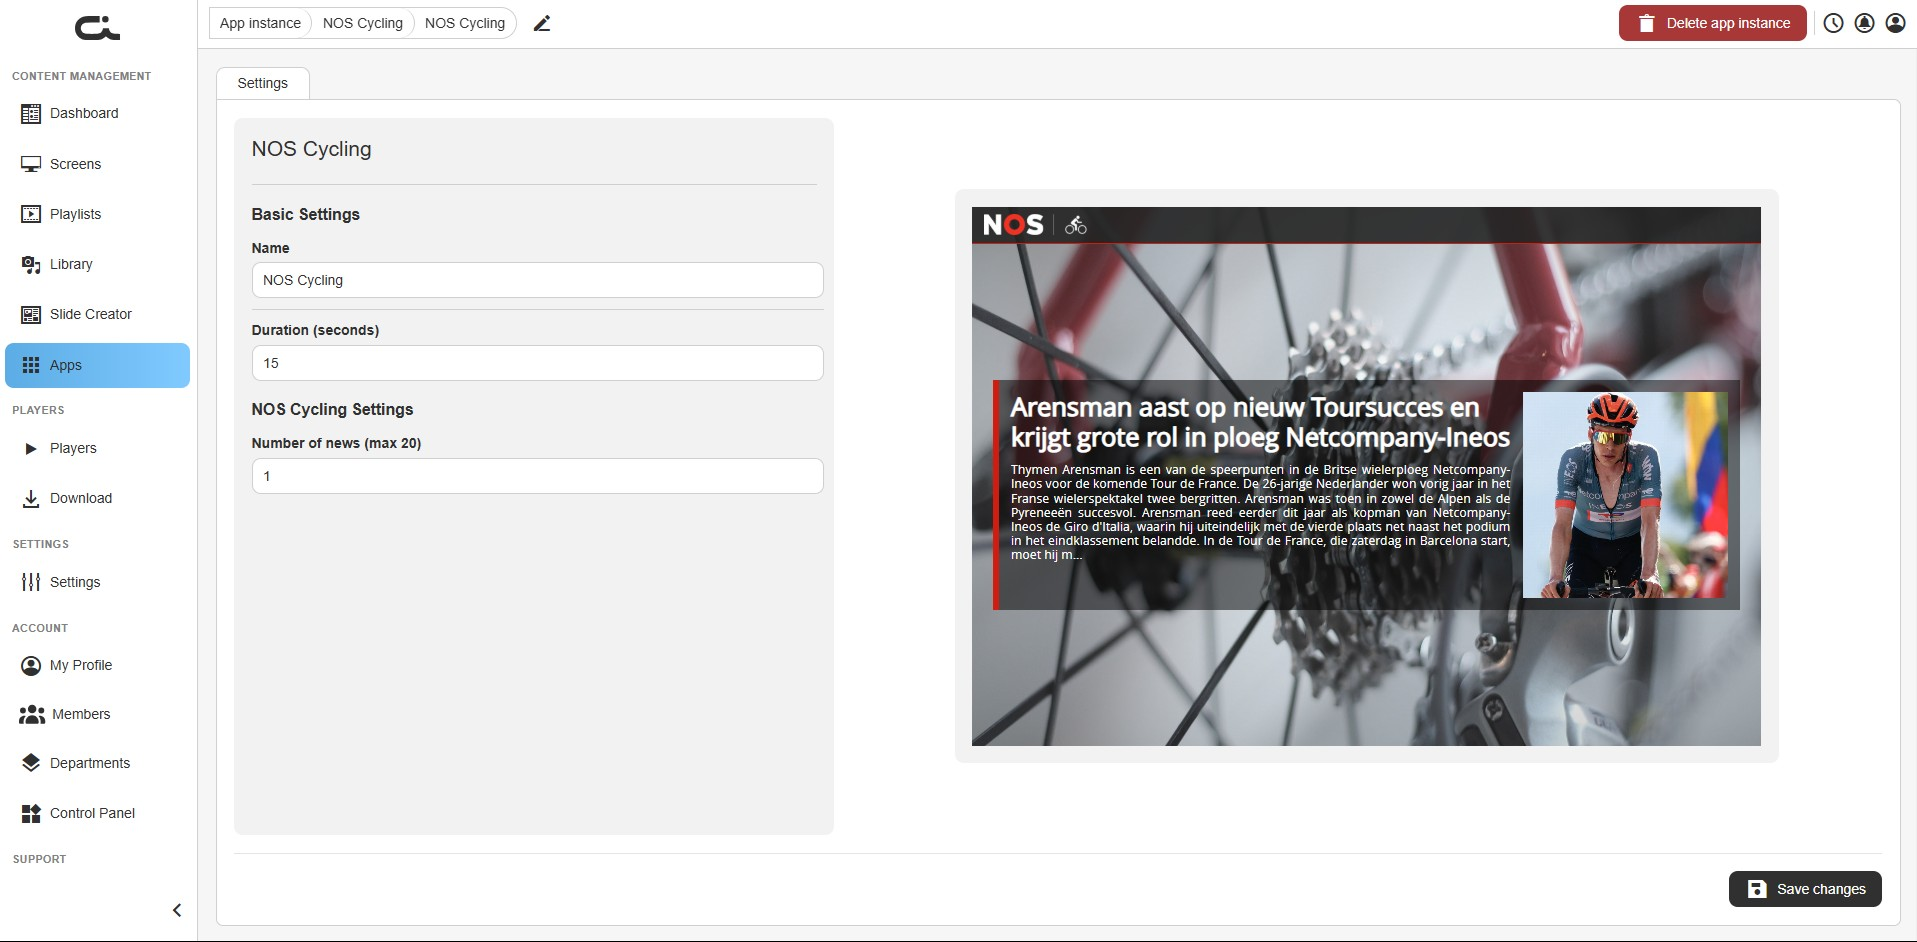
Set the following:
- Name: A label for this instance
- Duration (seconds): How long the app shows when it plays (default 15)
Step 2: Set how many stories to show
Under NOS Cycling Settings, set:
- Number of news: How many news items to cycle through, up to a maximum of 20
When the preview looks right, click Save changes at the bottom-right.
The news is pulled live, so the player needs an internet connection to keep it current.
Step 3: Use the app
Once saved, add the instance to a screen or playlist just like any other app (see Using Apps in Your Content). The news refreshes on its own. If you later change the number of news items, remember to click Save changes again.
NOS News
The NOS News app shows the latest general news from NOS. The app supplies the articles, so there's nothing to write or maintain. You just choose how many stories to show.
Step 1: Set the basic settings
After creating an instance, you land on the Settings tab. The left side holds the settings; the right side shows a live preview of the news feed.
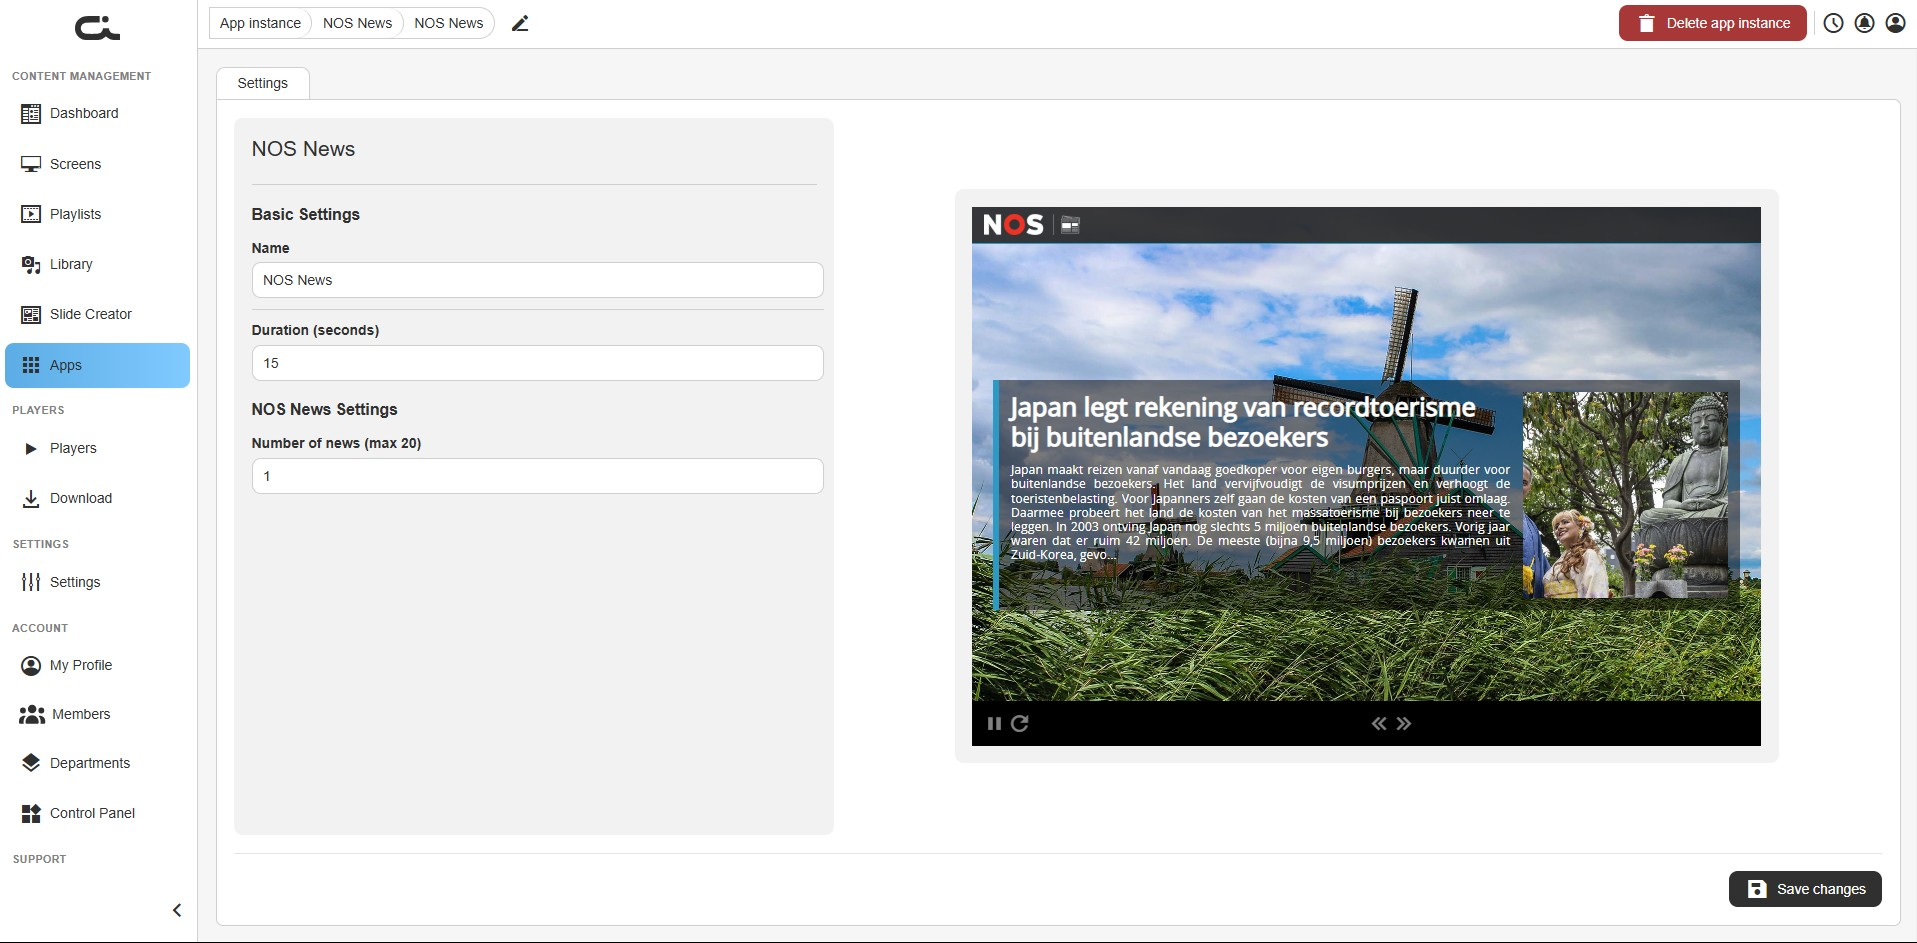
Set the following:
- Name: A label for this instance
- Duration (seconds): How long the app shows when it plays (default 15)
Step 2: Set how many stories to show
Under NOS News Settings, set:
- Number of news: How many news items to cycle through, up to a maximum of 20
When the preview looks right, click Save changes at the bottom-right.
The news is pulled live, so the player needs an internet connection to keep it current.
Step 3: Use the app
Once saved, add the instance to a screen or playlist just like any other app (see Using Apps in Your Content). The news refreshes on its own. If you later change the number of news items, remember to click Save changes again.
NOS Soccer
The NOS Soccer app shows the latest soccer news from NOS. The app supplies the articles, so there's nothing to write or maintain. You just choose how many stories to show.
Step 1: Set the basic settings
After creating an instance, you land on the Settings tab. The left side holds the settings; the right side shows a live preview of the news feed.
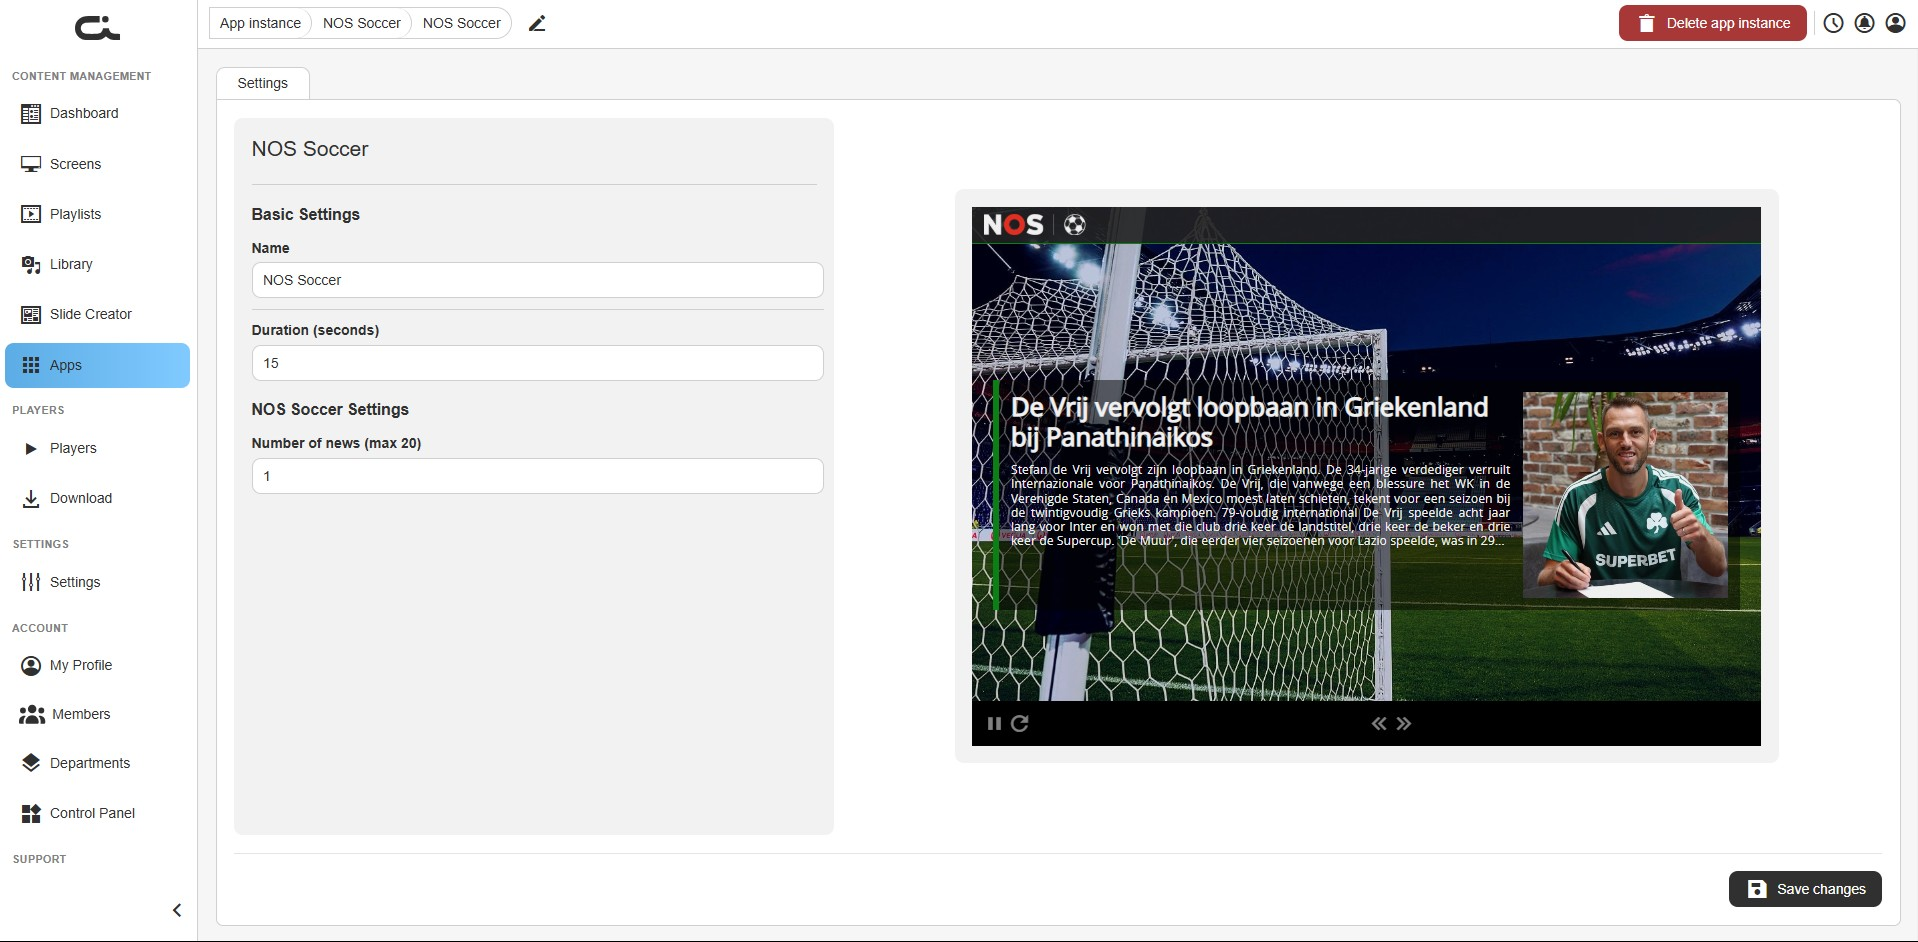
Set the following:
- Name: A label for this instance
- Duration (seconds): How long the app shows when it plays (default 15)
Step 2: Set how many stories to show
Under NOS Soccer Settings, set:
- Number of news: How many news items to cycle through, up to a maximum of 20
When the preview looks right, click Save changes at the bottom-right.
The news is pulled live, so the player needs an internet connection to keep it current.
Step 3: Use the app
Once saved, add the instance to a screen or playlist just like any other app (see Using Apps in Your Content). The news refreshes on its own. If you later change the number of news items, remember to click Save changes again.
NOS Tennis
The NOS Tennis app shows the latest tennis news from NOS. The app supplies the articles, so there's nothing to write or maintain. You just choose how many stories to show.
Step 1: Set the basic settings
After creating an instance, you land on the Settings tab. The left side holds the settings; the right side shows a live preview of the news feed.
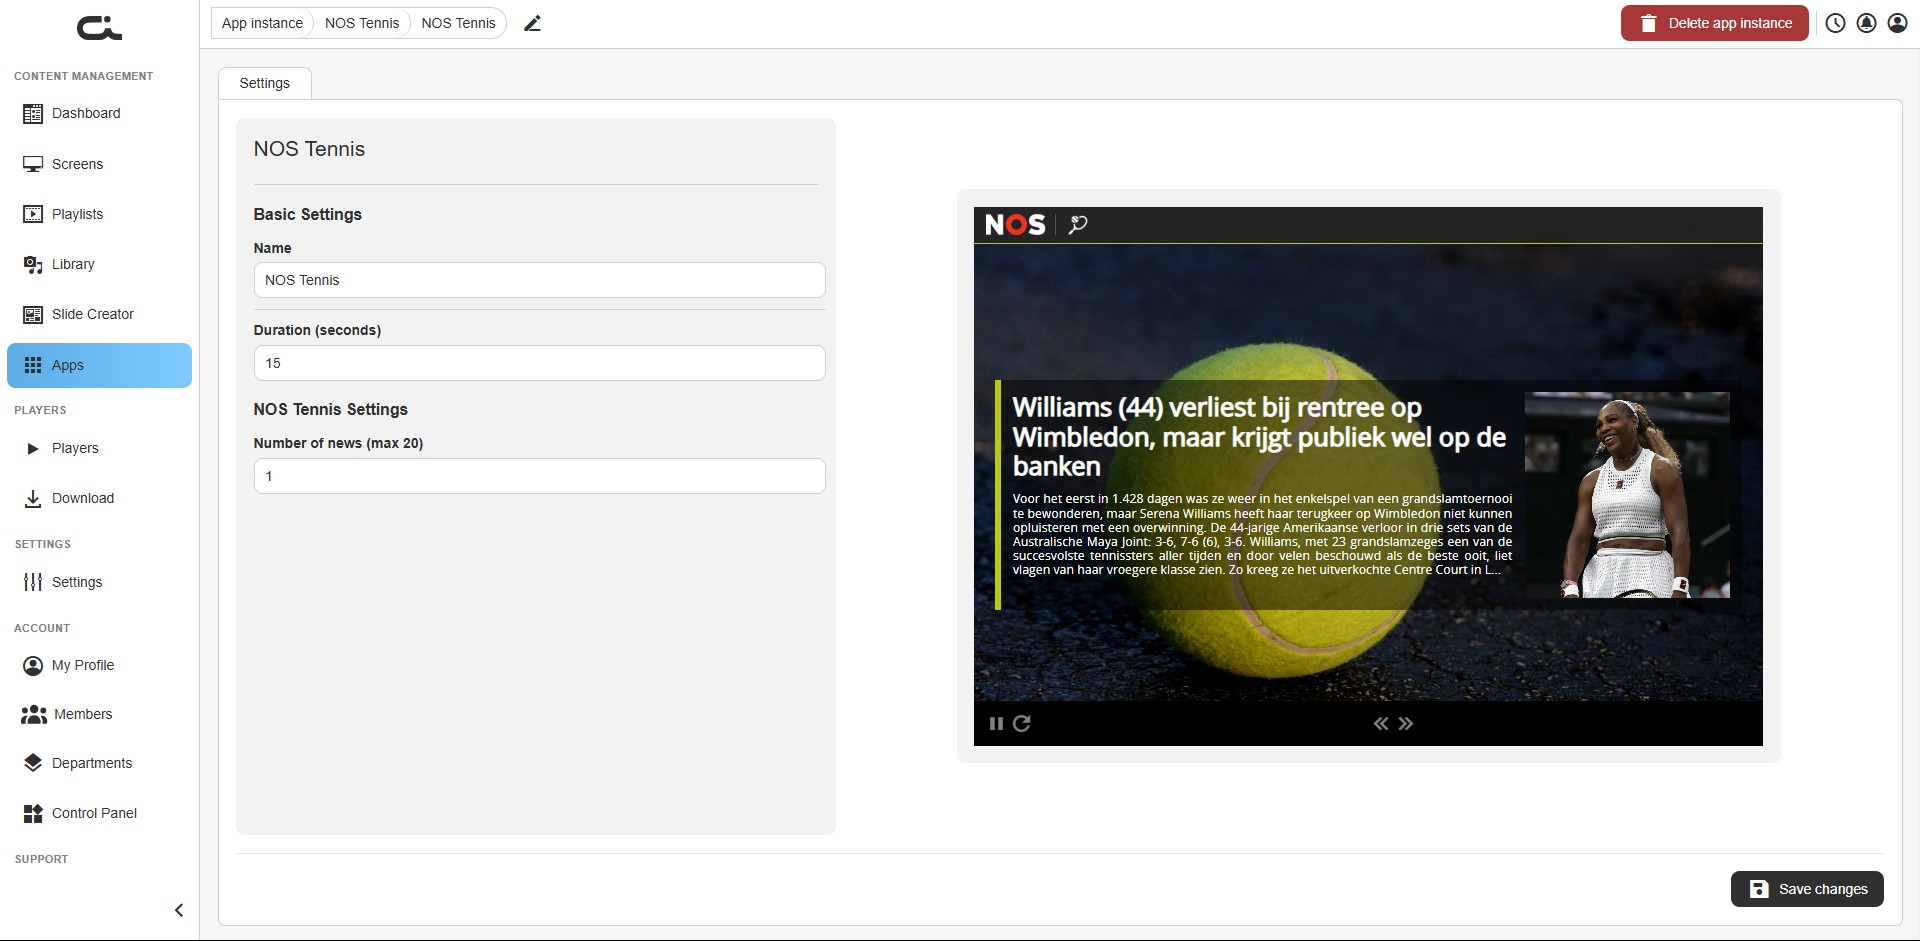
Set the following:
- Name: A label for this instance
- Duration (seconds): How long the app shows when it plays (default 15)
Step 2: Set how many stories to show
Under NOS Tennis Settings, set:
- Number of news: How many news items to cycle through, up to a maximum of 20
When the preview looks right, click Save changes at the bottom-right.
The news is pulled live, so the player needs an internet connection to keep it current.
Step 3: Use the app
Once saved, add the instance to a screen or playlist just like any other app (see Using Apps in Your Content). The news refreshes on its own. If you later change the number of news items, remember to click Save changes again.
NS Train Information
The NS Train Information app shows a live Dutch railway (NS) departures board for a station of your choice, just like the boards you see at the station. It lists upcoming departure times, destinations, platforms, and train types, and updates on its own.
Step 1: Set the basic settings
After creating an instance, you land on the Settings tab. The left side holds the settings; the right side shows a live preview of the departures board.
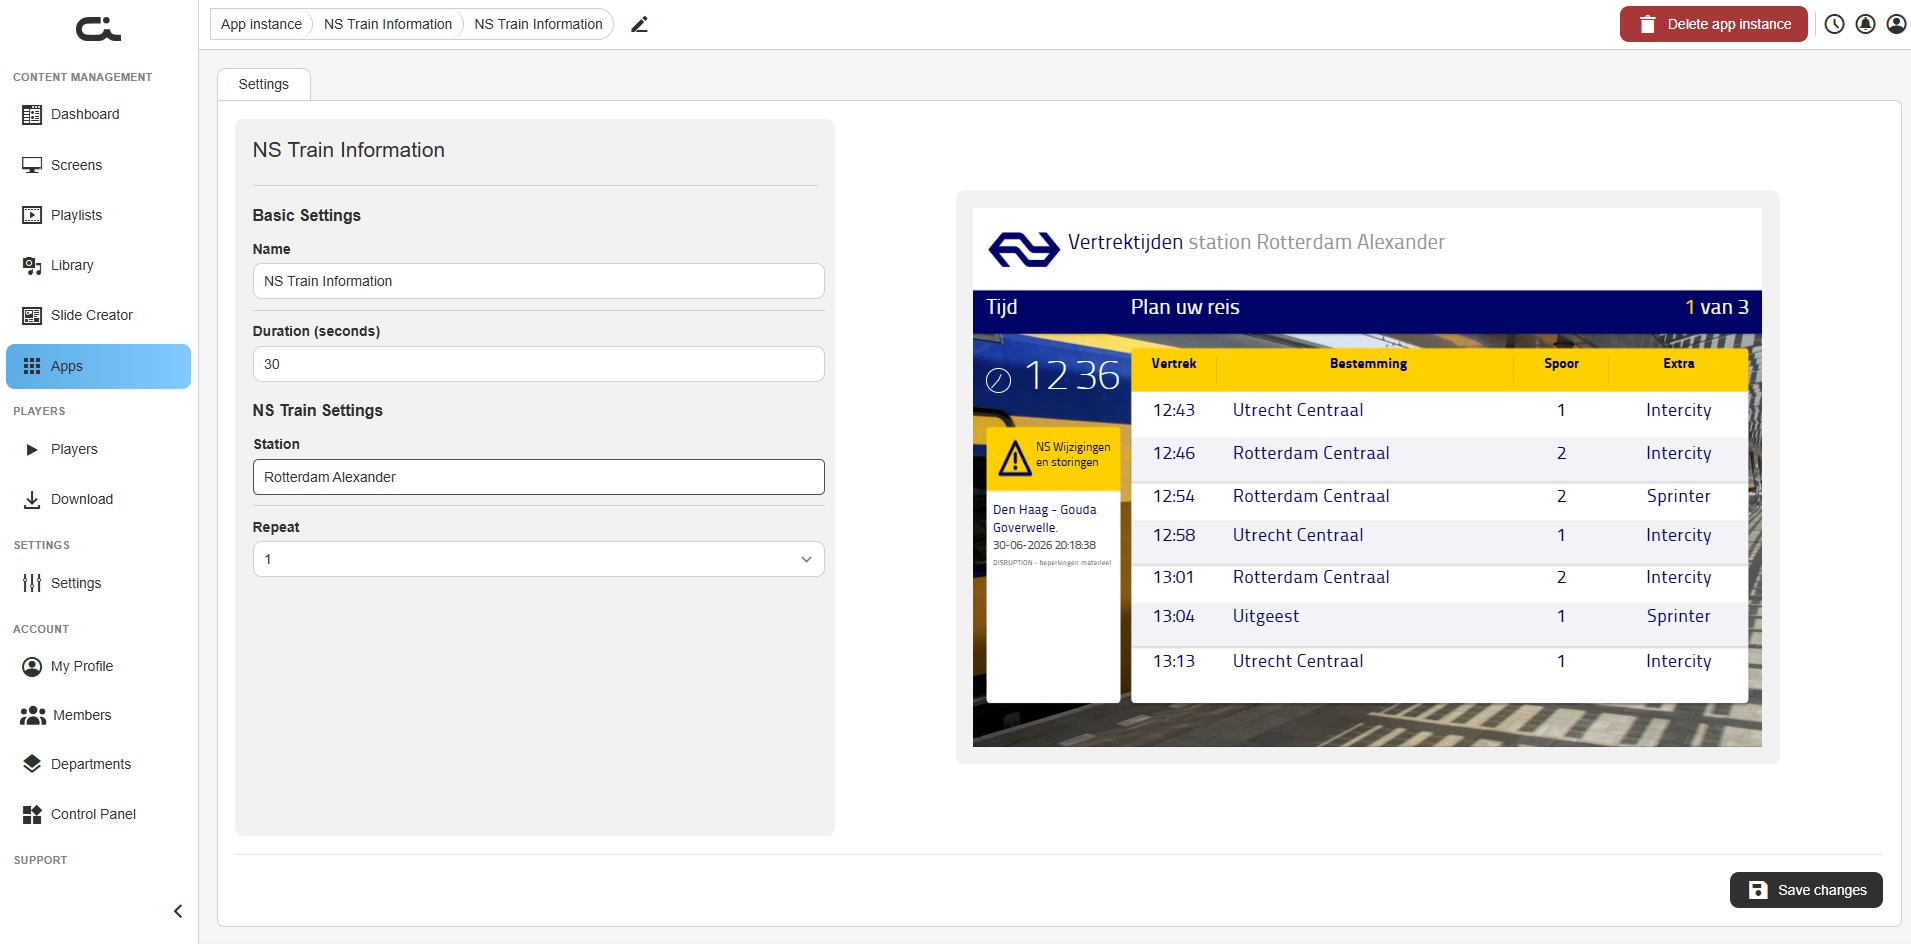
Set the following:
- Name: A label for this instance (helpful if you run more than one, for example one per station)
- Duration (seconds): How long the app shows when it plays (default 30)
Step 2: Choose the station
Under NS Train Settings, set:
- Station: Type the name of the station whose departures you want to show (for example,
Rotterdam Alexander) - Repeat: How many times the board cycles through its pages of departures while the app is on screen
When the preview shows the right station, click Save changes at the bottom-right.
The departure times are pulled live, so the player needs an internet connection to stay accurate.
Step 3: Use the app
Once saved, add the instance to a screen or playlist just like any other app (see Using Apps in Your Content). The board keeps refreshing on its own. If you later change the station or the repeat count, remember to click Save changes again.
NU Business
The NU Business app shows the business news channel from NU.nl. The app supplies the articles, so there's nothing to write or maintain. You choose how many stories to show, and you can point it at a different NU.nl feed if you want.
Step 1: Set the basic settings
After creating an instance, you land on the Settings tab. The left side holds the settings; the right side shows a live preview of the news channel.
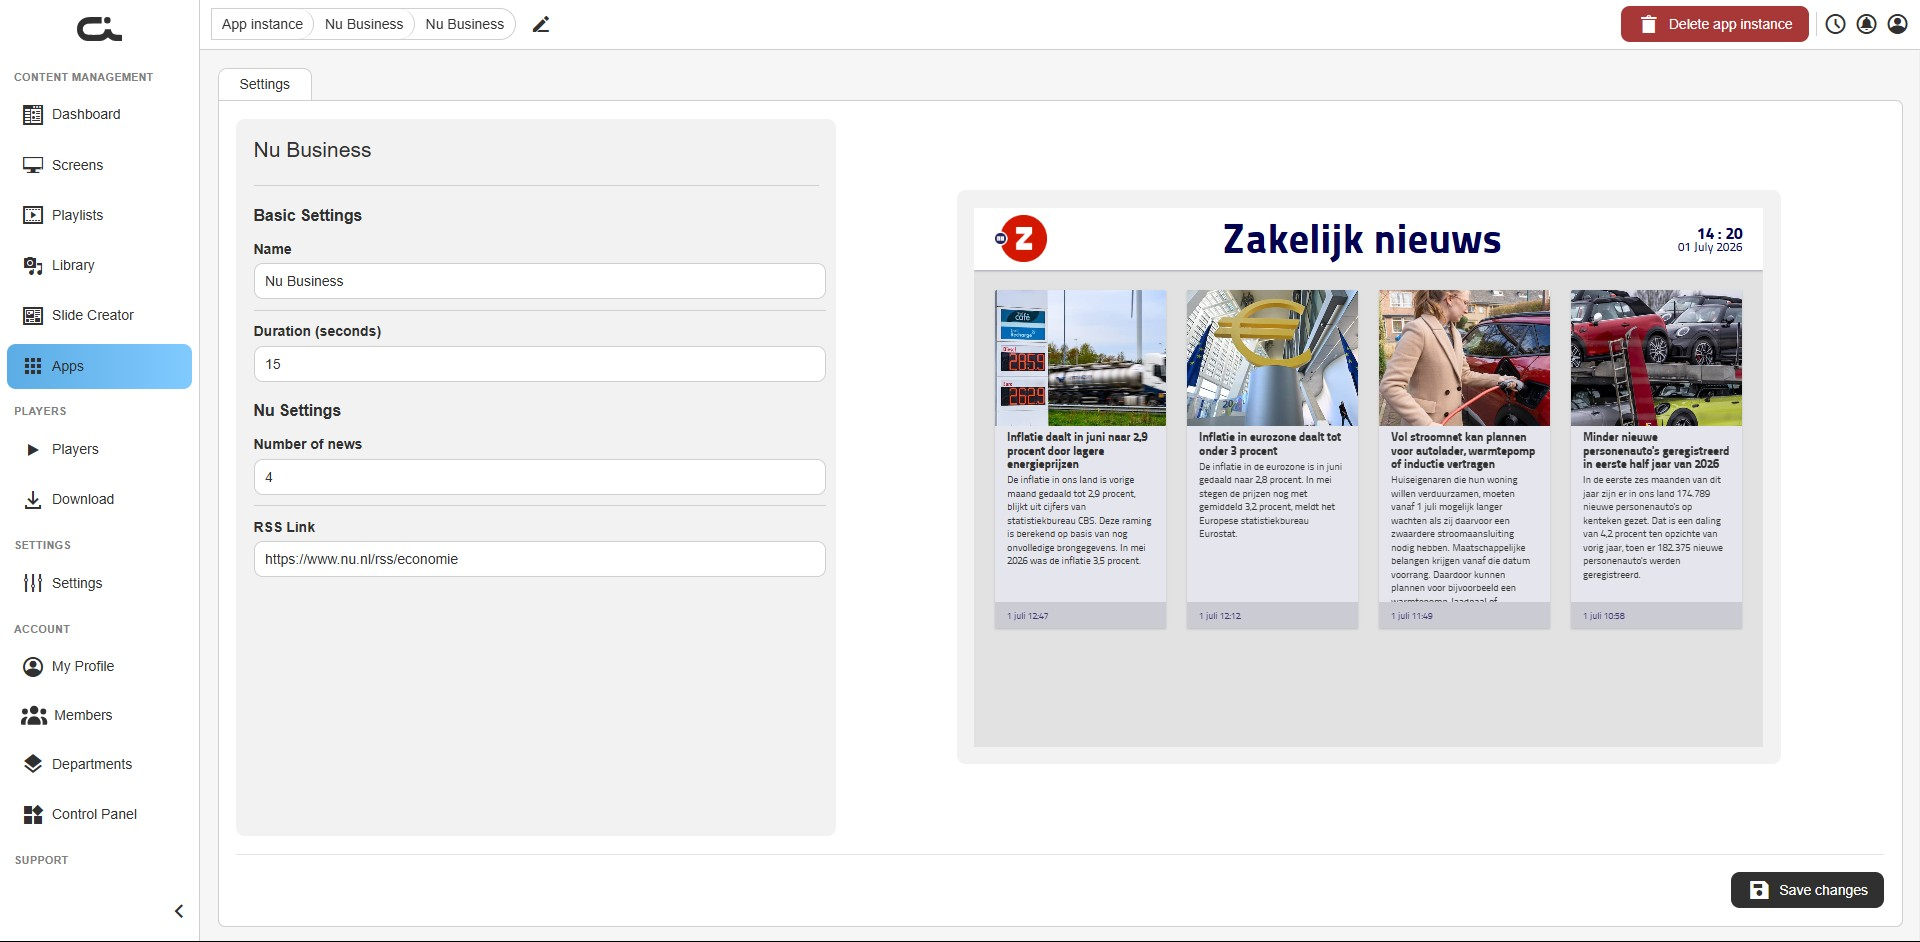
Set the following:
- Name: A label for this instance
- Duration (seconds): How long the app shows when it plays (default 15)
Step 2: Set the news options
Under Nu Settings, set:
- Number of news: How many news items to show
- RSS Link: The source feed the app reads from. This comes pre-filled with the NU.nl business feed, so you can leave it as is. To show a different NU.nl channel instead, paste that feed's address here
When the preview looks right, click Save changes at the bottom-right.
The news is pulled live, so the player needs an internet connection to keep it current.
Step 3: Use the app
Once saved, add the instance to a screen or playlist just like any other app (see Using Apps in Your Content). The news refreshes on its own. If you later change the number of news items or the RSS link, remember to click Save changes again.
NU Sport
The NU Sport app shows the sports news channel from NU.nl. The app supplies the articles, so there's nothing to write or maintain. You choose how many stories to show, and you can point it at a different NU.nl feed if you want.
Step 1: Set the basic settings
After creating an instance, you land on the Settings tab. The left side holds the settings; the right side shows a live preview of the news channel.
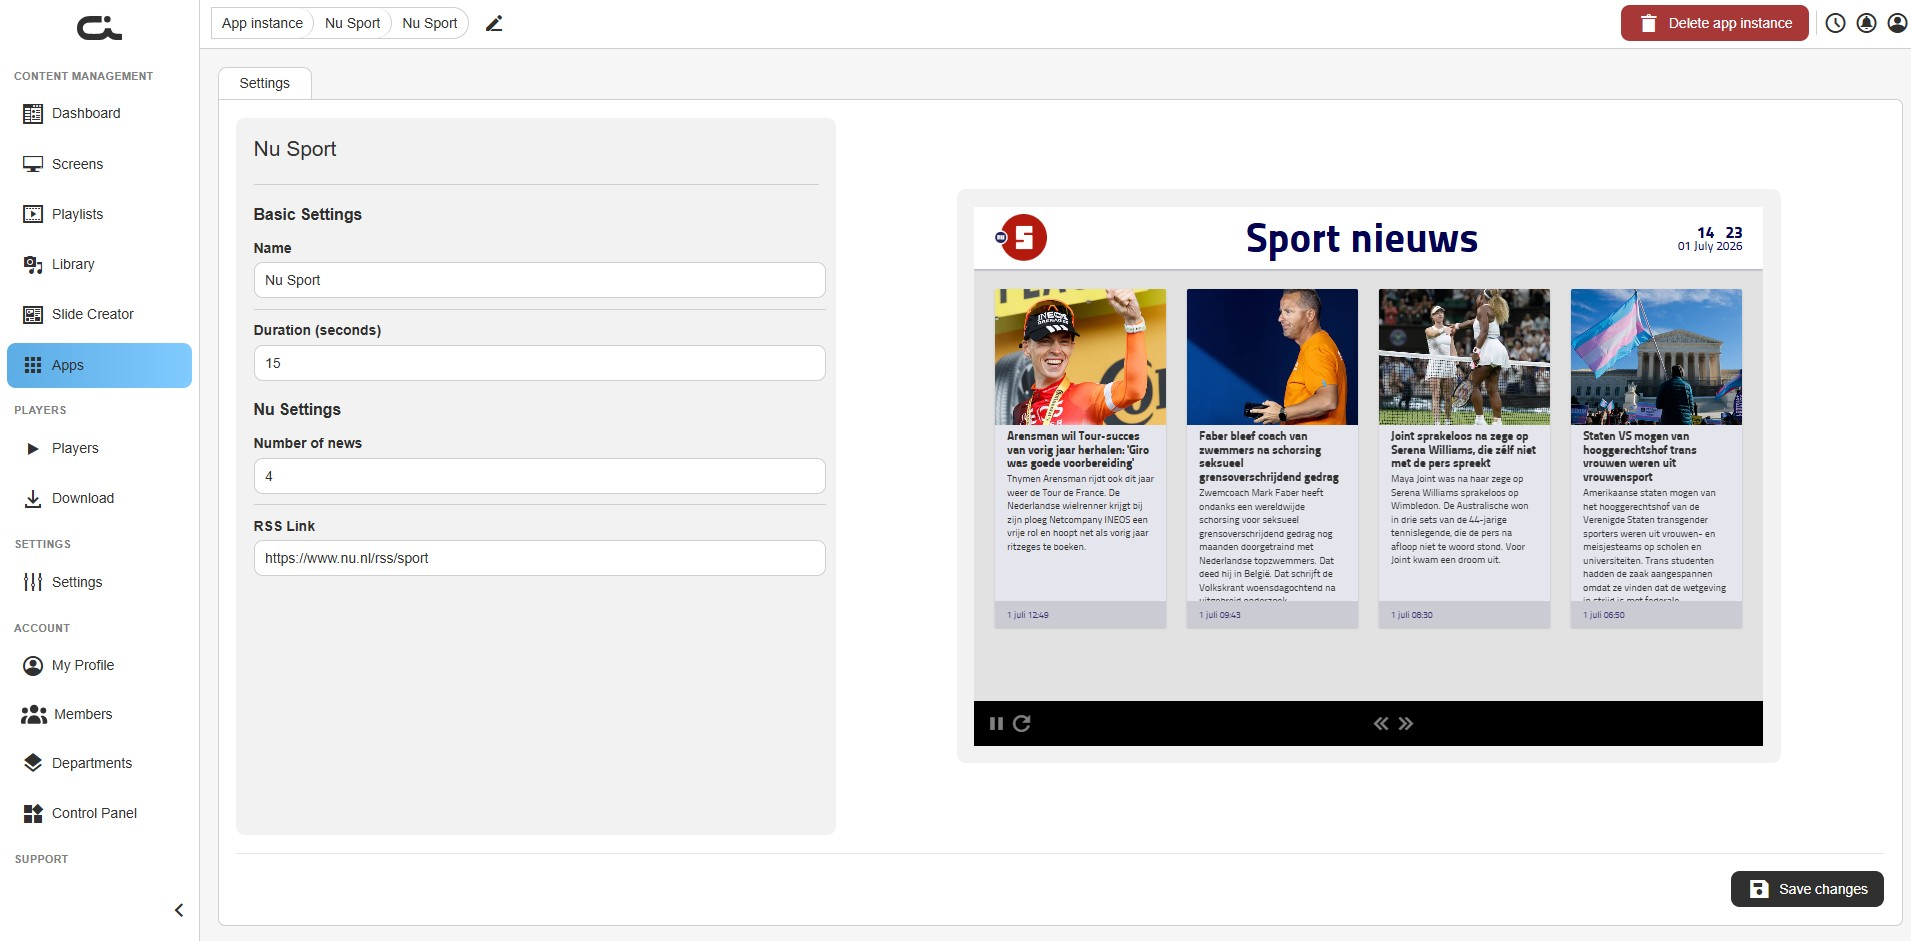
Set the following:
- Name: A label for this instance
- Duration (seconds): How long the app shows when it plays (default 15)
Step 2: Set the news options
Under Nu Settings, set:
- Number of news: How many news items to show
- RSS Link: The source feed the app reads from. This comes pre-filled with the NU.nl sport feed, so you can leave it as is. To show a different NU.nl channel instead, paste that feed's address here
When the preview looks right, click Save changes at the bottom-right.
The news is pulled live, so the player needs an internet connection to keep it current.
Step 3: Use the app
Once saved, add the instance to a screen or playlist just like any other app (see Using Apps in Your Content). The news refreshes on its own. If you later change the number of news items or the RSS link, remember to click Save changes again.
NU Tech
The NU Tech app shows the technology news channel from NU.nl. The app supplies the articles, so there's nothing to write or maintain. You choose how many stories to show, and you can point it at a different NU.nl feed if you want.
Step 1: Set the basic settings
After creating an instance, you land on the Settings tab. The left side holds the settings; the right side shows a live preview of the news channel.
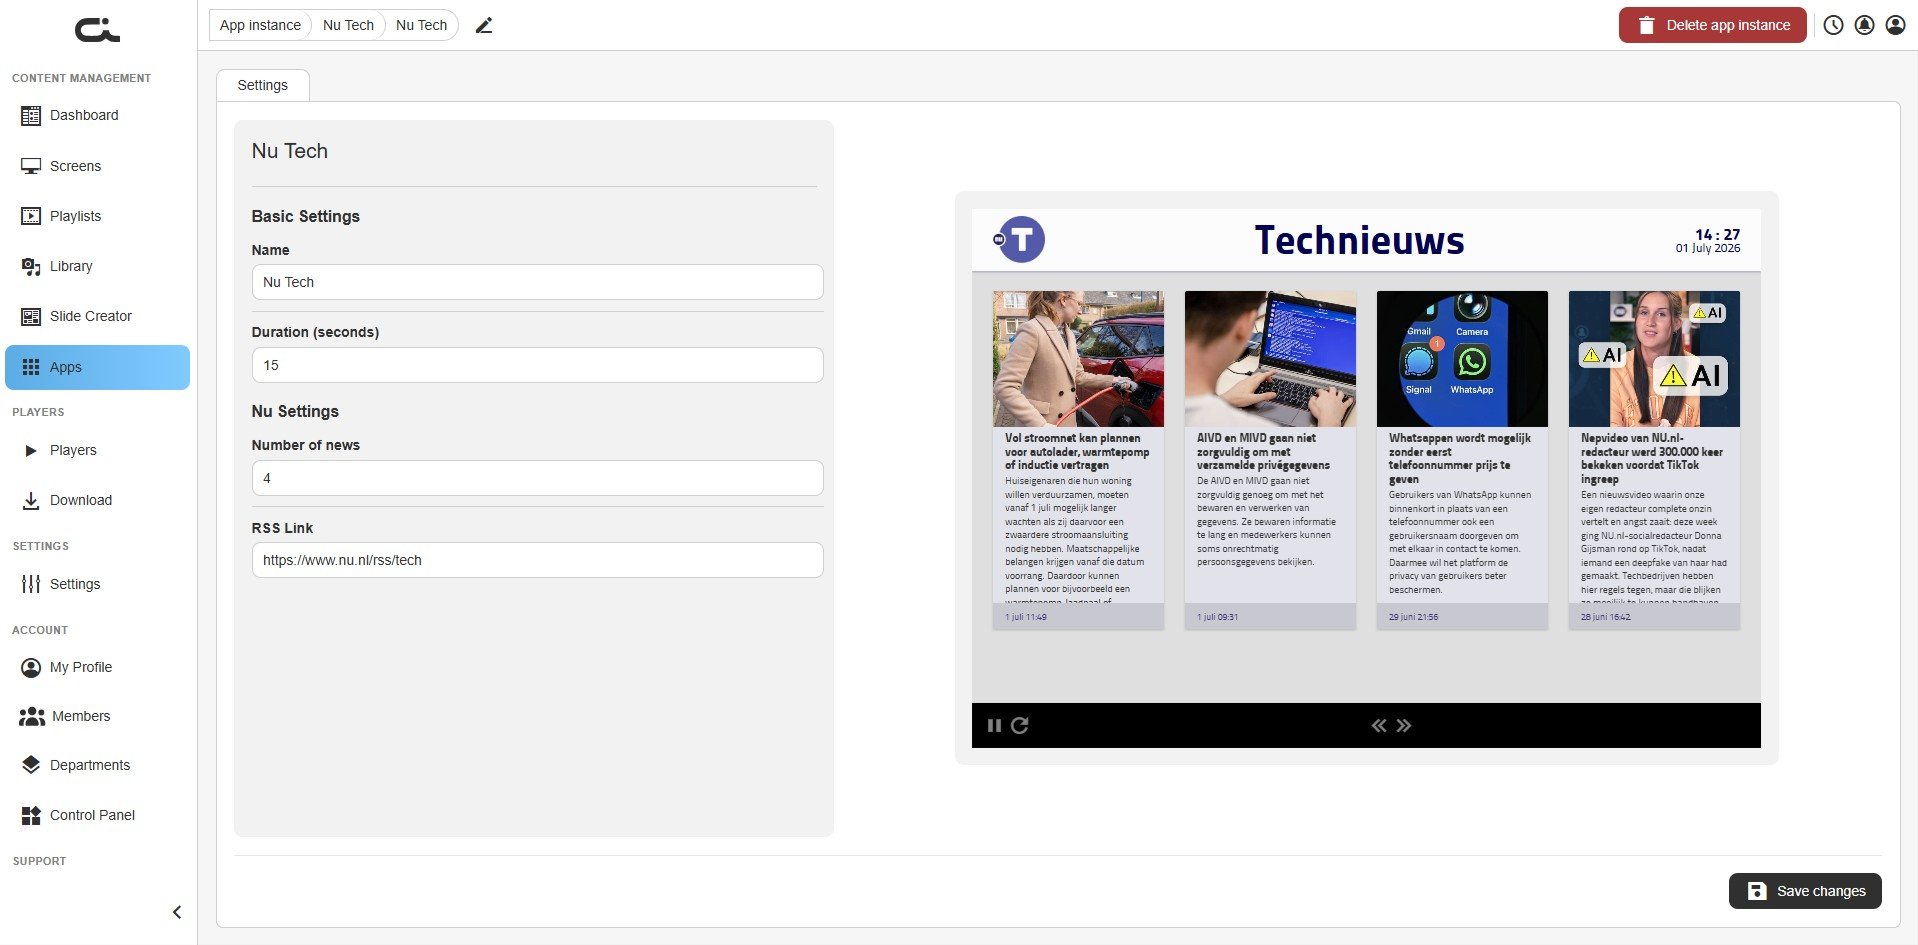
Set the following:
- Name: A label for this instance
- Duration (seconds): How long the app shows when it plays (default 15)
Step 2: Set the news options
Under Nu Settings, set:
- Number of news: How many news items to show
- RSS Link: The source feed the app reads from. This comes pre-filled with the NU.nl tech feed, so you can leave it as is. To show a different NU.nl channel instead, paste that feed's address here
When the preview looks right, click Save changes at the bottom-right.
The news is pulled live, so the player needs an internet connection to keep it current.
Step 3: Use the app
Once saved, add the instance to a screen or playlist just like any other app (see Using Apps in Your Content). The news refreshes on its own. If you later change the number of news items or the RSS link, remember to click Save changes again.
NU Video
The NU Video app plays the video news channel from NU.nl. Unlike the other NU.nl channels, which show text articles, this one plays video clips, so it needs almost no setup. The app supplies the videos and keeps them current on its own.
Step 1: Name the instance
After creating an instance, you land on the Settings tab. The left side holds the settings; the right side shows a live preview of the video channel playing.
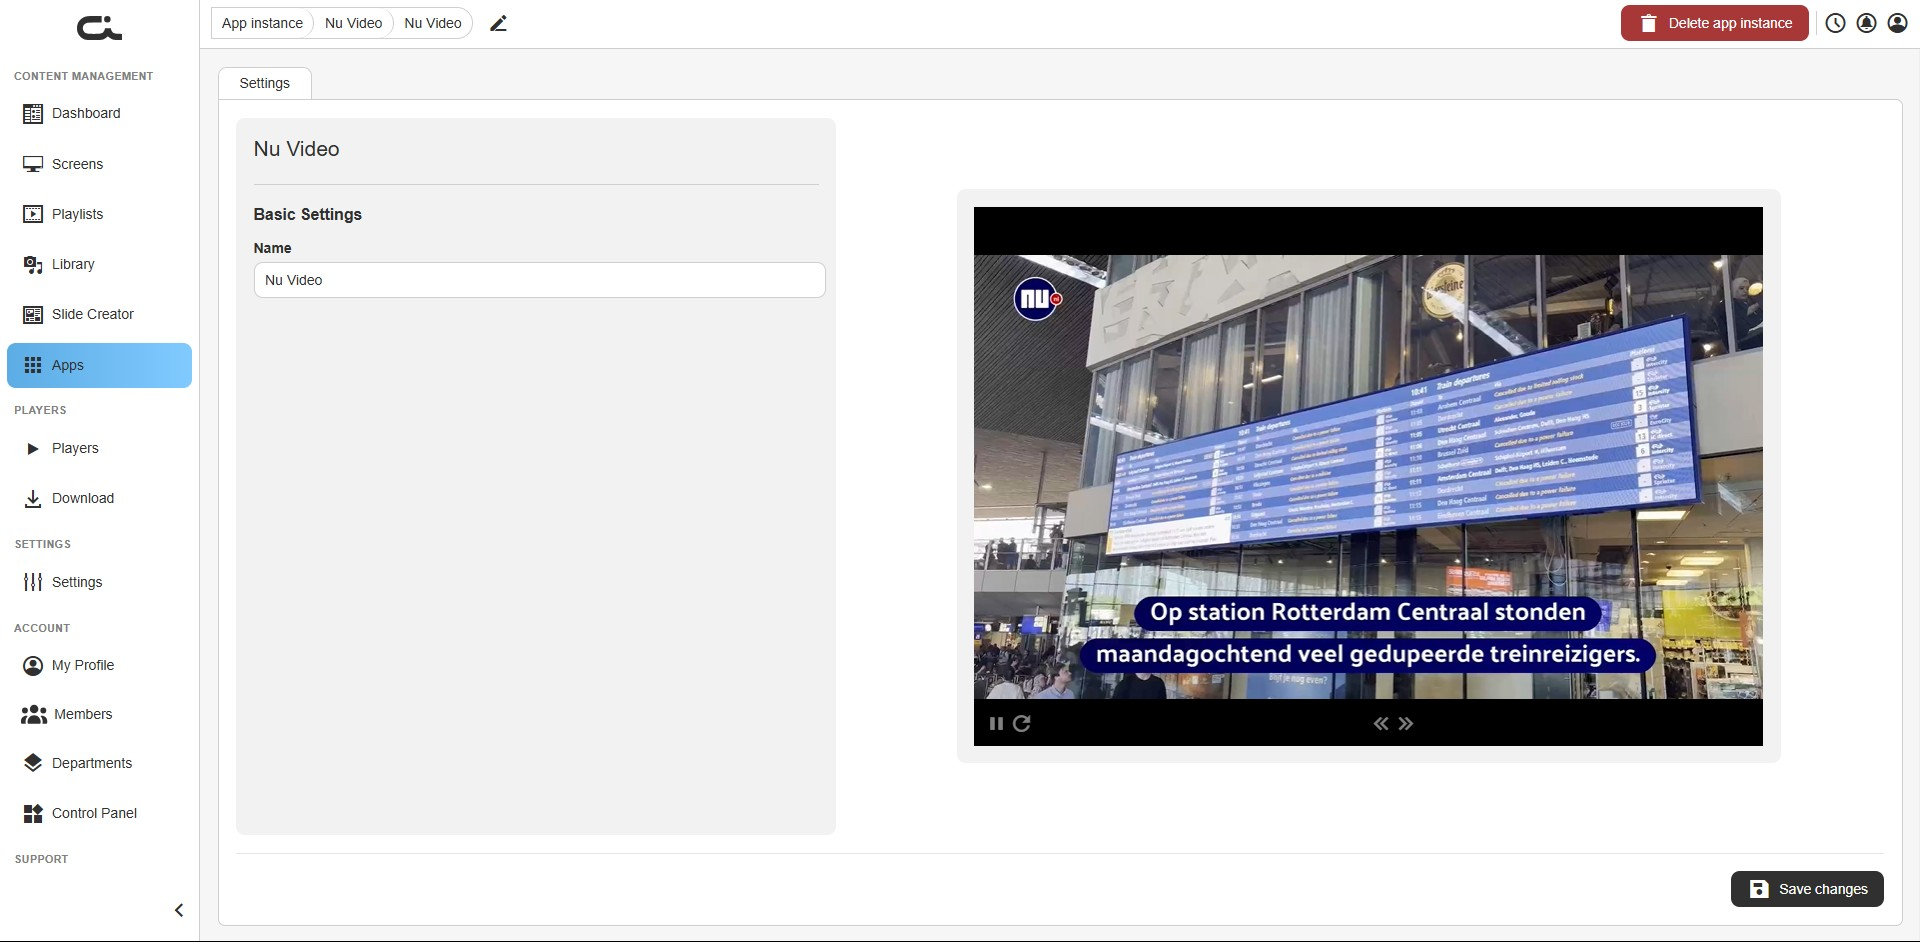
- Name: A label for this instance. This is the only setting, the video content and its length are handled automatically
When the preview is playing, click Save changes at the bottom-right.
The videos stream from NU.nl, so the player needs an internet connection to play them.
Step 2: Use the app
Once saved, add the instance to a screen or playlist just like any other app (see Using Apps in Your Content). The channel plays and refreshes on its own, with nothing more to maintain.
NU.nl News
The NU.nl News app shows the general news channel from NU.nl. The app supplies the articles, so there's nothing to write or maintain. You choose how many stories to show, and you can point it at a different NU.nl feed if you want.
Step 1: Set the basic settings
After creating an instance, you land on the Settings tab. The left side holds the settings; the right side shows a live preview of the news channel.
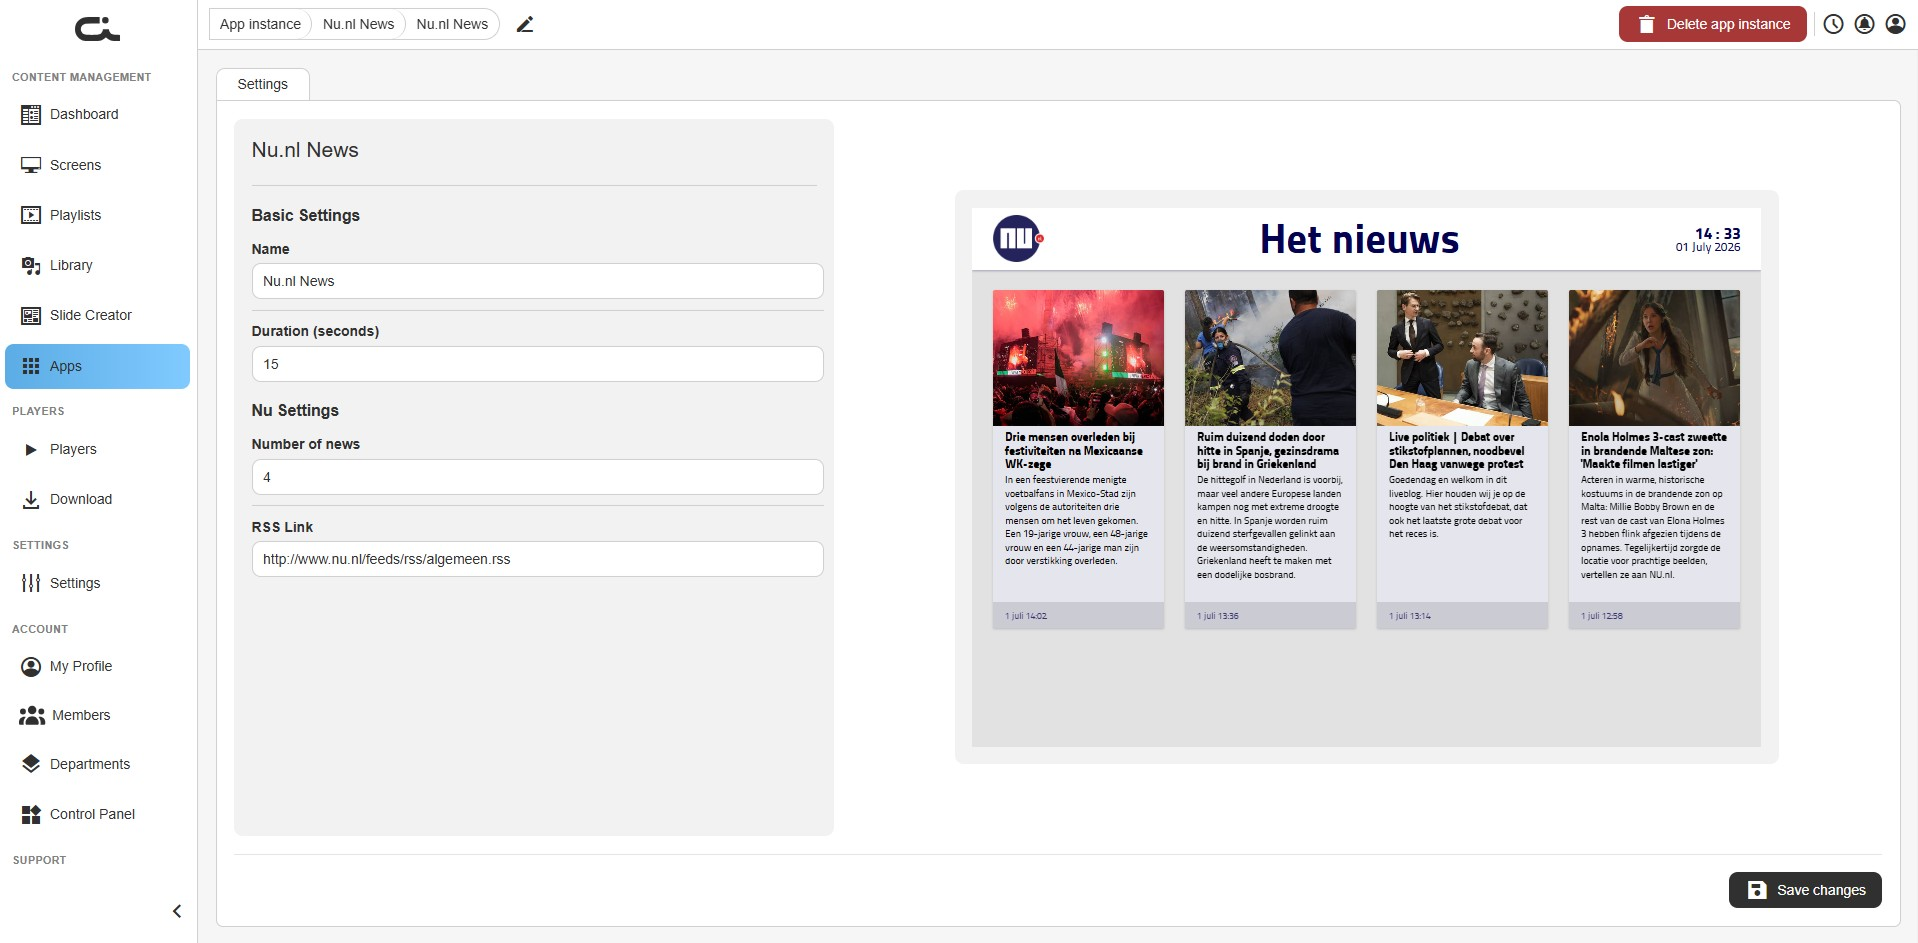
Set the following:
- Name: A label for this instance
- Duration (seconds): How long the app shows when it plays (default 15)
Step 2: Set the news options
Under Nu Settings, set:
- Number of news: How many news items to show
- RSS Link: The source feed the app reads from. This comes pre-filled with the NU.nl general feed, so you can leave it as is. To show a different NU.nl channel instead, paste that feed's address here
When the preview looks right, click Save changes at the bottom-right.
The news is pulled live, so the player needs an internet connection to keep it current.
Step 3: Use the app
Once saved, add the instance to a screen or playlist just like any other app (see Using Apps in Your Content). The news refreshes on its own. If you later change the number of news items or the RSS link, remember to click Save changes again.
PDF Interactive Viewer
The PDF Interactive Viewer app shows a PDF document on screen and lets you page through it. It's a good fit for menus, brochures, and reports on a touch screen, where viewers tap through the pages, or you can have it advance the pages automatically.
Step 1: Upload your PDF
After creating an instance, you land on the Settings tab. The left side holds the settings; the right side shows a live preview of the document once it's uploaded.
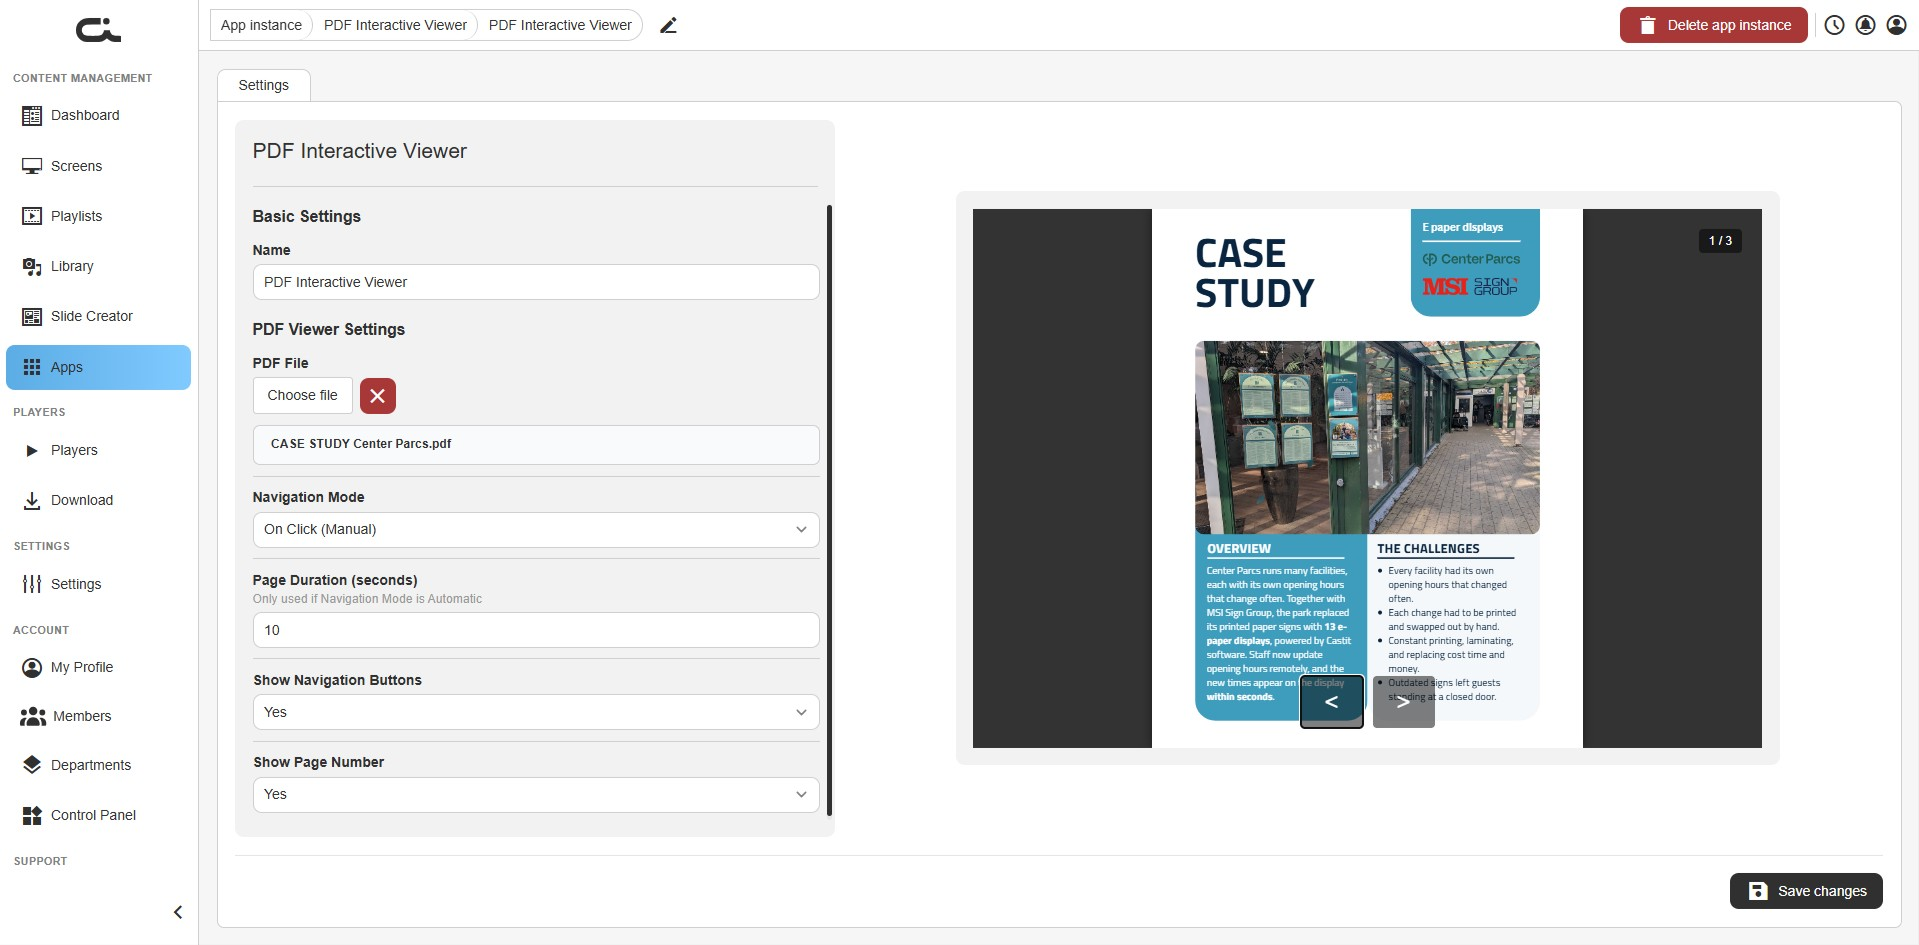
- Name: A label for this instance
- PDF File: Click Choose file and select the PDF you want to show. The file name appears once it's chosen. Use the X next to it to clear the file and pick a different one
Step 2: Choose how pages advance
- Navigation Mode: Pick how the pages turn:
- On Click (Manual): Pages turn only when someone taps or clicks the navigation buttons. Best for touch screens
- Automatic: Pages turn on their own after a set time
- Page Duration (seconds): How long each page shows before advancing. This is only used when Navigation Mode is set to Automatic
Step 3: Set the display options
- Show Navigation Buttons: Show or hide the on-screen previous/next arrows
- Show Page Number: Show or hide the current page indicator (for example, 1 / 3)
When the preview looks right, click Save changes at the bottom-right.
Step 4: Use the app
Once saved, add the instance to a screen or playlist just like any other app (see Using Apps in Your Content). To show a different document, upload a new PDF and click Save changes again.
PDF Viewer
The PDF Viewer app displays a static PDF document as on-screen content, paging through it automatically. It's the simpler counterpart to the PDF Interactive Viewer: use PDF Viewer when you just want a document to play through on its own, and PDF Interactive Viewer when you want people to tap through it.
Step 1: Set the basic settings and upload your PDF
After creating an instance, you land on the Settings tab. The left side holds the settings; the right side shows a live preview of the document once it's uploaded.
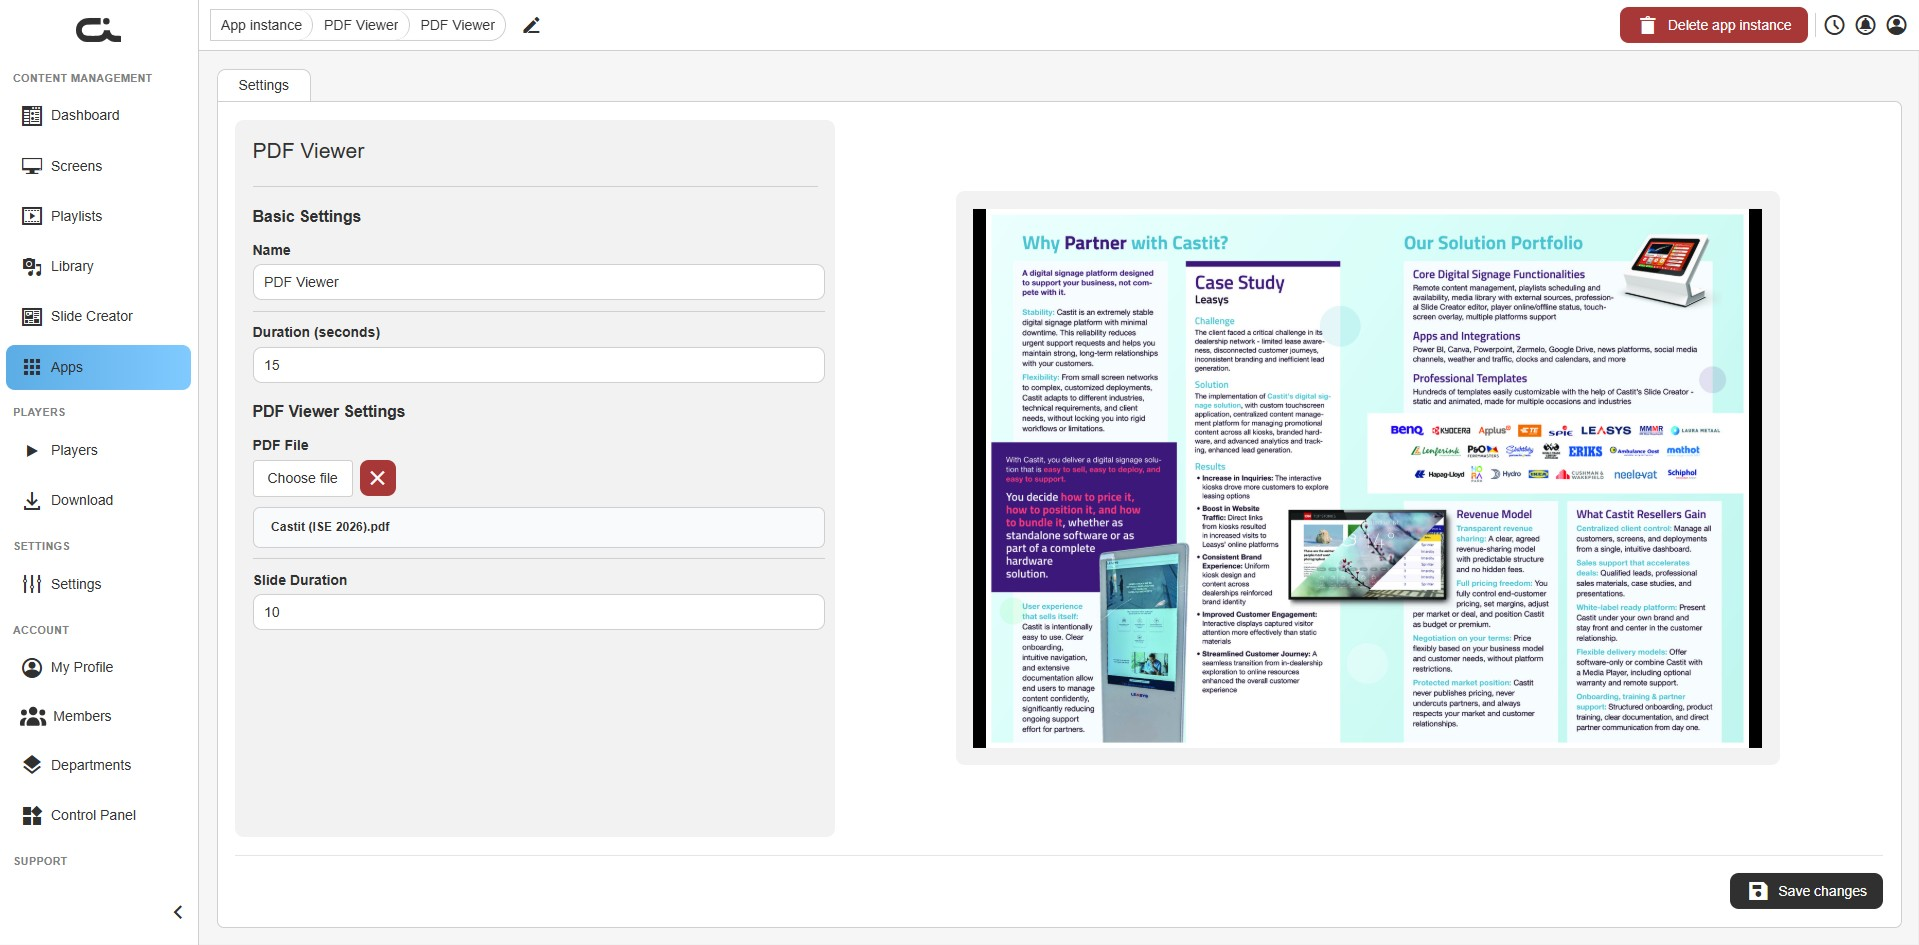
- Name: A label for this instance
- Duration (seconds): How long the app shows when it plays (default 15)
- PDF File: Click Choose file and select the PDF you want to show. The file name appears once it's chosen. Use the X next to it to clear the file and pick a different one
Step 2: Set the page pacing
- Slide Duration: How long each page shows before the app advances to the next one (default 10)
When the preview looks right, click Save changes at the bottom-right.
Step 3: Use the app
Once saved, add the instance to a screen or playlist just like any other app (see Using Apps in Your Content). The document pages through on its own. To show a different document, upload a new PDF and click Save changes again.
Playlist Trigger Application
The Playlist Trigger Application plays a chosen playlist on a screen when a physical Nexmosphere sensor fires, for example when someone steps close to a display or lifts a product off a shelf. It's an automation tool rather than visible content, so it has no on-screen preview of its own. Use it to make screens react to what people do in front of them.
This is a technical app that assumes you have a compatible Nexmosphere sensor connected to the player and know its XTalk channel.
Step 1: Set the basic settings
After creating an instance, you land on the Settings tab.
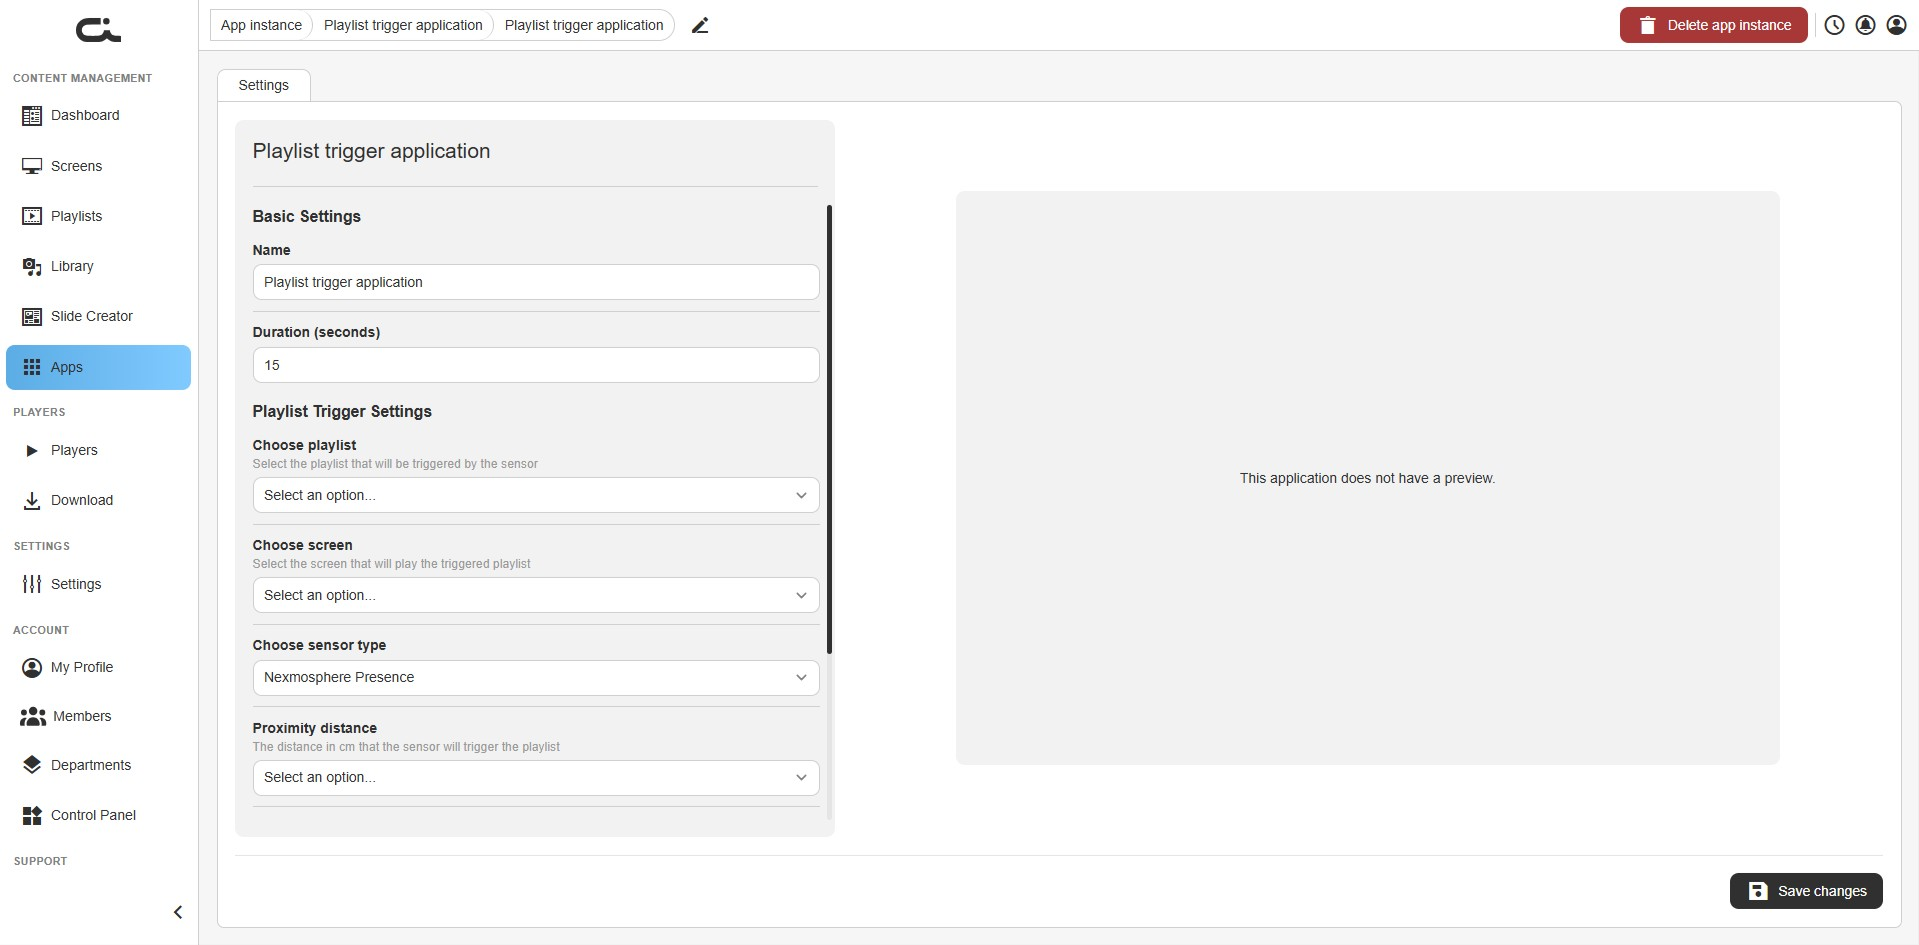
- Name: A label for this instance
- Duration (seconds): How long the app occupies when it plays (default 15)
Step 2: Choose what to trigger
Under Playlist Trigger Settings:
- Choose playlist: The playlist the sensor will trigger
- Choose screen: The screen that will play the triggered playlist
Step 3: Configure the sensor
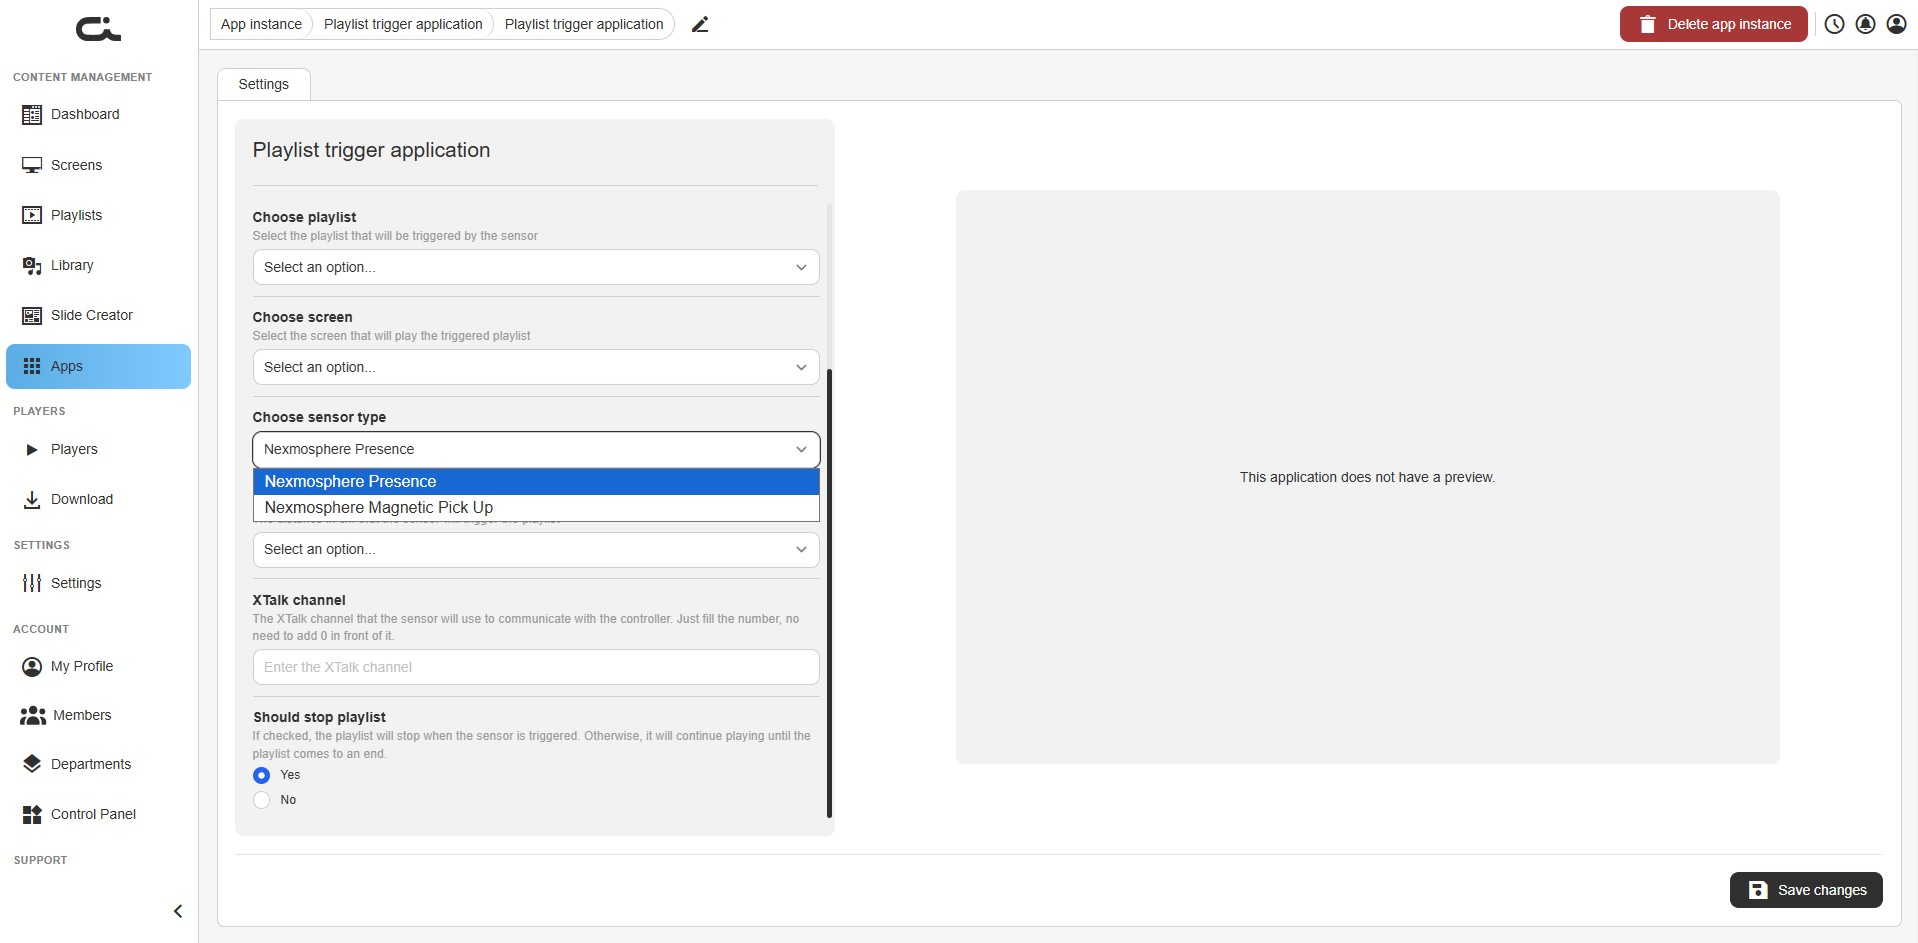
- Choose sensor type: Pick the connected sensor, either Nexmosphere Presence (detects someone nearby) or Nexmosphere Magnetic Pick Up (detects a product being lifted)
- Proximity distance: For a presence sensor, the distance in centimeters at which it triggers the playlist
- XTalk channel: The XTalk channel the sensor uses to communicate with the controller. Enter the number only, with no leading 0
- Should stop playlist: Choose Yes to stop the triggered playlist as soon as the sensor fires, or No to let it finish playing to the end
When everything is set, click Save changes at the bottom-right.
Step 4: Use the app
Once saved, add the instance to the screen or playlist where you want the trigger active (see Using Apps in Your Content). From then on, the sensor drives the chosen playlist automatically. If you later change the playlist, screen, sensor, or channel, remember to click Save changes again.
RainViewer.com Weather Radar
The RainViewer.com Weather Radar app shows an accurate, real-time weather radar map centered on a location you choose. It can animate the radar so you see how the weather is moving, and it refreshes on its own. For a richer weather map with more layers (wind, temperature, rain) and forecast timing, see Windy.com Weather Radar below.
Step 1: Set the basic settings
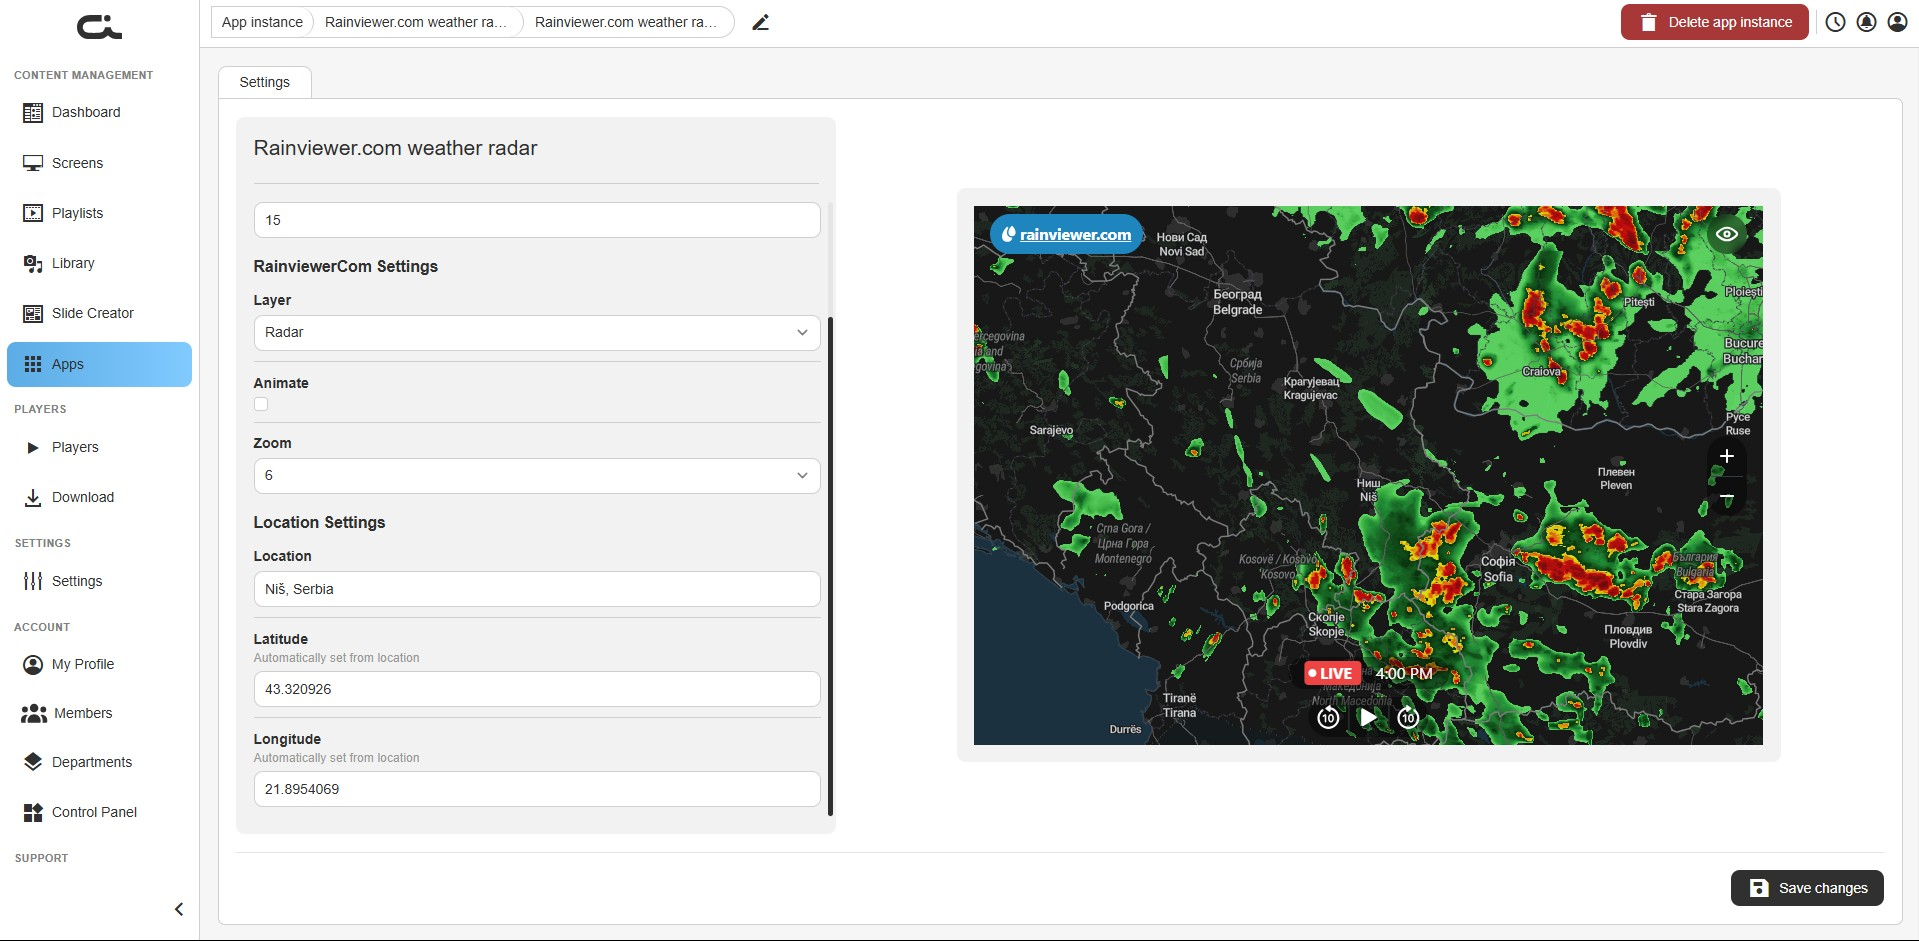
After creating an instance, you land on the Settings tab. The left side holds the settings; the right side shows a live preview of the radar map.
- Name: A label for this instance
- Duration (seconds): How long the app shows when it plays (default 15)
Step 2: Set the radar options
Under RainviewerCom Settings:
- Layer: What the map shows (for example, Radar)
- Animate: Tick this to animate the radar over time so you can see the weather moving. Leave it off for a still map
- Zoom: How close in the map is centered. A higher number zooms in tighter on your location
Step 3: Set the location
Under Location Settings:
- Location: Type the city or place you want the map centered on (for example,
Niš, Serbia) - Latitude / Longitude: These fill in automatically from the location you enter, so you normally don't need to touch them
When the preview shows the right area, click Save changes at the bottom-right.
The radar map is pulled live, so the player needs an internet connection to keep it current.
Step 4: Use the app
Once saved, add the instance to a screen or playlist just like any other app (see Using Apps in Your Content). The map keeps refreshing on its own. If you later change the location, layer, or zoom, remember to click Save changes again.
Windy.com Weather Radar
The Windy.com Weather Radar app shows a rich, detailed weather map centered on a location you choose. Compared with RainViewer.com Weather Radar, Windy offers more weather layers (temperature, rain, wind, and more) and lets you set the forecast time, so it's the better choice when you want a fuller weather visualization.
Step 1: Set the basic settings
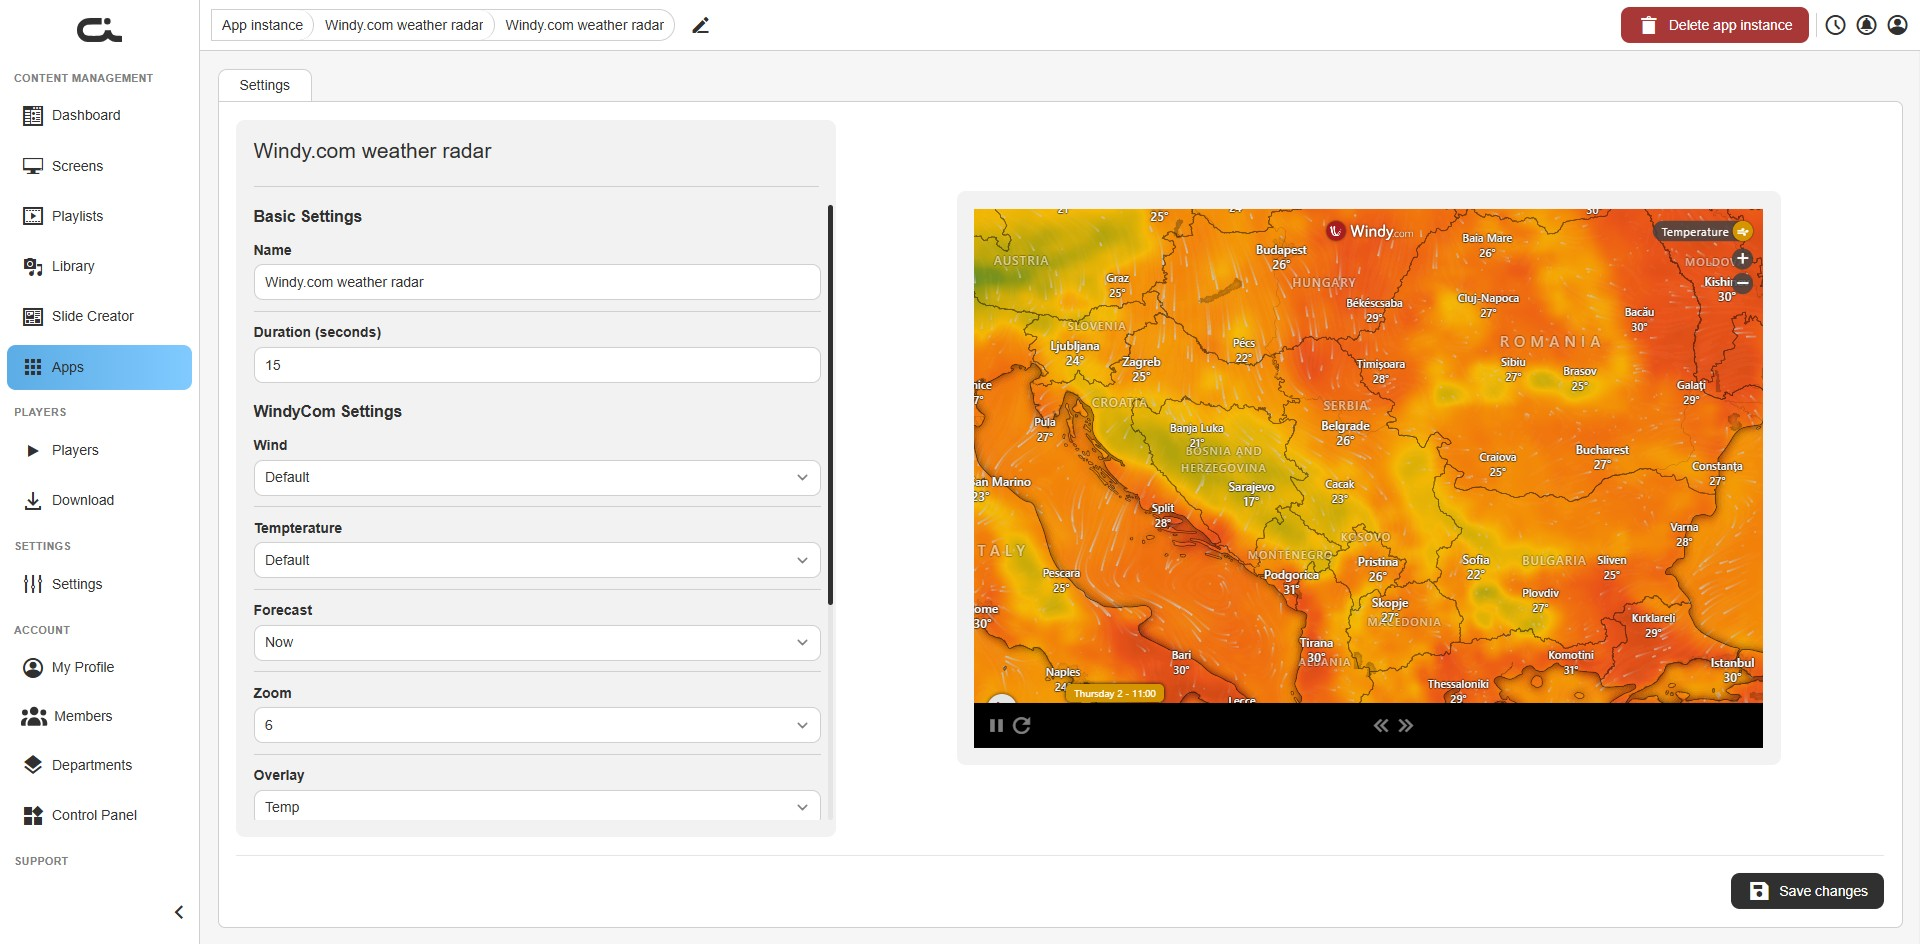
After creating an instance, you land on the Settings tab. The left side holds the settings; the right side shows a live preview of the weather map.
- Name: A label for this instance
- Duration (seconds): How long the app shows when it plays (default 15)
Step 2: Set the map options
Under WindyCom Settings:
- Wind: How wind is shown on the map (leave as Default unless you have a preference)
- Temperature: How temperature is shown (leave as Default unless you have a preference)
- Forecast: The forecast time to show, for example Now for current conditions
- Zoom: How close in the map is centered. A higher number zooms in tighter on your location
- Overlay: The main weather layer the map displays, for example Temp for temperature or Rain for precipitation
Step 3: Set the location
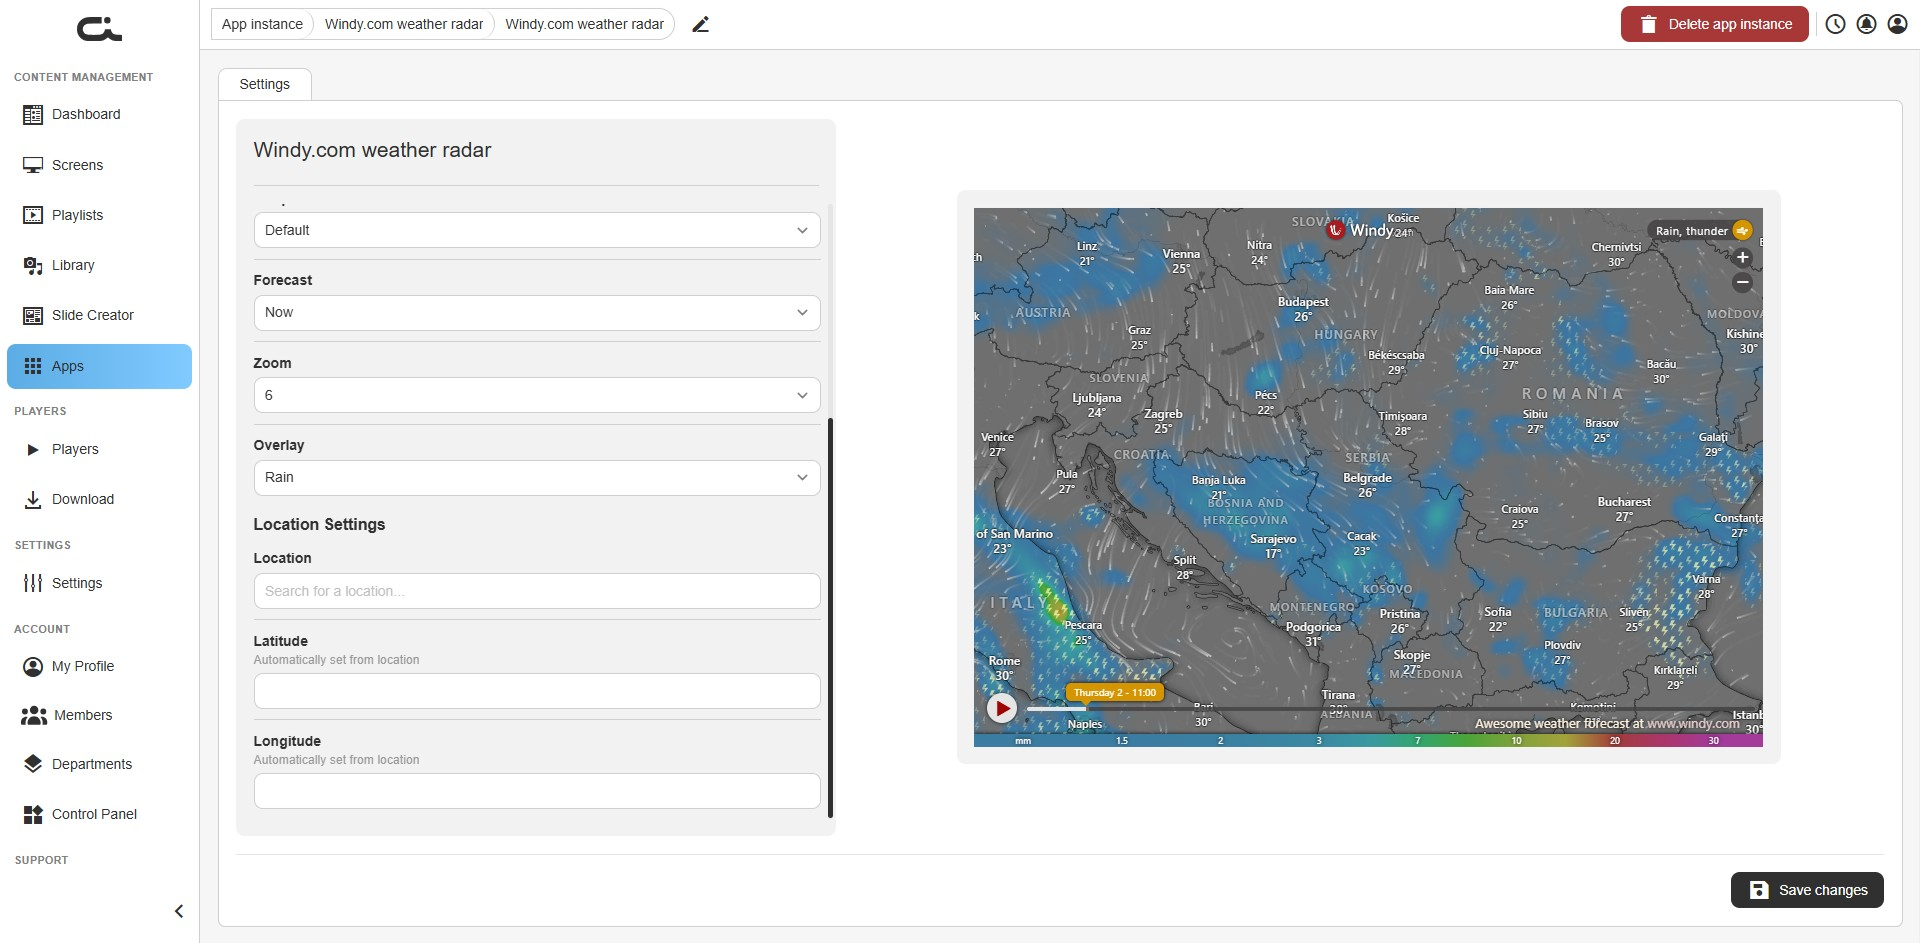
Under Location Settings:
- Location: Search for the city or place you want the map centered on
- Latitude / Longitude: These fill in automatically from the location you pick, so you normally don't need to touch them
When the preview shows the right area and layer, click Save changes at the bottom-right.
The weather map is pulled live, so the player needs an internet connection to keep it current.
Step 4: Use the app
Once saved, add the instance to a screen or playlist just like any other app (see Using Apps in Your Content). The map keeps refreshing on its own. If you later change the location, overlay, or any other option, remember to click Save changes again.
Real Estate Agents
The Real Estate Agents app publishes property listings on screen via the ERA Makelaardij Immotool integration. You point it at your property feed, and it shows each listing with its photo, price, features, and a QR code, refreshing as your listings change.
Step 1: Set the basic settings
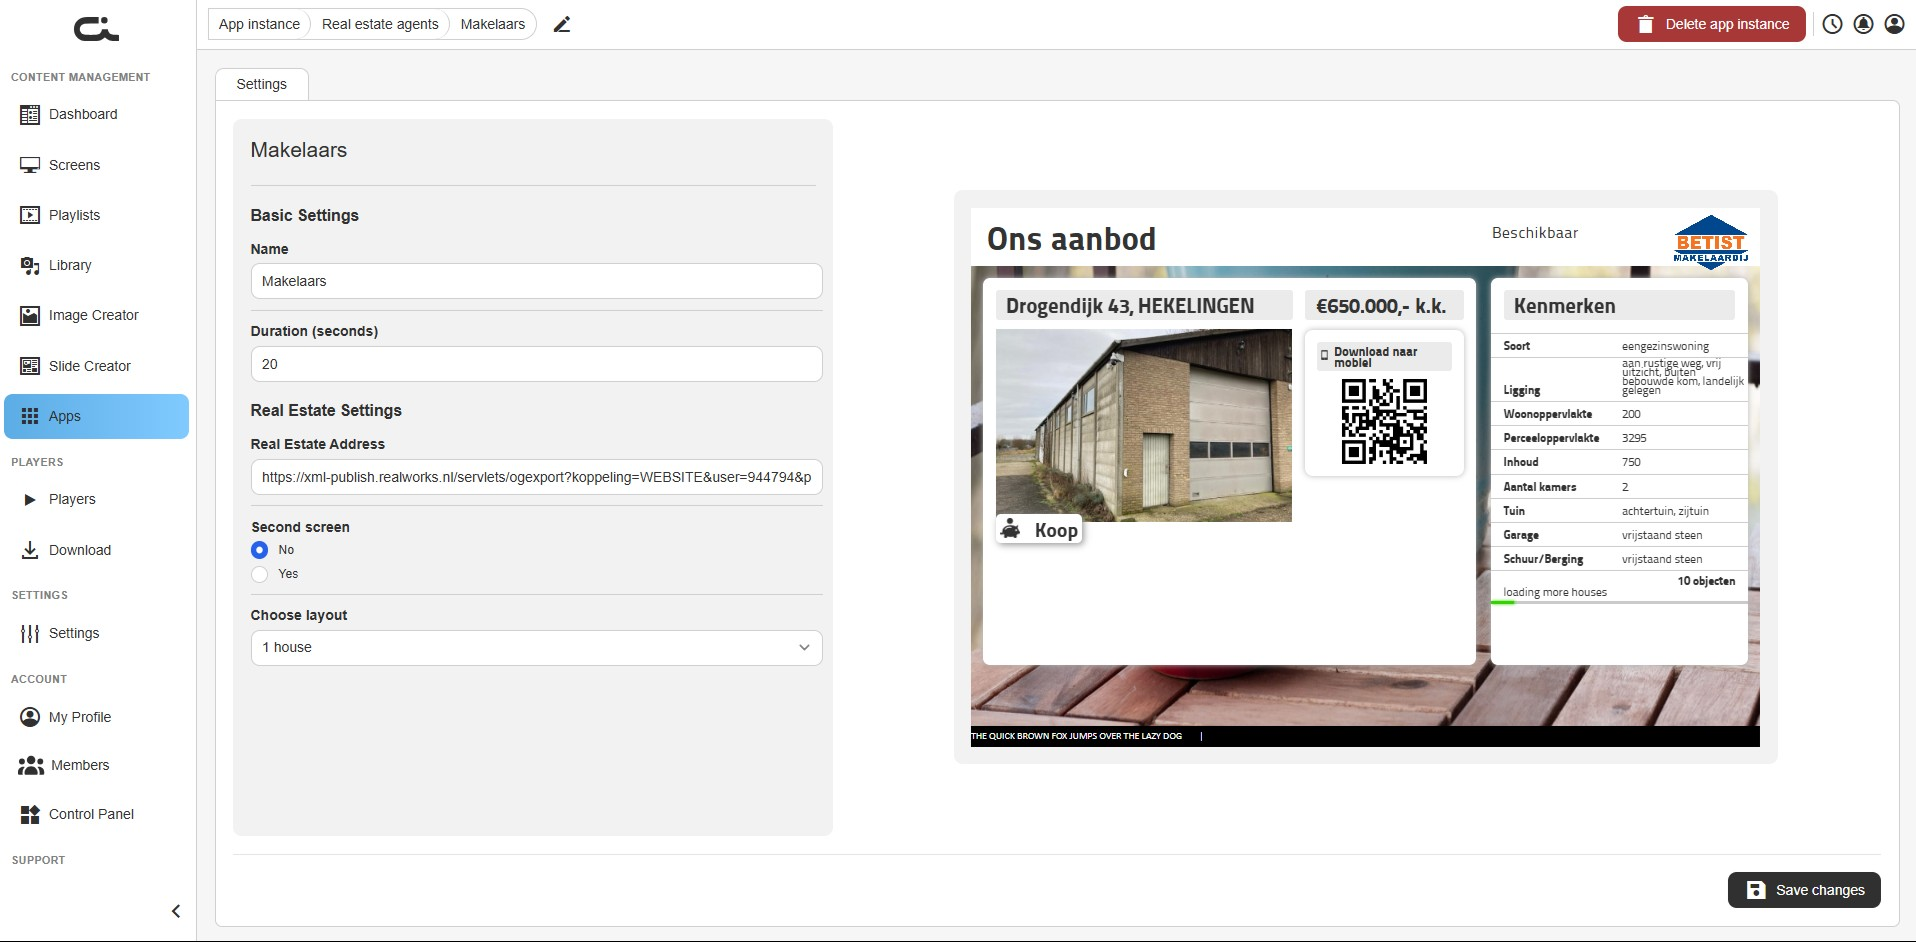
After creating an instance, you land on the Settings tab. The left side holds the settings; the right side shows a live preview of a property listing.
- Name: A label for this instance
- Duration (seconds): How long the app shows when it plays (default 20)
Step 2: Connect your property feed
Under Real Estate Settings:
- Real Estate Address: Paste the address of your property feed (the export URL from your real estate system). This is where the app reads your listings from
- Second screen: Choose Yes if you're running the app across a paired second display; otherwise leave it on No
- Choose layout: Pick how listings are shown, for example 1 house to feature a single property at a time
When the preview shows your listings, click Save changes at the bottom-right.
The listings are pulled live from the feed, so the player needs an internet connection to stay current.
Step 3: Use the app
Once saved, add the instance to a screen or playlist just like any other app (see Using Apps in Your Content). The listings refresh on their own as your feed updates. If you later change the feed address or layout, remember to click Save changes again.
Talent Gezocht Top Vacancies
The Talent Gezocht Top Vacancies app shows top job vacancies from the Rotterdam port via talent-gezocht.nl. Each listing appears with the employer, the role, a short description, and an apply QR code. The app supplies the vacancies, so there's nothing to write or maintain.
Step 1: Set the basic settings
After creating an instance, you land on the Settings tab. The left side holds the settings; the right side shows a live preview of the vacancies board.
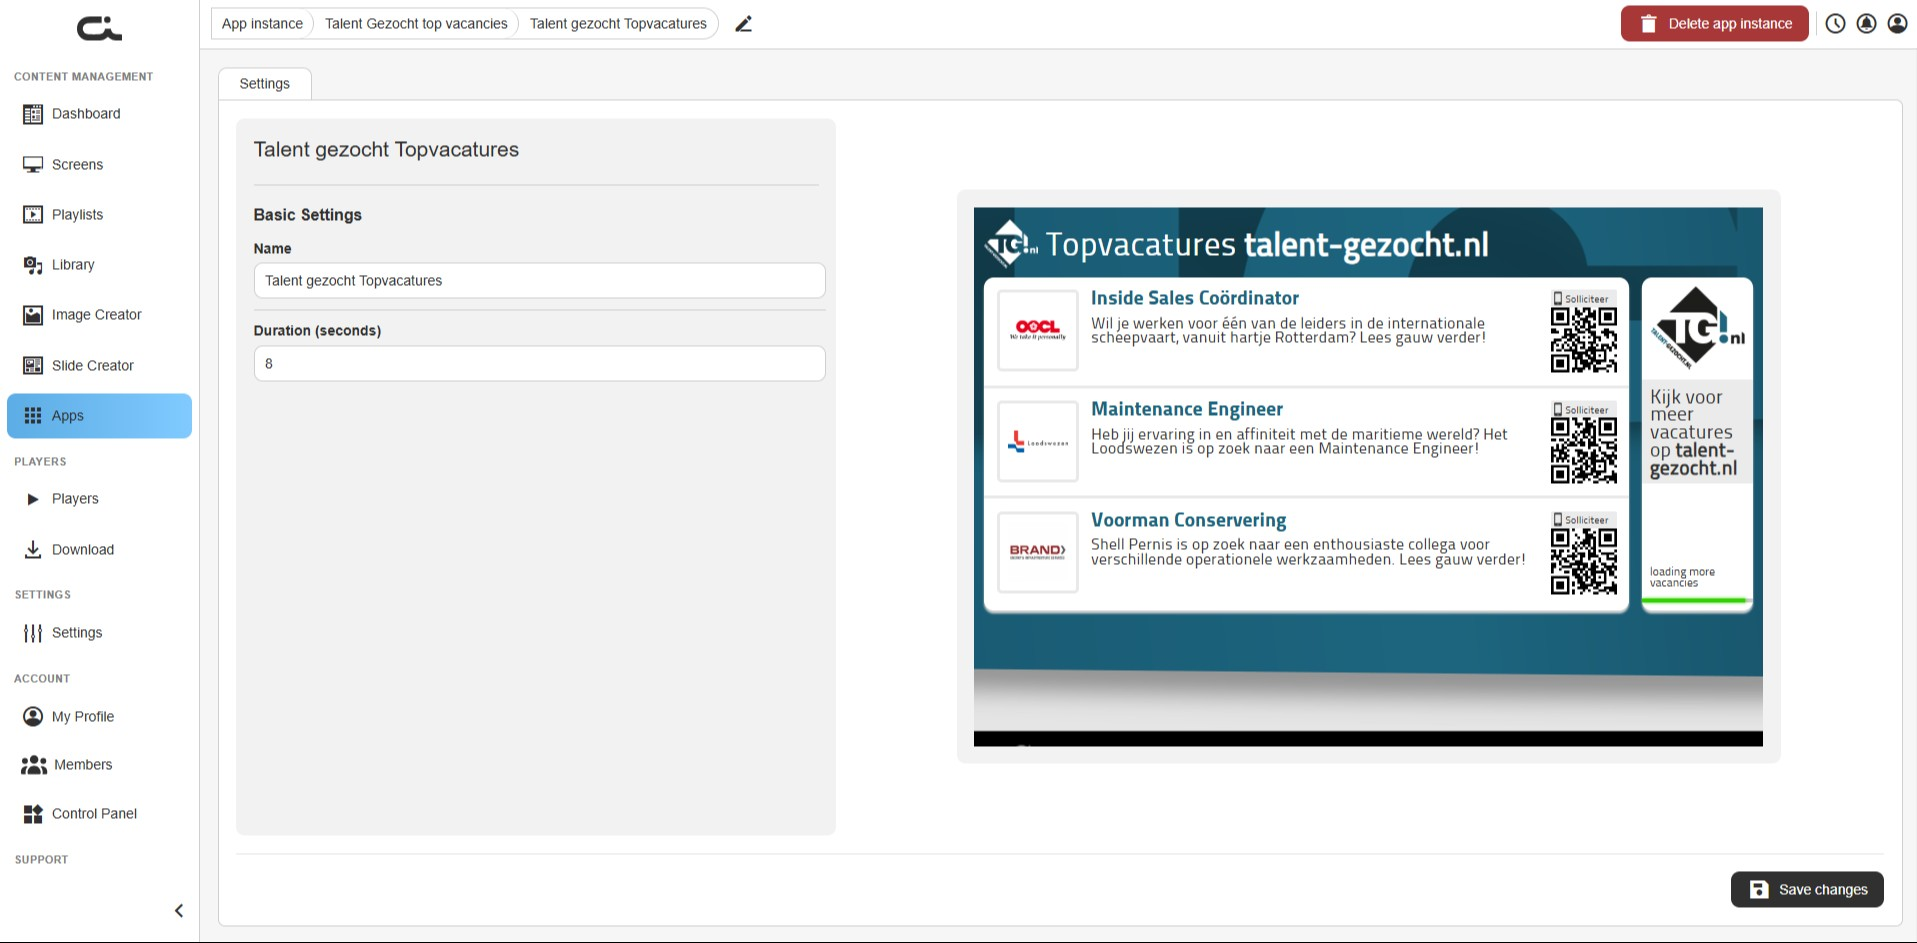
This app has only two settings:
- Name: A label for this instance
- Duration (seconds): How long the app shows when it plays (default 8)
When the preview looks right, click Save changes at the bottom-right.
The vacancies are pulled live, so the player needs an internet connection to keep them current.
Step 2: Use the app
Once saved, add the instance to a screen or playlist just like any other app (see Using Apps in Your Content). The vacancies refresh on their own, with nothing more to maintain.
Traffic Info
The Traffic Info app shows live traffic information for a location you choose: a map alongside a list of current roadworks and incidents, with distances and delays. It keeps updating on its own, so it's a handy thing to show near an exit or in a lobby.
Step 1: Set the basic settings
After creating an instance, you land on the Settings tab. The left side holds the settings; the right side shows a live preview of the traffic map and reports.
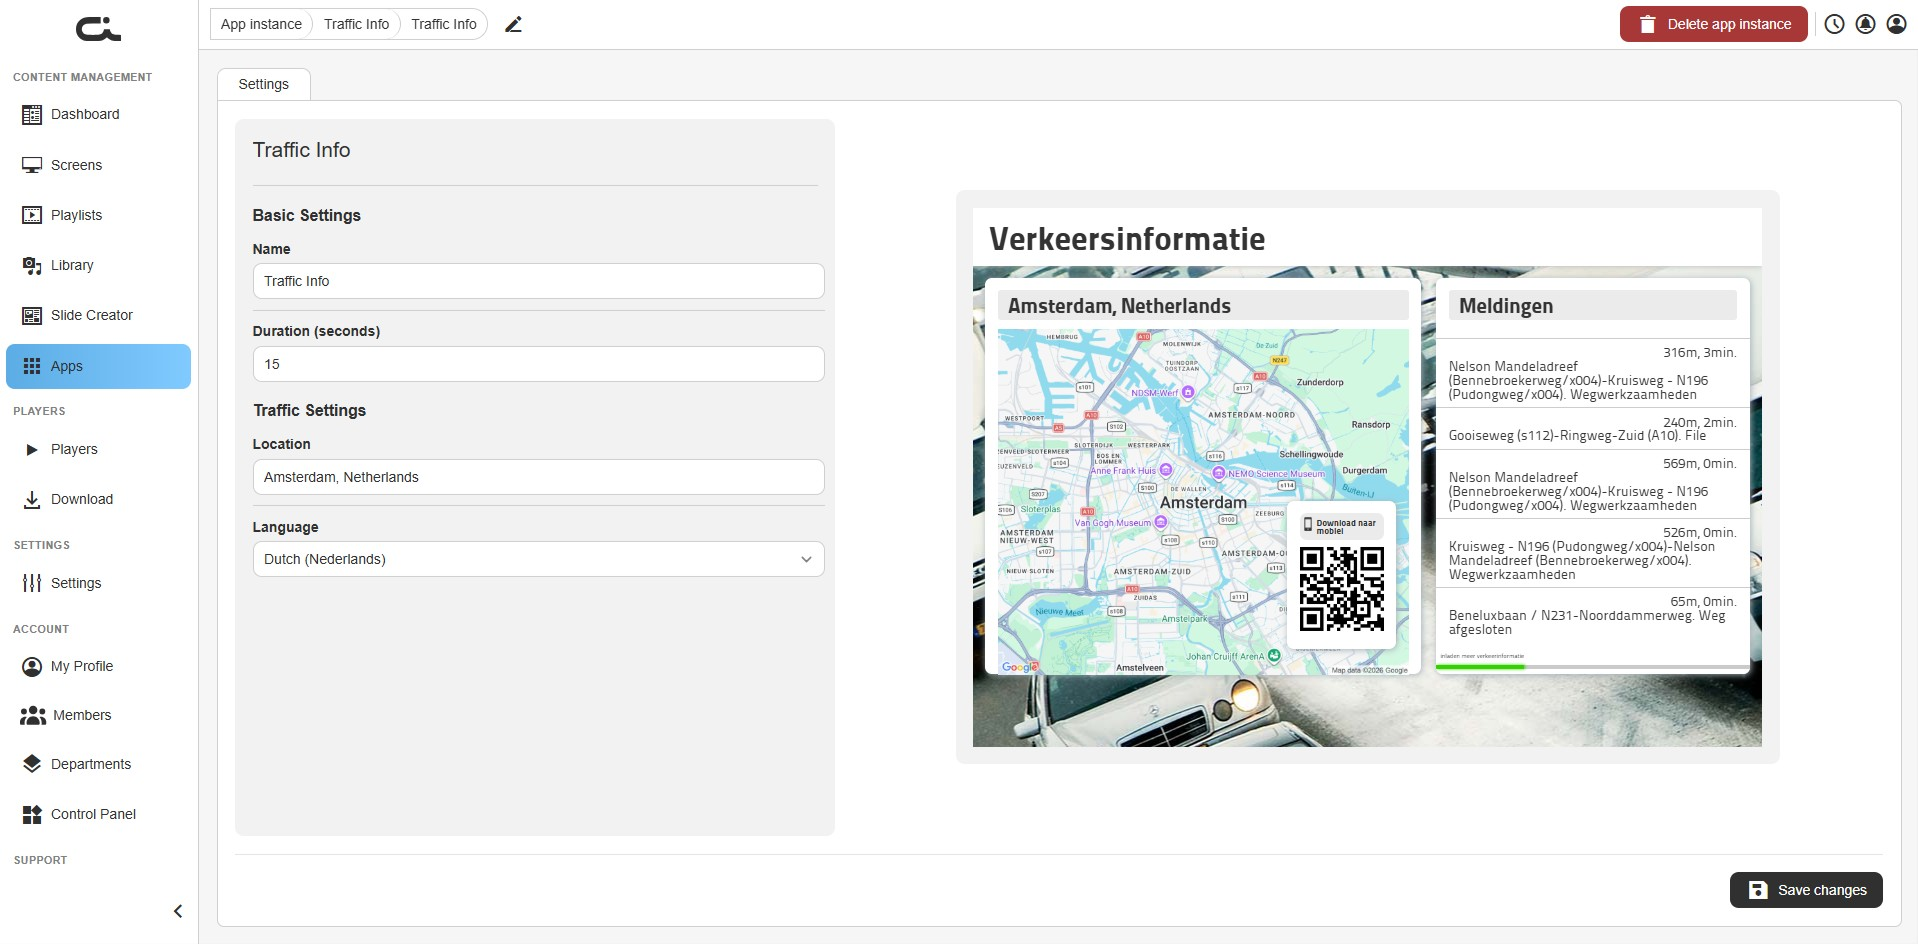
- Name: A label for this instance
- Duration (seconds): How long the app shows when it plays (default 15)
Step 2: Set the location and language
Under Traffic Settings:
- Location: Type the city or area you want traffic information for (for example,
Amsterdam, Netherlands) - Language: The language of the text on the panel
When the preview shows the right area, click Save changes at the bottom-right.
The traffic data is pulled live, so the player needs an internet connection to stay current.
Step 3: Use the app
Once saved, add the instance to a screen or playlist just like any other app (see Using Apps in Your Content). The map and reports refresh on their own. If you later change the location or language, remember to click Save changes again.
Voorne-Putten.nl News
The Voorne-Putten.nl News app shows regional news from the Voorne-Putten area. The app supplies the articles, so there's nothing to write or maintain.
Step 1: Set the basic settings
After creating an instance, you land on the Settings tab. The left side holds the settings; the right side shows a live preview of the news feed.
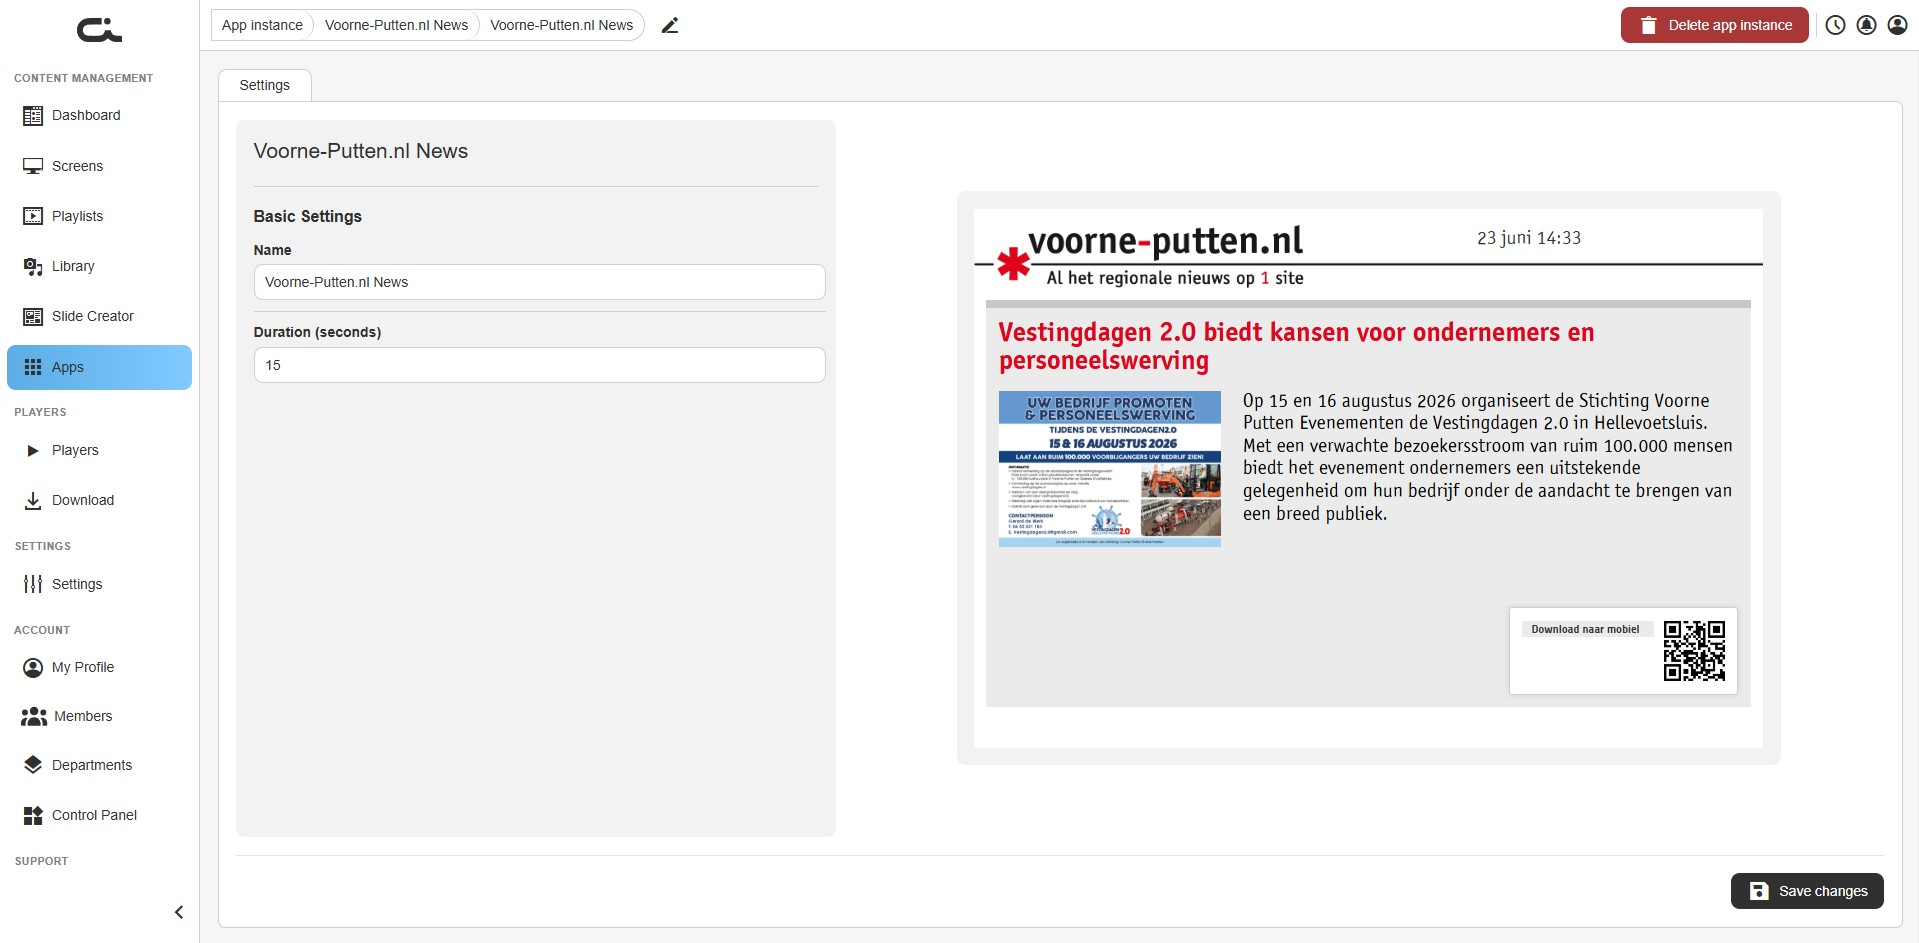
This app has only two settings:
- Name: A label for this instance
- Duration (seconds): How long the app shows when it plays (default 15)
When the preview looks right, click Save changes at the bottom-right.
The news is pulled live, so the player needs an internet connection to keep it current.
Step 2: Use the app
Once saved, add the instance to a screen or playlist just like any other app (see Using Apps in Your Content). The news refreshes on its own, with nothing more to maintain.
Website Embed Into Playlist
The Website Embed Into Playlist app plays any website on your screen as a piece of content. Point it at a URL and it shows that live web page, which is handy for dashboards, intranet pages, booking sites, or any web content you want on a screen.
If a site won't embed, or you want a clean captured image of a page instead of the live site, use Website To Slide instead.
Step 1: Set the basic settings
After creating an instance, you land on the Settings tab. The left side holds the settings; the right side shows a live preview of the web page.
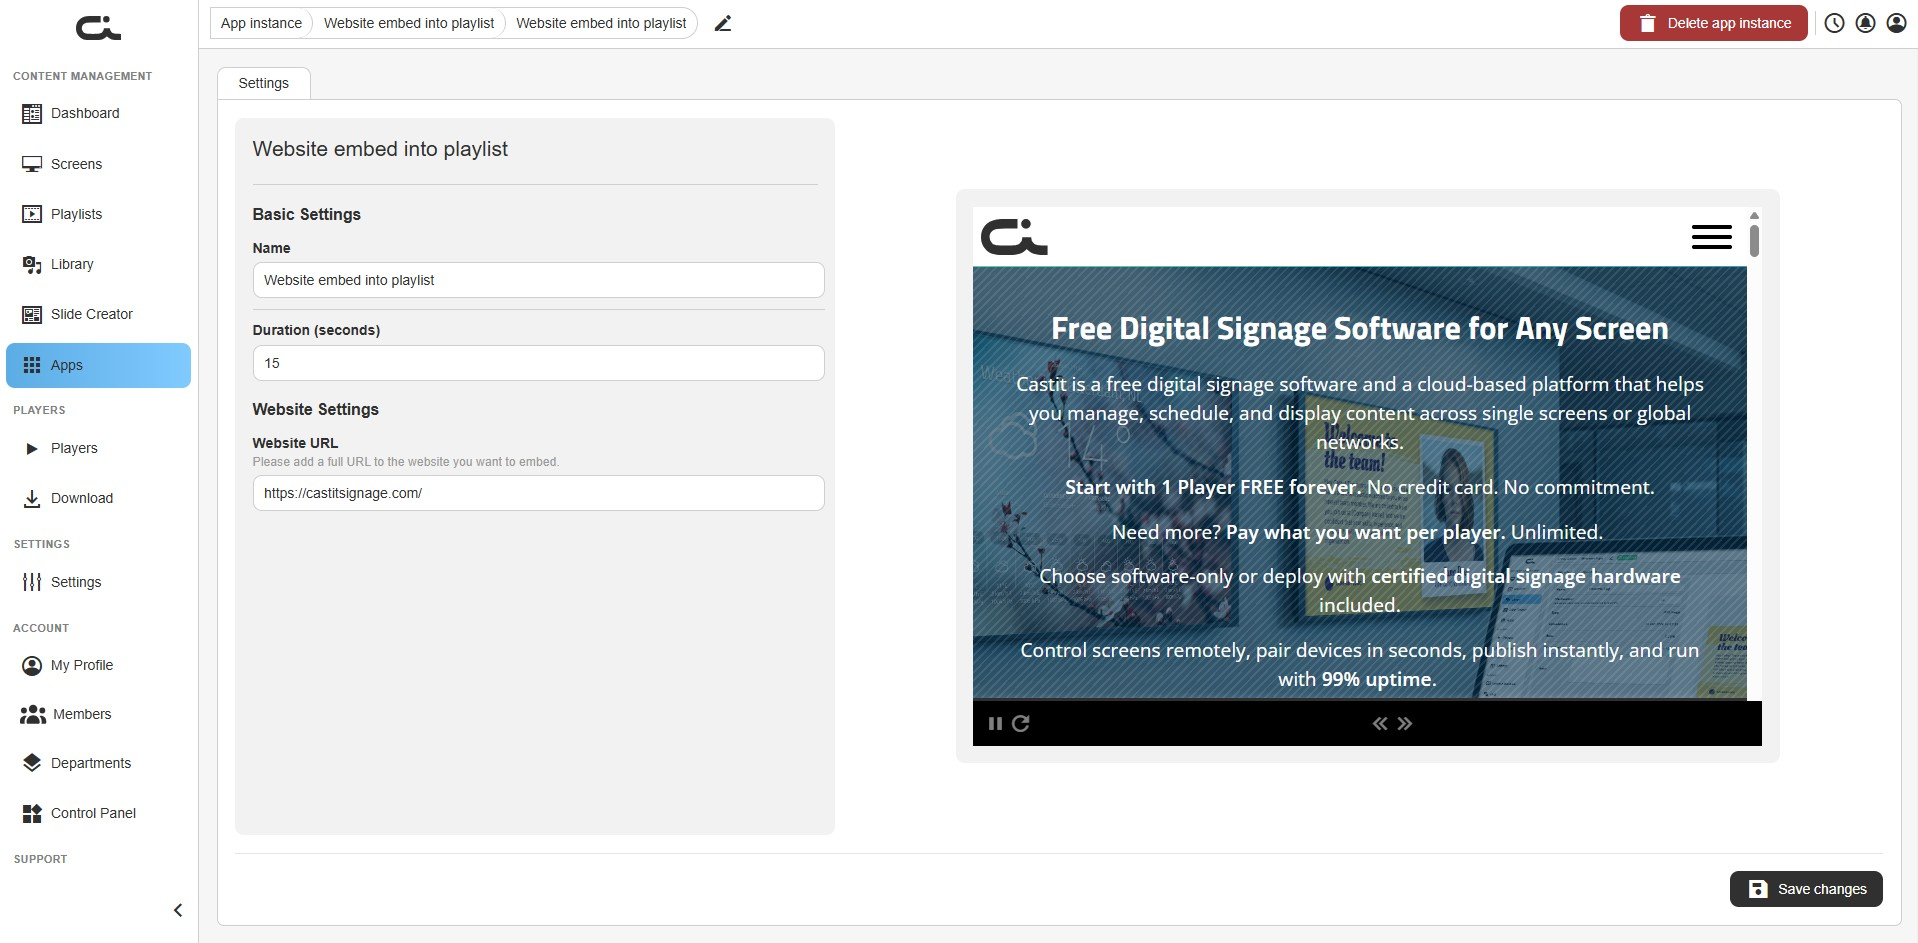
- Name: A label for this instance
- Duration (seconds): How long the app shows when it plays (default 15)
Step 2: Enter the website
Under Website Settings:
- Website URL: Paste the full address of the website you want to show, including the
https://(for example,https://castitsignage.com/)
When the preview shows the right page, click Save changes at the bottom-right.
The page loads live, so the player needs an internet connection. Some websites block being embedded; if a page shows blank, it may not allow embedding.
Step 3: Use the app
Once saved, add the instance to a screen or playlist just like any other app (see Using Apps in Your Content). The page reloads and stays current on its own. To show a different site, change the URL and click Save changes again.
Website To Slide
The Website To Slide app captures a web page as an image and shows it as a slide, instead of embedding the live site. This is the better choice when a website refuses to be embedded, or when you want a clean, stable snapshot rather than a page that might scroll or change while it's on screen. It also gives you extra controls to dismiss cookie popups and wait for the page to finish loading before the snapshot is taken. Compare it with Website Embed Into Playlist, which shows the live page.
Step 1: Set the basic settings
After creating an instance, you land on the Settings tab. The left side holds the settings; the right side shows a live preview of the captured page. A Preview ready badge and a last-updated time tell you when the snapshot was last refreshed.
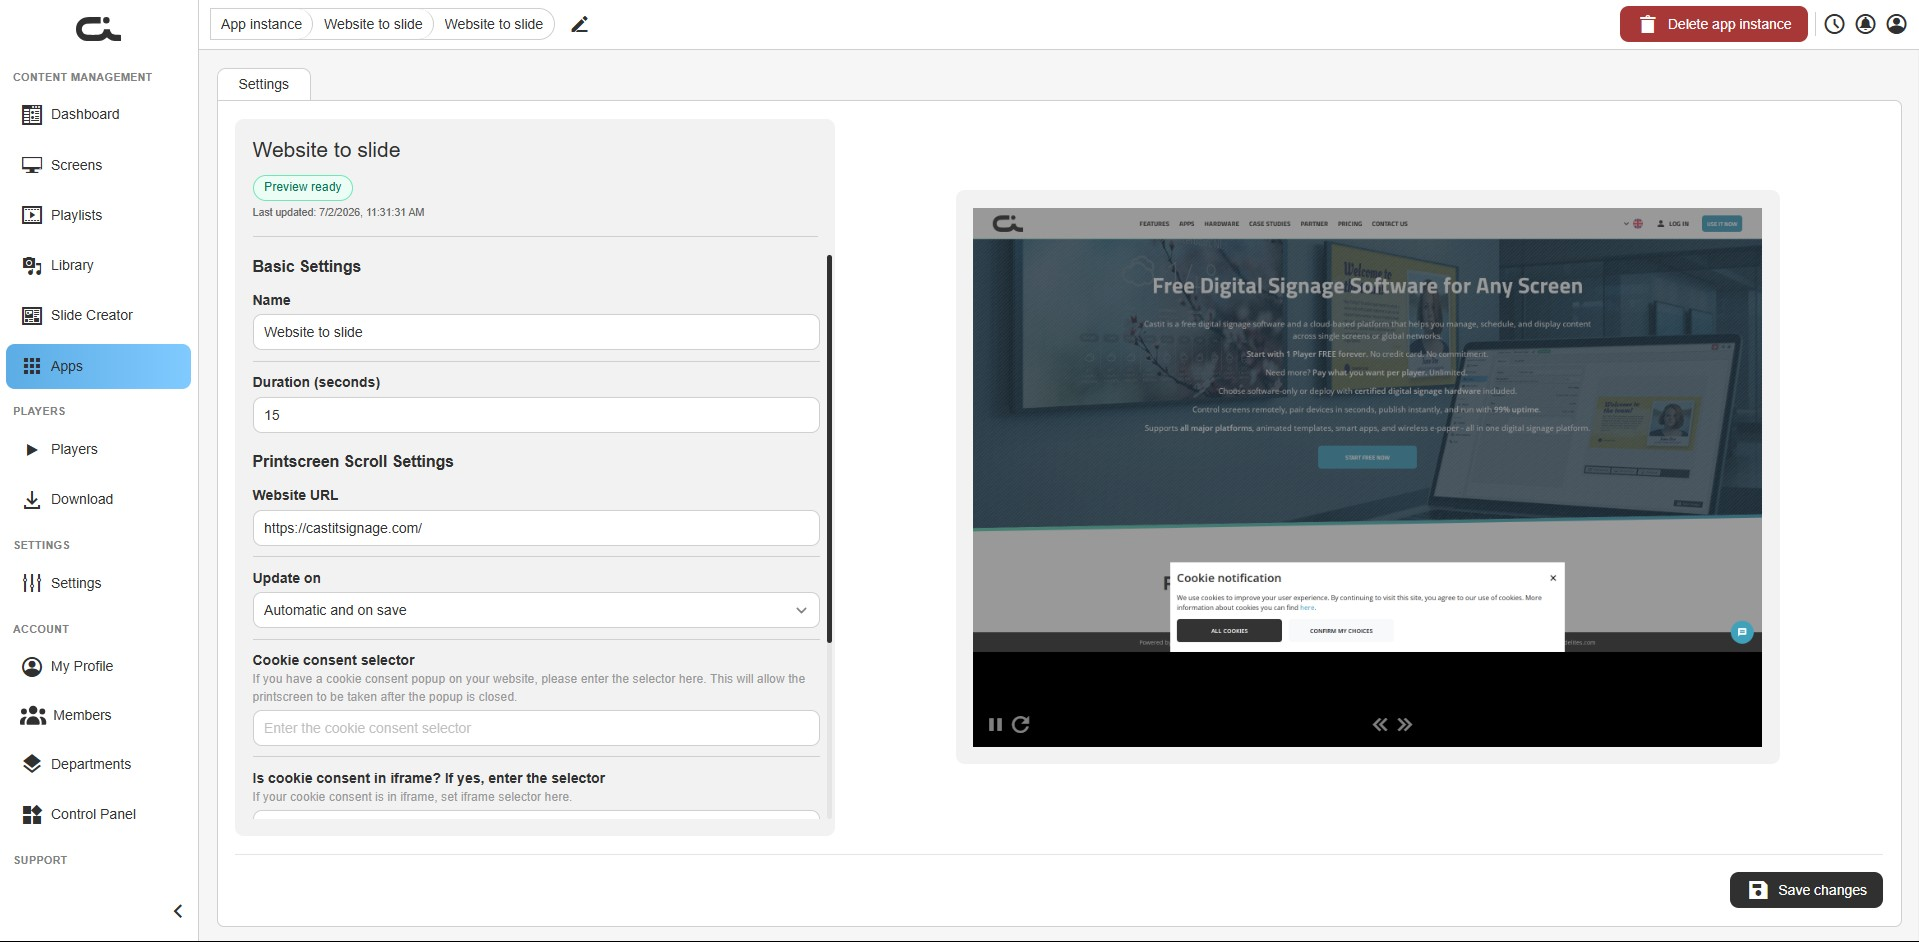
- Name: A label for this instance
- Duration (seconds): How long the app shows when it plays (default 15)
Step 2: Point it at the page
Under Printscreen Scroll Settings:
- Website URL: The full address of the page to capture (including
https://) - Update on: When to refresh the snapshot, for example Automatic and on save to keep it updating on its own and whenever you save
- Take full height of the website: Choose Yes to capture the whole page top to bottom, or No to capture just the visible screen
Step 3: Handle cookie popups and loading (optional)
Many sites show a cookie banner or take a moment to load. These optional settings help the snapshot come out clean.
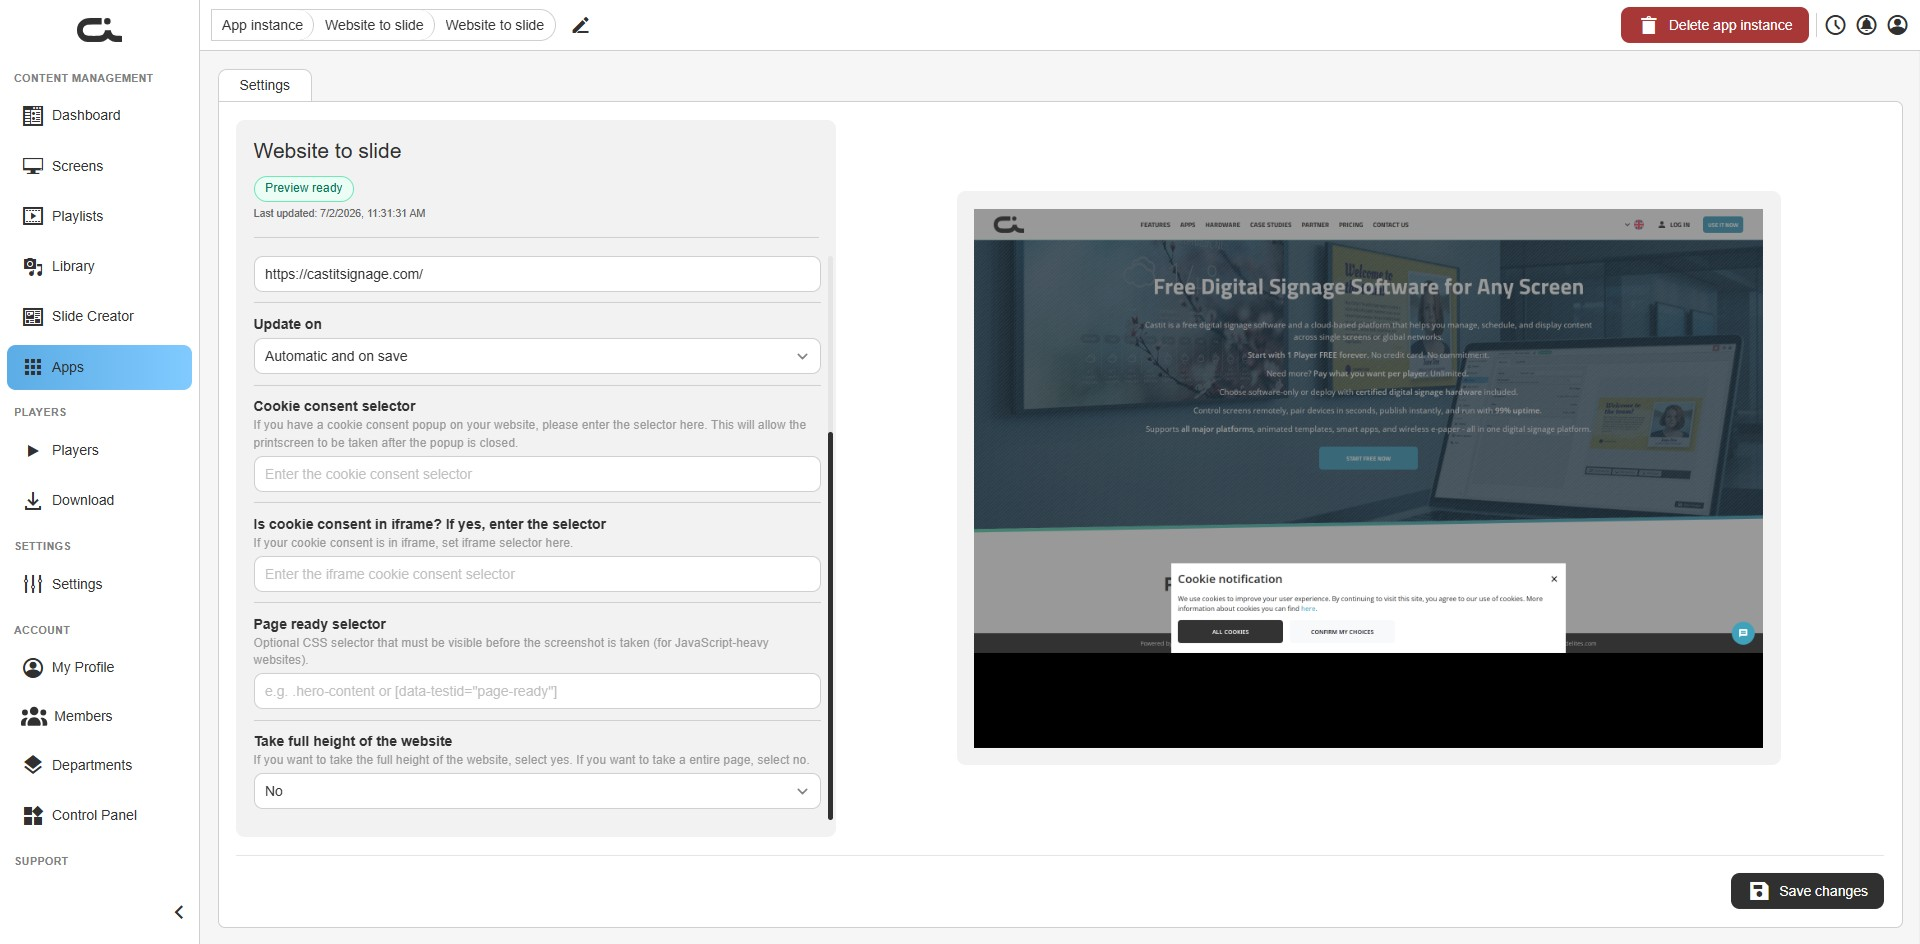
- Cookie consent selector: If the page shows a cookie popup, enter the CSS selector of its accept/close button so the snapshot is taken after the popup is dismissed
- Is cookie consent in iframe?: If that cookie popup lives inside an iframe, enter the iframe's selector here
- Page ready selector: For JavaScript-heavy sites, enter a CSS selector for an element that must be visible before the snapshot is taken, so you don't capture a half-loaded page
When the preview looks right, click Save changes at the bottom-right.
Finding the right selectors takes some knowledge of the target website's HTML. If you're not sure, leave these blank and check the preview; add them only if the snapshot shows a cookie popup or a page that hasn't finished loading.
Step 4: Use the app
Once saved, add the instance to a screen or playlist just like any other app (see Using Apps in Your Content). The snapshot refreshes based on your Update on choice. If you later change the URL or any option, remember to click Save changes again.
WindowSight
The WindowSight app turns your screen into a digital art gallery, showing curated outdoor visual art. To show your own gallery, you connect it to a WindowSight account using a couple of IDs from that account. Until you do, the app runs in a demo mode with sample art.
This app needs a WindowSight account. You'll get a User ID and a Player ID from WindowSight to link your gallery. Without them, the app only shows demo content.
Step 1: Set the basic settings
After creating an instance, you land on the Settings tab. The left side holds the settings; the right side shows a live preview of the gallery (in demo mode until you enter your IDs).
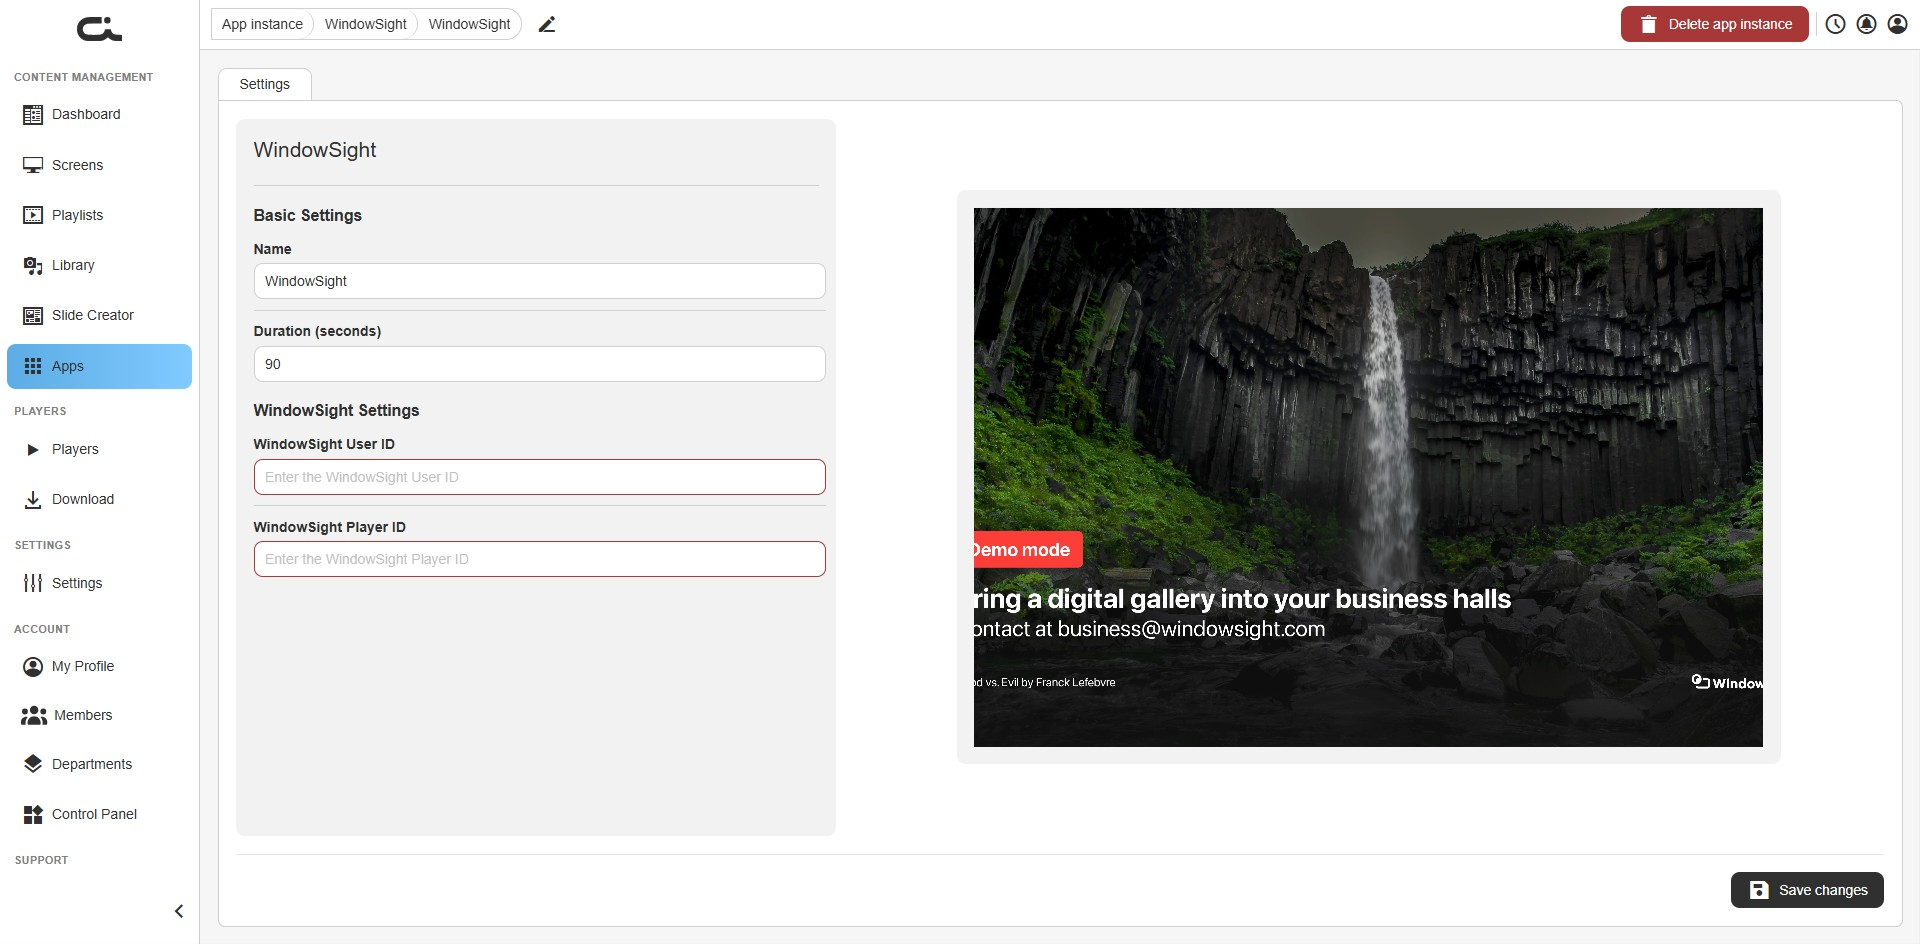
- Name: A label for this instance
- Duration (seconds): How long the app shows when it plays (default 90)
Step 2: Connect your WindowSight gallery
Under WindowSight Settings, enter the IDs from your WindowSight account:
- WindowSight User ID: Your WindowSight user ID
- WindowSight Player ID: The player ID from WindowSight
Once both are filled in correctly, the preview switches from demo mode to your gallery. Click Save changes at the bottom-right.
The art is pulled live from WindowSight, so the player needs an internet connection.
Step 3: Use the app
Once saved, add the instance to a screen or playlist just like any other app (see Using Apps in Your Content). The gallery updates on its own. If you later change the IDs, remember to click Save changes again.
iCalendar
The iCalendar app displays a whole week of calendar events on screen, read from an iCal feed. It works with any calendar that can share an iCal link, such as Google Calendar, so it's a simple way to show opening hours, bookings, or an events schedule.
Step 1: Set the basic settings
After creating an instance, you land on the Settings tab. The left side holds the settings; the right side shows a live preview of the week's calendar.
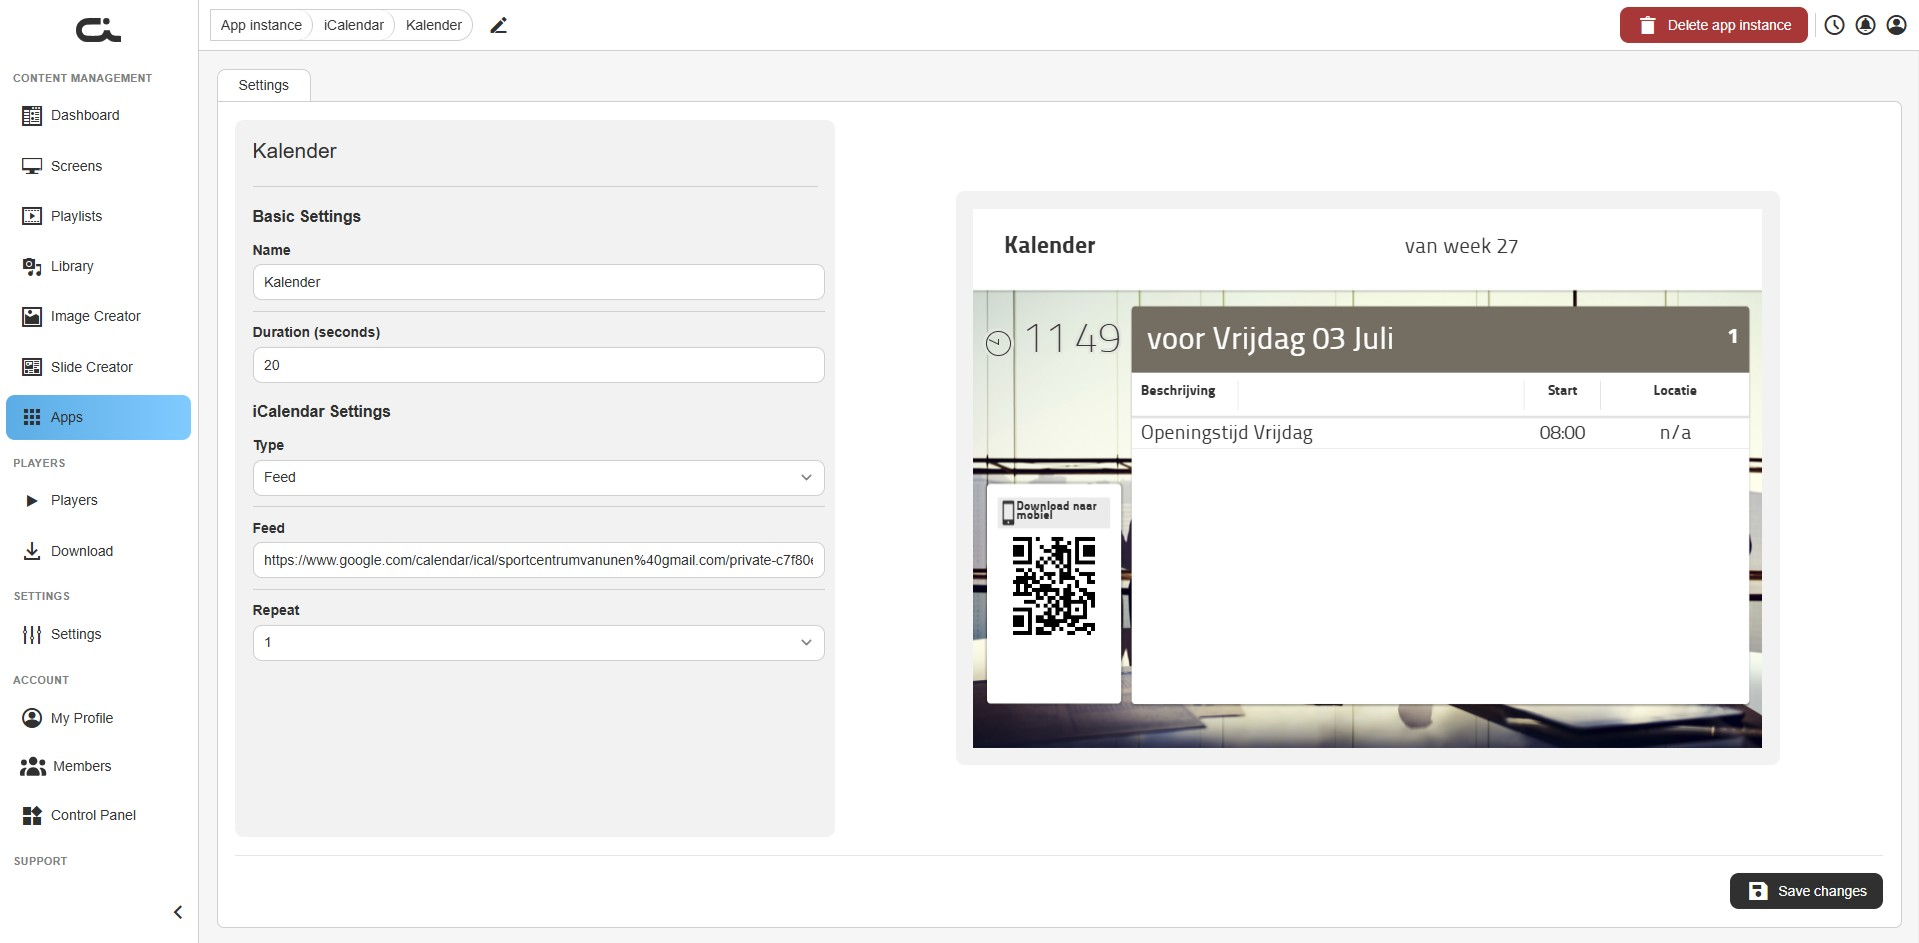
- Name: A label for this instance
- Duration (seconds): How long the app shows when it plays (default 20)
Step 2: Connect your calendar feed
Under iCalendar Settings:
- Type: The kind of source. Leave it on Feed to read from an iCal link
- Feed: Paste the iCal feed address for your calendar. In Google Calendar, for example, this is the calendar's private iCal (
.ics) address - Repeat: How many times the calendar cycles through while the app is on screen
When the preview shows your events, click Save changes at the bottom-right.
The events are read live from the feed, so the player needs an internet connection to stay current. Anyone with the feed link can see the calendar, so use a link you're comfortable showing.
Step 3: Use the app
Once saved, add the instance to a screen or playlist just like any other app (see Using Apps in Your Content). The calendar refreshes on its own as events change. If you later change the feed or repeat count, remember to click Save changes again.
Outlook Calendar
The Outlook Calendar app shows your Outlook calendar on screen, so a team or reception area can see what's coming up at a glance. You connect your Microsoft account, pick which calendar to display, and choose whether to show a day, a week, or a month at a time. If you'd rather show a calendar from a shared iCal link instead of a Microsoft account, see iCalendar.
Step 1: Connect your Microsoft account
When you first open an Outlook Calendar instance, the Settings tab shows a Not Connected card, and the preview asks you to connect your account.
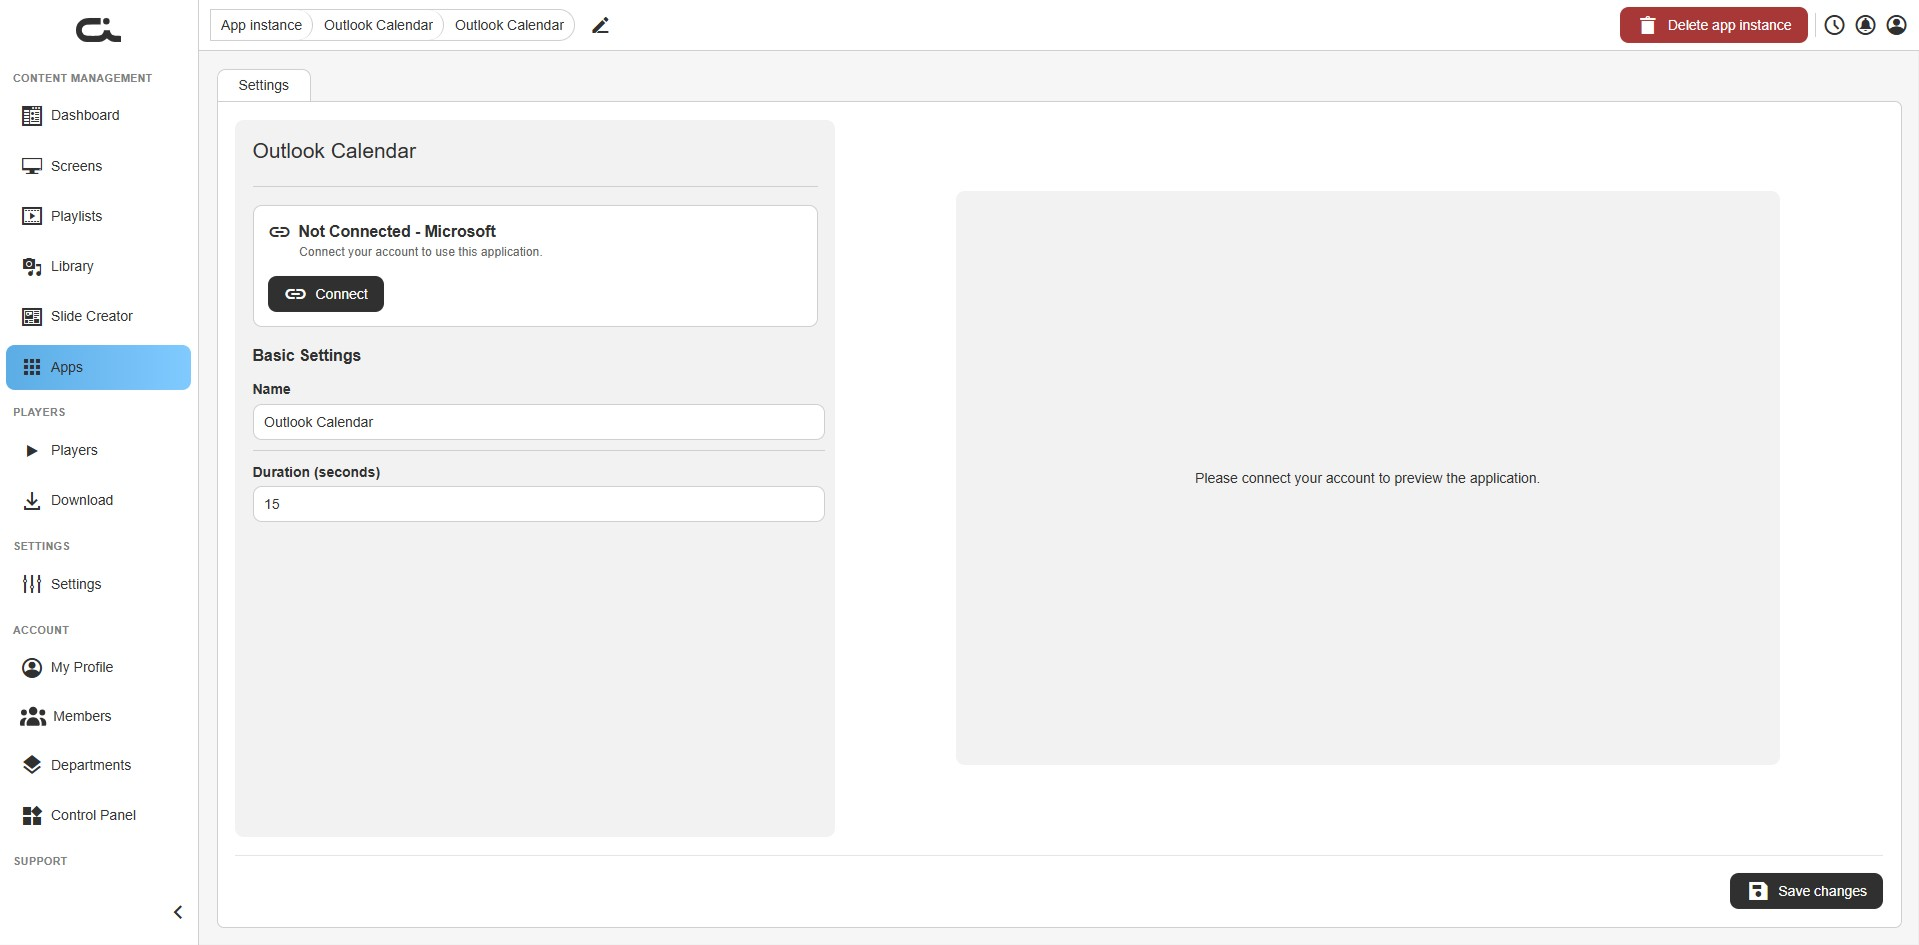
- Click Connect
- Sign in with the Microsoft account whose calendar you want to show, and authorize the connection
- When you return, the card turns green and reads Connected - Microsoft
The connection only has to be made once per instance. To unlink later, use Disconnect on the same card.
Step 2: Choose the calendar and view
Once connected, the Outlook Calendar settings appear, and the preview shows the calendar panel.
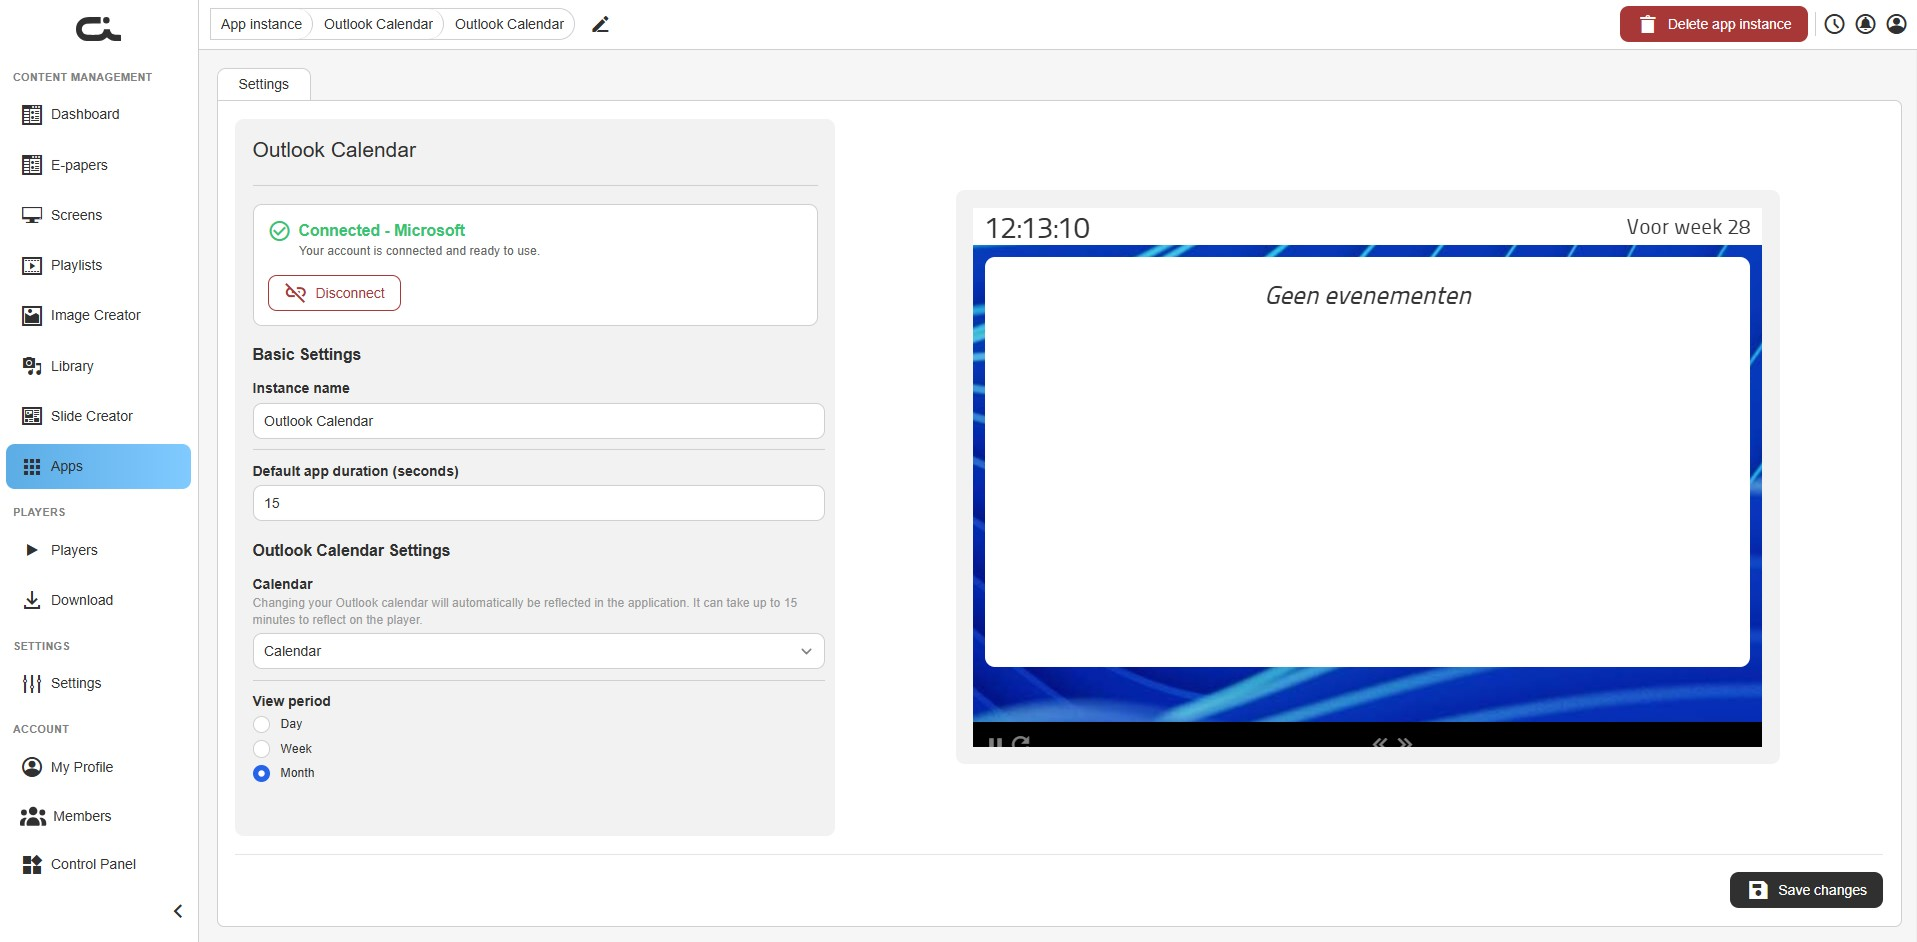
Set the following:
- Instance name: A label for this instance
- Default app duration (seconds): How long the app shows when it plays
- Calendar: Choose which of your Outlook calendars to display
- View period: Choose how much to show at once, Day, Week, or Month
When the preview looks right, click Save changes at the bottom-right.
Changes you make in Outlook update on screen automatically, but it can take up to 15 minutes to appear on the player.
Step 3: Use the app
Once saved, add the instance to a screen or playlist just like any other app (see Using Apps in Your Content). The calendar stays linked to Outlook and keeps showing current events. If you later change the calendar or view period, remember to click Save changes again.
Streaming App
The Streaming App puts a live stream, or any online video, straight onto your screen. It accepts links from a wide range of sources and works out the format on its own, so in most cases you just paste a link and you're done.
Step 1: Set the basic settings
After creating an instance, you land on the Settings tab. The left side holds the settings; the right side shows a live preview of the stream.
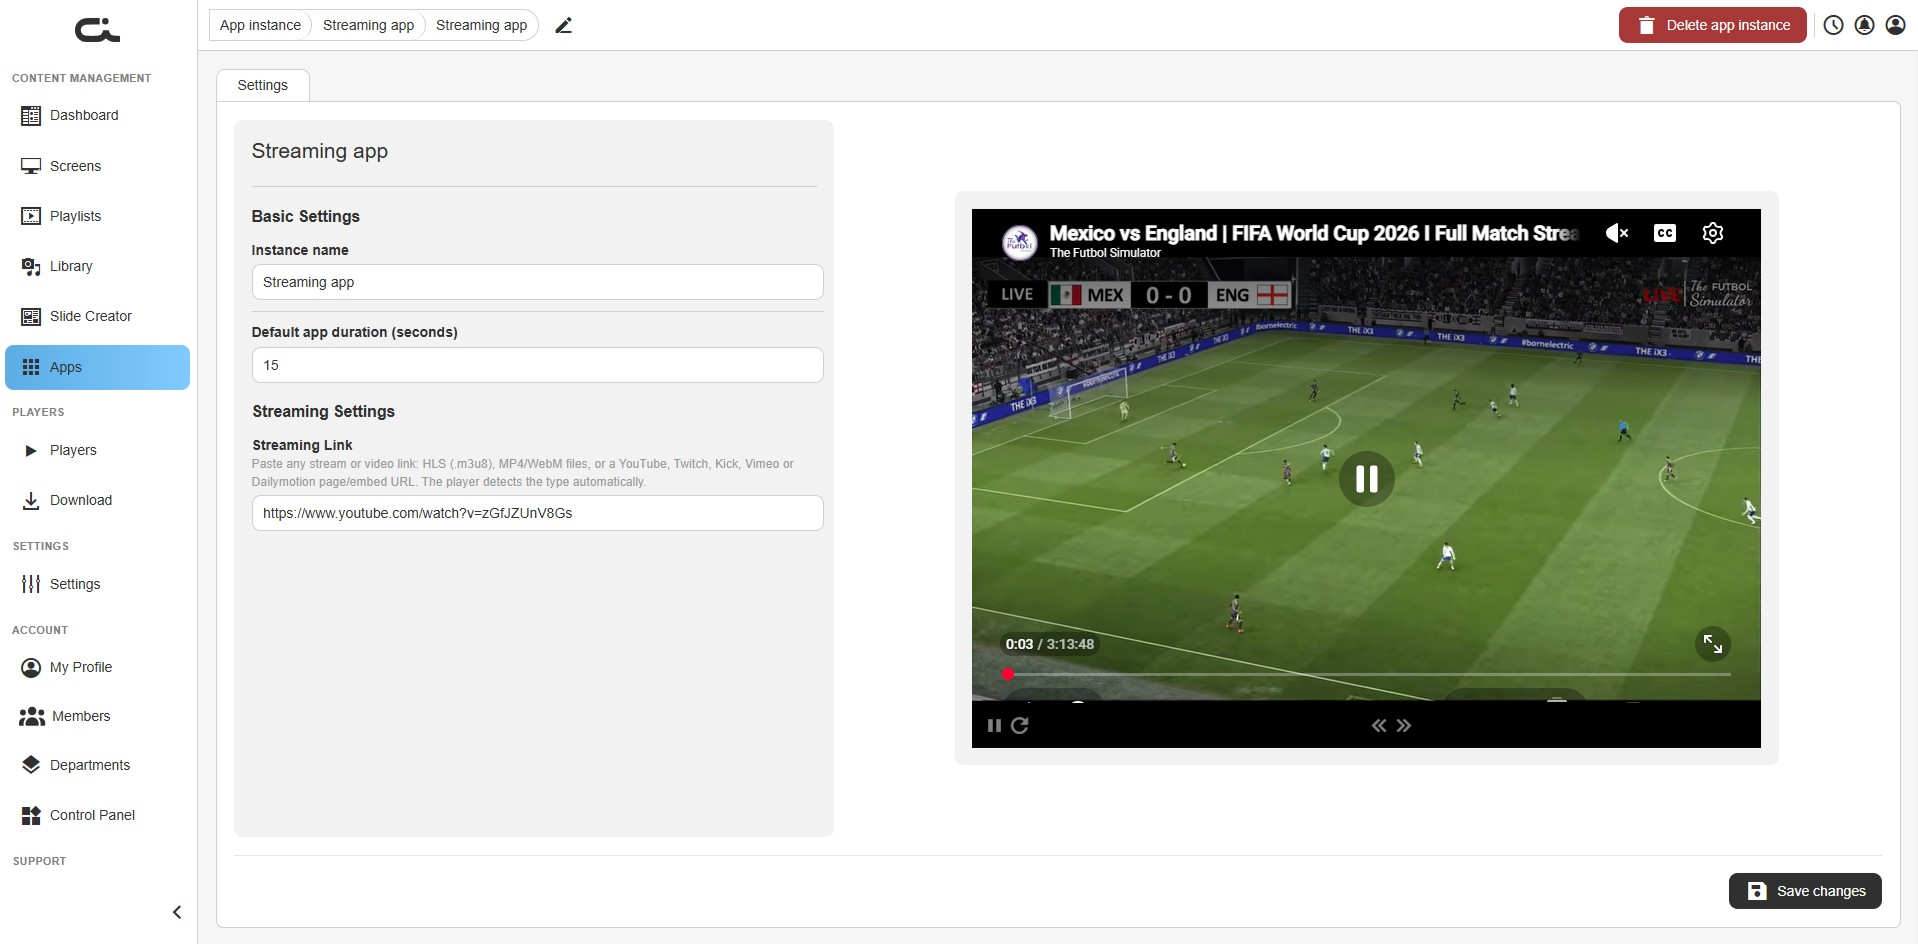
- Instance name: A label for this instance
- Default app duration (seconds): How long the app shows when it plays (default 15)
Step 2: Paste the stream link
Under Streaming Settings:
- Streaming Link: Paste any stream or video link. The app accepts HLS (
.m3u8) streams, MP4/WebM video files, and YouTube, Twitch, Kick, Vimeo, or Dailymotion page or embed URLs. The player detects the type automatically, so you don't need to tell it what kind of link it is
As soon as you paste a valid link, the preview starts playing it. When it looks right, click Save changes at the bottom-right.
The stream plays over the internet, so the player needs a stable connection. For a continuous live stream, set the duration long enough to show as much as you want before the app moves on.
Step 3: Use the app
Once saved, add the instance to a screen or playlist just like any other app (see Using Apps in Your Content). To show a different stream, paste a new link and click Save changes again.
Best Practices
- Review before installing: Read the app info to confirm it fits your need
- Test first: Add a new app instance to a test screen before going live
- Use instances: Create separate instances for different locations or settings instead of reconfiguring one
- Check New and Updated: Look for newly added and recently improved apps
- Configure properly: Enter API keys, URLs, and accounts correctly
- Mind connectivity: Live apps need a stable internet connection on the player
Troubleshooting
App Not Displaying
- Verify the app is installed and an instance is configured
- Check the instance settings (URLs, API keys, accounts)
- Ensure the player has internet connectivity for live data
App Shows an Error
- Review the instance configuration
- Check API key validity (for authenticated apps)
- Verify URL format (for web embed apps)
- Contact support if the issue persists